Logging In
In most cases, your workstation will boot up to a graphical login screen. You will likely see the names of users you set up during the installation of your system, with a box for the username and another for the password. Remember that both the username and password are case-sensitive, so you must type both as they were created. You can always change the password at a later time (I'll tell you about it later in the chapter).
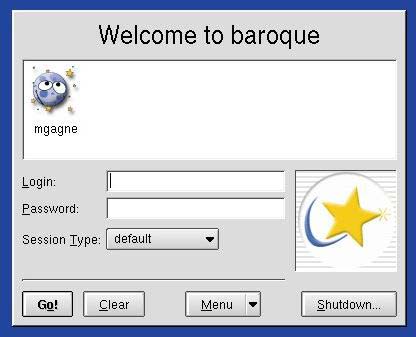
This graphical login screen is known as the login manager. Depending on the installation, it may appear different from system to system. The KDE login screen will look something like the one shown in Figure 4-1, which comes from a Mandrake Linux system. Login managers, like so many things on your system, can be configured to take on different looks and styles. As a result, the companies that provide Linux distributions will often customize them to suit their needs. What they will all have in common is a place for your login name, your password, and an option for selecting your desktop environment (KDE, GNOME, etc.).
Figure 4-1. A graphical login manager.
Start by logging in with the non-root user you created when you installed the system. For session type, make sure you choose KDE. If this is your first time logging in, you may be presented with the KDE personalizer. I say "may" because some distributions will log you in to a default desktop with a given look and feel which you can then change to suit your needs and tastes, something we'll talk about in detail in Chapter 6.
Quick Tip
If you don't see the KDE personalizer after logging in, you should still take a few minutes to read through this section as it does introduce you to some basic concepts. You can always run the KDE personalizer by clicking the button in the bottom left hand corner of your screen, and selecting "Run command." Simply type kpersonalizer and press <Enter>. Note that SuSE 8.1 Pro does not include the kpersonalizer , but provides a tour which lets you set some of the same items. Even so, all of these settings can all be changed using the tools I will describe in Chapter 6. The kpersonalizer information only applies to first time logins. |
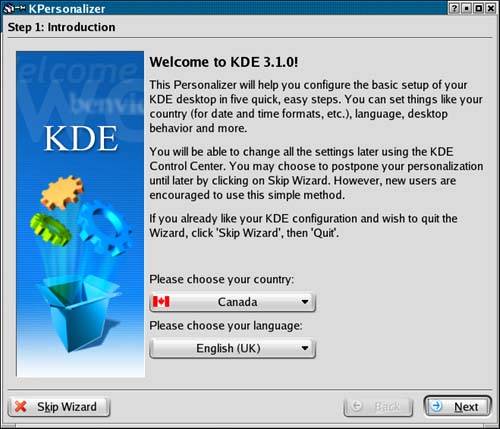
When kpersonalizer runs, you'll first be asked for your country and language of choice (Figure 4-2). Aside from the obvious usefulness of the language setting, this sets some intelligent defaults for you based on that decision, for instance, currency and date format.
Figure 4-2. Setting your country information.
The next screen, System Behavior, is particularly interesting (Figure 4-3). If you are coming from the Windows world, you are used to double-clicking on desktop icons to make things happen. Not so in the Linux world. A single click on an icon activates your program. If you like the double-click, choose Windows for system behavior or stick with the single-click KDE default.
Figure 4-3. Changing system behavior (single vs. double-click, etc.).
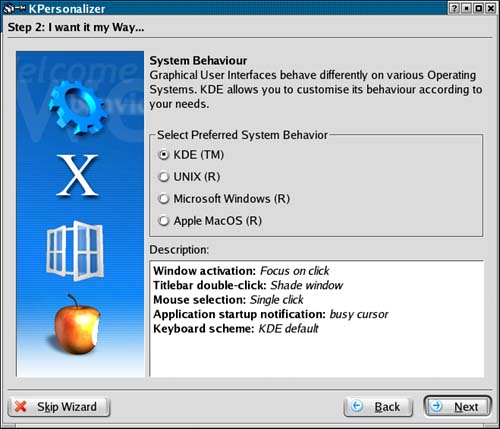
Before we move on from here, I want to mention one other thing. Notice the Window activation item? This is sometimes referred to as focus. On a windowing system, it is possible to have many application windows on your screen at the same time. Sometimes they overlap. When you want to start using a particular window, you click on that window to bring it forward. That's focus on click. Aside from the KDE and Windows behaviors, you could also choose UNIX, which has an interesting method of focus. Simply moving your mouse cursor over the background window brings it forward. This is referred to as focus follows mouse. It takes some getting used to, but some people, particularly those with large monitors, may find it useful.
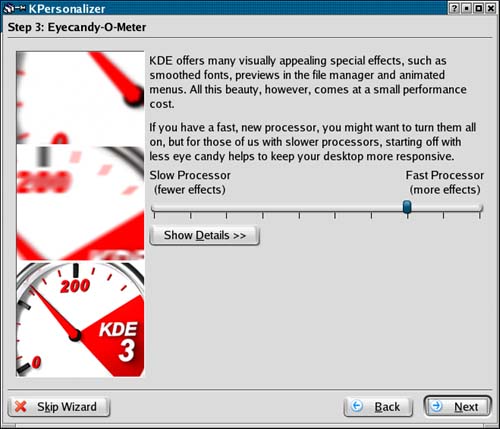
The next step brings up the Eyecandy-O-Meter (Figure 4-4). If you have a powerful, fast machine, you might want to just crank the slider to the maximum. What you will get are animated icons, sound themes, and special effects of various types. Click on the Show details button to find out just what you get for your processor and memory buck.
Figure 4-4. Adjusting the level of "eye candy."
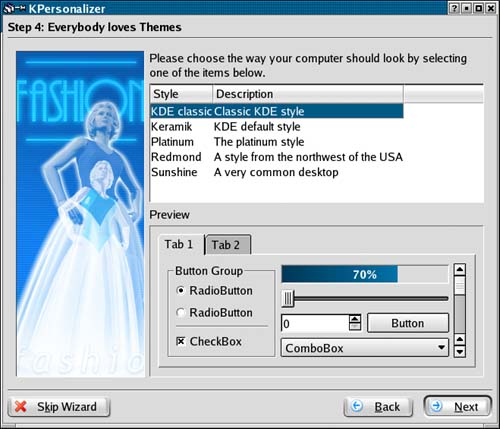
Hot on the heels of this screen is even more eye candy?this time in the guise of a desktop theme (Figure 4-5). What kind of style would you like for your desktop? Pick one, click Next, and your desktop style will change automatically. If you don't like the choice, hit the Back button and try again. For the time being, I would highly recommend that you pick the KDE classic theme. That's because the look and feel of the windows I'm going to describe will be affected by the theme you choose. I will revisit this subject in the next chapter, at which point, you can go wild.
Figure 4-5. Setting the default theme.
Finally, kpersonalizer offers to load up your panel with some default settings and icons. For now, just accept the default, click Next, and you are done setting up your desktop.
Click Here! Click Here!
A quick note on clicking before we continue. Everything is pretty much launched with a single click of the left mouse button. As I mentioned above, you can change that to a double-click if you prefer, but I would suggest that you (for the moment, anyhow) try to get used to the single click. I think you will like it.
Clicking on the right mouse button almost anywhere will bring up a menu of available options.
The middle mouse button (if you have one or have configured your two-button mouse to emulate a three-button mouse) serves a number of purposes, based on the application. The best one, to me, is pasting text from one application to another.


