Printers and Printing
This might seem like a silly thing to mention, particularly if your printer was automatically detected, configured, and tested at boot time. Nevertheless, there are things that you might want to do with your printer, and we should probably cover some of these now. Furthermore, printing is one of the most important functions a personal computer can perform. It's good to get it right. On that note, I'm going to spend a little bit of time talking about printers and printing. Trust me, it's going to be lots of fun.
Printing under Linux works on the basis of print queues. At its simplest, this means that whenever you send something to the printer, it is queued in a directory where it awaits its turn at the printer. This de-queuing is known as spooling. Consequently, the process that sends the print jobs from the queue to the printer is called the spooler. That spooler can be one of a small handful of programs, all of which are transparent to you when you print from applications. Here's a quick roundup of the more popular spoolers.
CUPS, the Common Unix Printing System, is designed to be a platform-independent printing system that works across a great number of UNIX flavors, including Linux. CUPS uses the Internet Printing Protocol (IPP), a next-generation printing system designed to allow the printing of any job to any printer, anywhere. At this point, CUPS certainly looks like the spooler of the future. Most modern Linux distributions include CUPS, and KDE will use it transparently.
The second most likely spooler you will run into is LPD, the classic UNIX spooler. LPD has been around for a long, long time and continues to be distributed with pretty much every Linux out there.
Whether it is CUPS or LPD, KDE handles printing beautifully. Adding, configuring, or removing a printer is done through the KDE Control Center. After kcontrol has been activated, click on System (in the left side category window) and select Printing Manager (for KDE 3.1, click on Peripherals, then Printers).
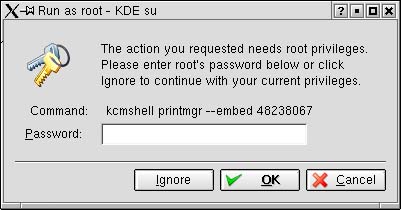
We'll start by adding a printer. Because adding hardware, like adding software, is an administrative function, start by clicking the Administrator button at the bottom of the Printing Manager window. A window will pop up, asking you for the root password (Figure 8-4).
Figure 8-4. Accessing the printer configuration requires the root password.
When you have entered the password, you'll be looking at the same interface, but things will be a little different. For starters, the window to the right is now surrounded by a red border. Furthermore, some of the icons have gone from being grayed out to being active. If the toolbar and icons are not visible, right-click in the printer list window (at the top of the printer configuration window). A pop-up menu will appear (Figure 8-5), from which you should select View Toolbar or View Menu Toolbar. Both have the same menu options but are presented somewhat differently. One of those is the Add printer/class icon. Clicking that icon brings up the KDE Add Printer wizard (see Figure 8-6).
Figure 8-5. Toolbar menu options in the KDE printer configuration manager.
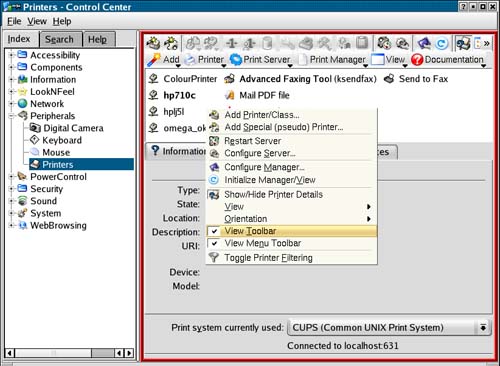
Figure 8-6. The KDE Add Printer wizard.
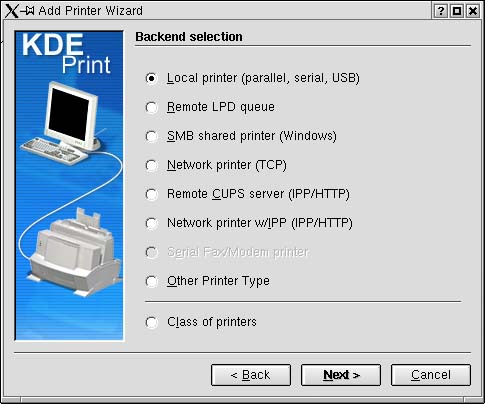
Click Next through the welcome screen, and you can select the type of printer, whether it is connected directly to your PC with a parallel or USB cable or via the network in some way. Network-connected printers could be good old LPD printers, Microsoft Windows-connected and -shared printers (SMB), CUPS, HP JetDirect, IPP, or others. Click on the one you are looking to connect and click Next. In my example, I was hooking up an HP Deskjet 710C.
When you click Next after selecting your connection, you'll face different choices, based on whether the printer is local or on the network. For a local printer, your choices are parallel port, serial port, or some kind of USB connection.
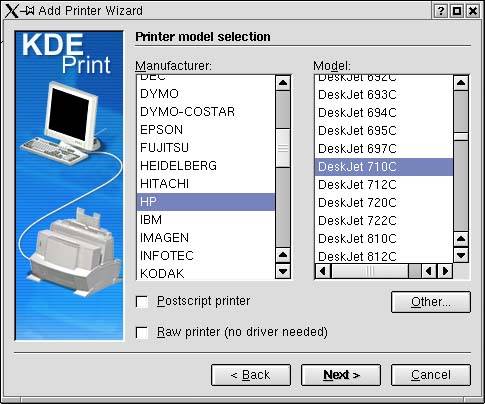
After clicking Next, the wizard will load its printer database. Select your vendor and model from the list (Figure 8-7) and click Next.
Figure 8-7. Selecting a printer vendor and model.
This brings us to the Printer Test screen. The information regarding your new printer will be displayed, and you'll have the option of sending a test page to the printer. I strongly recommend that you do print a test page before moving on.
At this point, you can also click the Settings button and personalize certain defaults, for instance, the default page size (U.S. letter, A4, etc.), margins, print quality, or (in the case of a color inkjet like mine) how ink cartridges are accessed and used. If everything looks as you expect it to on your test page, click Next one more time. You'll be looking at the banner selection screen. Simply put, would you like a banner page before or after your print job has completed? Unless you are in an office with many people trying to keep their jobs straight, you probably don't want to waste the extra paper. Luckily, no banners of any kind is the default.
Click Next and you'll be looking at the Printer quota settings (Figure 8-8). You might be asking what the heck a printer quota is and why you should care. Once again, if this is your home printer, you can just click Next and completely ignore this. In some office environments, it may be practical (or necessary) to limit the number of jobs any single user can print to a printer in a given time period. The time period can be per hour, per day, or per week?even per minute. The size of job can be based on the number of pages or the amount of data sent.
Figure 8-8. You can add restrictions on printer use.

Click Next, and it is time for the User access settings where you can decide who can and can't use your printer. You can either specify a list of Denied users where everyone can use your printer except those listed or a list of Allowed users where only those listed can use the printer. It is at times like this that Linux reminds you it is a multiuser system.
After making all these decisions, we come to the General information, or summary screen. Enter a name for this printer (a one-word name is best), followed by a location and a description. In reality, the only thing you need to enter is a name for the printer. Click Next, and you'll have a final opportunity to review the choices you've made up to this point. At this point or at any point before now, you can still click Back and make different choices. If you are happy, click Finish, and you are done. Congratulations, you've added and configured a printer.
Let's have a closer look at the Printing Manager (Figure 8-9). Take a moment to move your mouse slowly over the various icons at the top and take note of the tooltips. You can do a lot in terms of printer modification and administration here. If you are looking to share your Linux printer with Windows workstations in the office (or home), you can even export the driver for use. Notice the tabs, as well?Information, Jobs, Properties, and Instances.
Figure 8-9. The Control Center Printing Manager provides all the information you need.
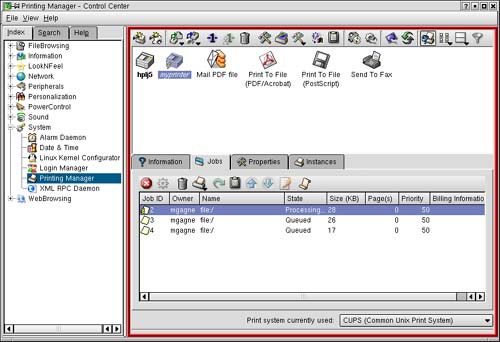
Information is just that, basic information about your printer, such as its name, location, and so on. Under the Jobs tab, you can see all the jobs currently waiting in your print queue.
Let me tell you about a great way to work with printers, monitor print jobs, and so on. For quick access to your printing subsystem, right-click on the application launcher (the big K), select Panel Menu | Add | Special Button, and click on Print System. A new icon will appear in your Kicker panel. Click on that icon, and all your printers will appear in a pop-up list (along with quick access to other print system tools). Click on the appropriate printer icon, and a window will appear with a list of jobs waiting to be printed (Figure 8-10).
Figure 8-10. Checking on queued print jobs.

From the jobs list, you can delete jobs, change the order in which they print, or redirect them to another printer if yours is particularly busy. Using the Properties tab, you can change some of the characteristics that you assigned to your printer when you configured it, such as quotas, banner pages, and so on (just make sure you are in Administrator mode).
That brings us to Instances. Each printer you create will have at least one instance, the default instance. The idea behind this is that you can create multiple instances of the same printer. Let's pretend that we are talking about a color printer and that you often switch between a high-quality color mode (for photographs) to a lower quality draft mode when you want to conserve that expensive colored ink. Just add another instance of the same printer but with different characteristics.
Now that you have added a printer (or printers), configured it, and given yourself supreme power over all print functions, it is time to print something. Luckily, this is the easiest part of all. Whenever you print from any KDE application (Kmail, Konqueror, and so on), you'll be presented with a common printer dialog (Figure 8-11).
Figure 8-11. KDE print dialog.
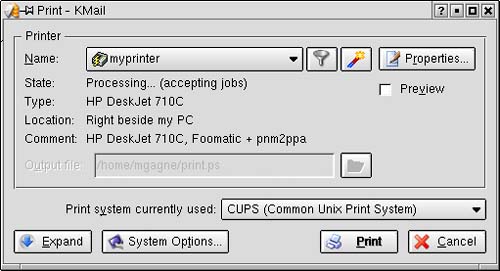
From that window, you can select the printer of your choice or click Properties and change the number of copies, the paper size, and a number of other settings associated with that particular printer and that particular job. If you want to see those details up front, click on the Expand button for a somewhat more panoramic view. Finally, you can even start from here to add yet another printer. Notice that little icon to the left of the Properties button, the one that looks a bit like a magic wand. Clicking this fires up the Add Printer wizard.
Yes, we've come back around to where we started.


