10.2 Configuring an Internet Connection
The Network Administration Tool simplifies configuration of your system to access the Internet via a telephone dialup, ISDN, DSL, Ethernet, or wireless connection. The Network Administration Tool requires you to follow a three-step process:
Set up the hardware device associated with the connection.
Specify DNS settings and hostnames.
Activate the device, if necessary.
The following subsections explain how to perform these steps.
|

10.2.1 Setting Up Hardware Devices
In the past, most computer users connected to the Internet via a plain old telephone service (POTS) dial-up modem. However, today, many means of connecting to the Internet are available. For example, many home computer users have high-speed connections using ISDN or DSL. Corporate computer users often connect to the Internet via a local area network, using an Ethernet adapter. And wireless network adapters are becoming quite popular.
To set up a hardware device using the Network Administration Tool, choose System Settings Network from the main menu. The Network Administration Tool appears, as shown in Figure 10-1. Although the screen is titled "Network Configuration," the tool is nevertheless commonly known as the Network Administration Tool.
Figure 10-1. The Network Administration Tool
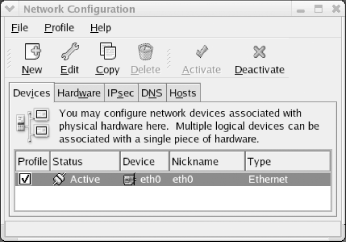
The Network Administration Tool has five tabs:
- Devices
-
Used to associate a physical device with a network connection
- Hardware
-
Used to set up a physical device
- IPsec
-
Used to set up a virtual private network (VPN); to use this option you must first install the cipe package
- DNS
-
Used to specify DNS servers and related options
- Hosts
-
Used to specify names of hosts not known to a DNS server
To begin setting up an Internet connection, click the Devices tab and then click the New button in the toolbar. A dialog box appears, inviting you to choose the type of your device, as shown in Figure 10-2. Choose the appropriate device type and click Forward. Then, follow the steps in the following subsection appropriate to the type of your device.


