6.2 Evolution
Ximian's Evolution is an email client and personal scheduler. Previously, Evolution was available from Ximian as an add-on to Red Hat Linux. However, conflicts between Ximian's RPM packages and those distributed by Red Hat sometimes made life complicated for Ximian users. Red Hat is now distributing Evolution as part of Red Hat Linux, so Ximian users can expect more trouble-free operation and fewer problems when upgrading to new versions of Red Hat Linux. You can learn more about Evolution at http://www.ximian.com.
Evolution has four main functions:
- Email client
-
Evolution receives email from POP and IMAP servers and sends email via SMTP servers.
- Calendar
-
Evolution provides daily and monthly calendars to help you plan your time.
- Task list
-
Evolution provides a to-do list that helps you keep track of projects and deadlines.
- Contact database
-
Evolution provides a contact list that you can conveniently use when composing email.
Evolution is available via the Internet 
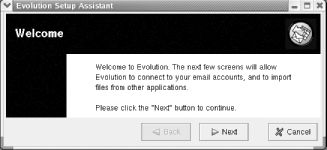
Figure 6-7. The Welcome panel of the Evolution setup wizard

Click Next to move on to the Identity panel. There, you specify your full name and email address. Optionally, you can specify the name of your organization, a plain text email signature file, and an HTML email signature file.
Click Next to move on to the Receiving Email panel. There, you specify the type of server you use to receive email, the hostname of the server, your username, and information on the security and authentication characteristics of the server. You can obtain this information from your email provider or determine the correct values by experimentation.
Click Next to move on to a second Receiving Email panel. This panel lets you specify options about checking for new email and using folders and filters. You can specify the values according to your preferences.
Click Next to move on to the Sending Email panel. There, you specify the type of server you use to send mail, its hostname, and security and authentication options. You can obtain this information from your email provider or determine the correct values by experimentation.
Clicking Next takes you to the Account Management panel. This panel lets you associate a name with the account, so that you can distinguish from accounts you may add later. You can also specify whether the account is the default account. If you have only one account, you should specify that it is the default account.
Clicking Next takes you to the Timezone panel. Click the map or use the drop-down list to specify your time zone.
Finally, Next takes you to the Importing Files panel. The appearance of this panel depends on what other email clients and applications you have previously configured. Its purpose is to let you specify whether and how information from other email clients and applications should be imported into Evolution.
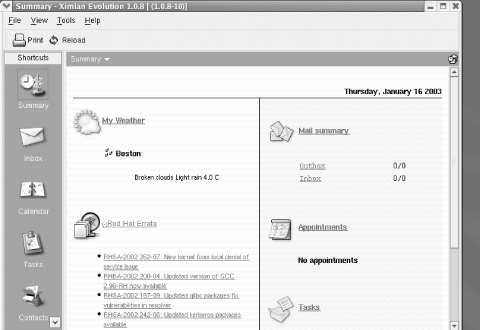
Clicking Next takes you to the Done panel. From there, click Finish to save your configuration. At last, Evolution appears as shown in Figure 6-8.
Figure 6-8. Evolution's main window

The left pane of Evolution's window is a menu that lets you choose the contents of the right pane. The Summary pane, which appears initially, presents weather, news, and a status summary of Evolution. Clicking Inbox, Calendar, Tasks, or Contacts selects the corresponding Evolution function.


