6.3 Connecting Cellular Phones
Once you've got Bluetooth on your Mac, it's time to do something with it. The most common use of Bluetooth is to simplify moving data between your computer and your cell phone. Instead of having to type in all of your contacts' names and phone numbers into both your Mac and your phone, Apple thinks that you should be able to synchronize the two devices. That makes sense to us, too.
We'll be using the Sony Ericsson T68i cell phone for the following examples. If you have a Sony Ericsson T68, T68c, or T68m, the following instructions should work as-is.
If you have a different Bluetooth-enabled phone (or are shopping for a Mac-friendly phone), check Apple's list of compatible cell phones (and other devices) at http://www.apple.com/isync/devices.html. In addition to the Sony Ericsson offerings, many Bluetooth phones from Nokia, Motorola, and Siemens can be configured to wirelessly sync with your Mac.
6.3.1 Pairing Your Phone and Mac
The first step is pairing your phone to your Mac via Bluetooth. Pairing is the process of telling your Mac to remember and trust your phone. As of Mac OS X 10.2.6, Apple has created several different ways of pairing phones to Macs, some of which are more dependable than others. This example gives the method that we've found works the most reliably.
In order for devices to find each other they must be made discoverable, which means that the device is broadcasting its availability for connection. To make your T68i cell phone discoverable, scroll to the Connect menu and choose option 3, Bluetooth. From the Bluetooth menu, choose option 1, Discoverable. The blue light on your phone will begin to blink, indicating that Bluetooth is active.
|
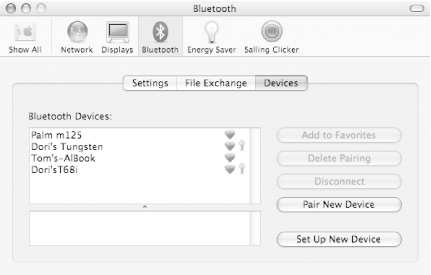
On your Mac, choose the Bluetooth pane from System Preferences, as shown in Figure 6-2. Make sure that Bluetooth power is on, then click on the Devices tab, as shown in Figure 6-3. The first time you pair a device, the "Bluetooth Devices" list will be blank.
Figure 6-2. The System Preferences Bluetooth pane
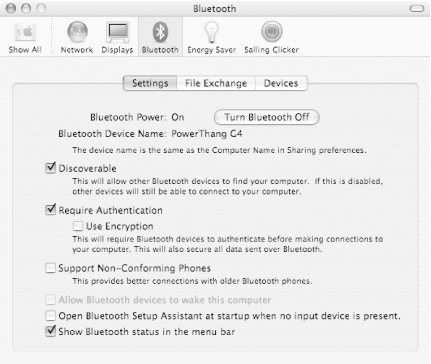
Figure 6-3. The Devices tab
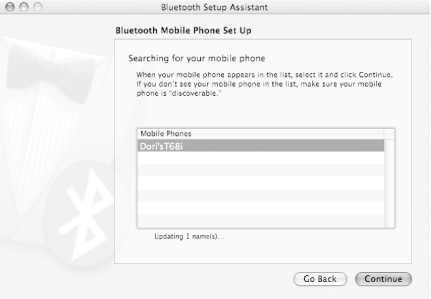
Click "Set Up New Device." This will launch the Bluetooth Setup Assistant application. Select "Mobile Phone" as the type of device you want to set up, and click Continue. Step 1 (seen in Figure 6-4) of the pairing process is for the Mac to search for your mobile phone. When it's found, it will show up on the list. Click Continue to go to Step 2.
Figure 6-4. Bluetooth Setup Assistant, Step 1
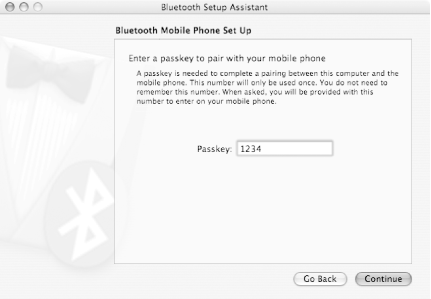
In Step 2 (as shown in Figure 6-5), enter a passkey. This isn't a password: it's not bulleted out when it's entered, and you don't need to keep track of it for the future. It needs to be all numeric so that it can be entered on your phone.
Figure 6-5. Bluetooth Setup Assistant, Step 2
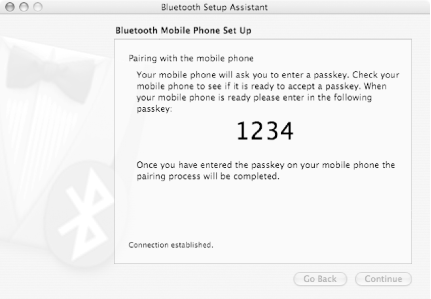
In Step 3, your Mac will warn you that you need to pay attention to your phone, and display (in the clear) the passkey you entered on the previous window. If everything's working correctly, a window should pop up on your phone, where the title bar is the name of your computer, and the options are 1: Accept, 2: Add to paired, or 3: Decline. Choose option 2, Add to paired, enter the passkey, and then click the Yes button. At this point, your Mac and your phone are paired, but you're not quite done yet! Hit the Continue button, shown in Figure 6-6.
Figure 6-6. Bluetooth Setup Assistant, Step 3
|
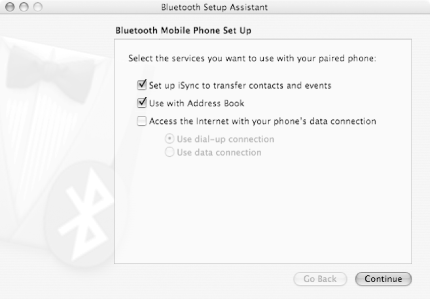
Your Mac now needs to figure out what services your phone can handle, and there may be a short pause while the two exchange information. Eventually, the Bluetooth Setup Assistant will switch to Step 4 (see Figure 6-7), where you can choose which of the available services you plan to use. You'll definitely want iSync and Address Book capabilities. If you plan on using your phone as a modem (covered in Chapter 7), choose the third option as well. Click Continue to go to the next step.
Figure 6-7. Bluetooth Setup Assistant, Step 4
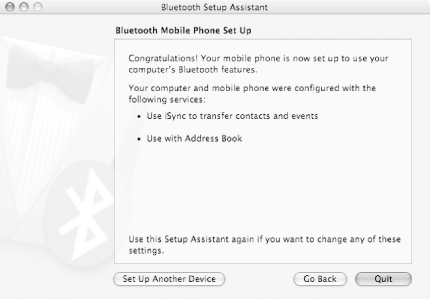
The conclusion screen (see Figure 6-8) displays the features you've configured and tells you that you've completed the process. You can click Quit to leave the Setup Assistant and return to Bluetooth Preferences.
Figure 6-8. Bluetooth Setup Assistant, conclusion
|
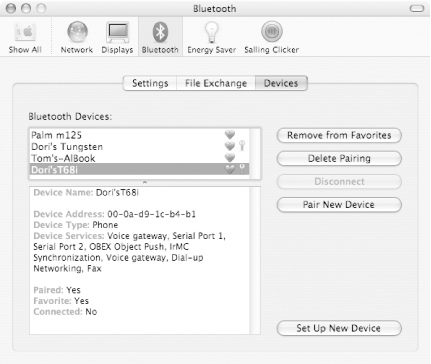
Upon returning to Bluetooth Preferences (see Figure 6-9), you should now see your cell phone displayed under the list of both paired and favorite devices, but not connected.
Figure 6-9. Bluetooth Preferences after pairing; note that the selected phone is paired and a favorite, but not connected
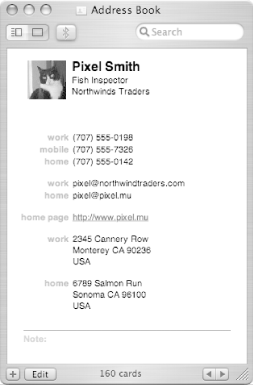
In order for the Mac and the phone to be connected, an application will need to make the actual connection. The simplest way to do this is via Mac OS X's Address Book application. As shown in Figure 6-10, click on the black Bluetooth icon (it's the right-most one on the left side of the toolbar). Appropriately, the Bluetooth icon will turn blue, and also animate briefly. Your Mac and your phone are now both paired and connected, and Address Book can interact with your cell phone.
Figure 6-10. Turning Bluetooth on in Address Book
|
Apple hasn't documented what they mean by "favorite" devices, and it doesn't appear to be meaningful as yet. All paired devices are added to the list by default; if you want one removed, just select it and click on "Remove from Favorites."
Another of the Bluetooth Preferences options (shown previously in Figure 6-2) is to show the Bluetooth status in the menu bar. This is very helpful, as it lets you see the current status at a glance. Figure 6-11 shows the various status symbols.
Figure 6-11. Bluetooth menu bar icons: disabled, enabled but off, enabled and on, and connected
|
6.3.2 Using Your Phone
At this point, your phone is paired and connected, so it's time to put it to work. Bluetooth phones work with your Mac in ways that you'll soon wonder how you lived without.
|
6.3.2.1 Announcing incoming calls
If someone calls your cell phone when you're within range of your Mac, a small window (see Figure 6-12) will pop up telling you that you have an incoming phone call. If the caller is in your address book, their name and the calling number will be displayed; otherwise, just the number will be shown.
Figure 6-12. Incoming phone call alert
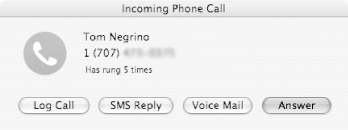
This window gives you three choices:
- SMS Reply
-
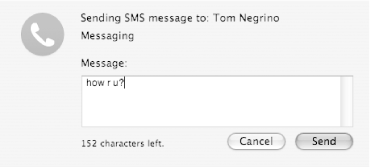
A new sheet opens with a text box (Figure 6-13). You can use this form to enter an SMS message that will be sent (via your phone) to the caller. The caller will be automatically transferred to your voice mail.
Figure 6-13. Outgoing SMS message box
|
- Voice Mail
-
This is the same as refusing the call on your phone. If you choose this option, the caller is pushed to voice mail.
- Answer
-
This option works the same way as just answering your phone.
If you don't pick any of these and choose to answer your phone instead, your Mac treats it as if you'd chosen "Answer."
6.3.2.2 Making outgoing calls
Without Bluetooth, if you click on a phone number in Address Book, you're given the option of displaying the number in large type. While this can be useful if you're trying to dial from a phone across the room, it'd be a lot simpler if your Mac could just tell your phone what number to dial. Bluetooth to the rescue!
If Bluetooth is active, there are two more options, as shown in Figure 6-14.
Figure 6-14. Outgoing call options in Address Book
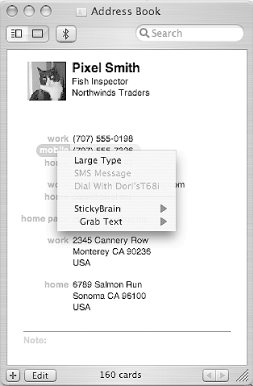
- SMS Message
-
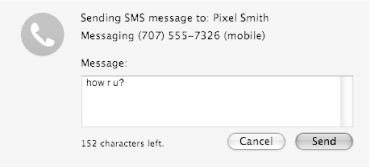
A new sheet appears within the Address Book window, allowing you to enter your message into a text box (Figure 6-15).
Figure 6-15. Sending an SMS message from Address Book
|
- Dial
-
This works just about the way you'd imagine: pick this option, and your cell phone starts to immediately dial out.
6.3.3 Fun with Phones
Once Apple had Bluetooth connectivity handling the cell phone basics, third-party developers started having some fun. A couple of applications have been introduced that allow you to use your cell phone as a remote control for your Mac: Salling Clicker (formerly Sony Ericsson Clicker), shareware from Salling Software http://clicker.salling.com/, and Romeo, freeware from Arboreal Software http://www.irowan.com/arboreal/.
6.3.3.1 Salling Clicker
Salling Clicker hasn't been out long, but it's already impressive enough that an early version won Apple Design Awards for both "Best Mac OS X Product (Best of Show)" and "Most Innovative Mac OS X Product" at Apple's Worldwide Developer Conference in 2003. Clicker uses Bluetooth to tell your Mac to run AppleScripts that control your Mac and Mac applications. For instance, it's possible to control applications such as iTunes and DVD Player from across the room and, unlike previously available IR remotes, your Mac doesn't have to be in your line of sight.
In addition, Clicker has a proximity sensor, which can tell when your phone leaves or moves into range. This is useful for situations varying from the handy (pausing iTunes when you leave your desk and restarting when you come back) to the serious (starting up a password-protected screensaver when you move out of range). Clicker can also control both Microsoft PowerPoint and Apple Keynote, allowing you to give presentations without being tethered to your Mac.
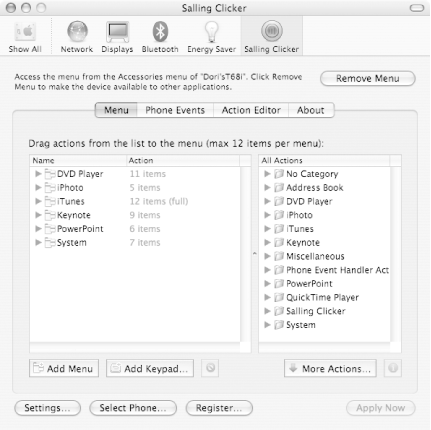
Figure 6-16 shows Clicker's Preferences. There's just one gotcha here: it says that you can "access [Clicker's] menu from the Accessories menu," but many new Clicker users can't find the Accessories menu. Don't fret, on the T68i it's the last option under the "Connect" menu, and it's available only when your phone is paired to another Bluetooth device.
Figure 6-16. Salling Clicker 2.0's Preference pane
But wait, there's more! Clicker doesn't just let you use your cell phone as a remote, it also does the same for Bluetooth-enabled PDAs. Since Palm OS support was a little trickier, Clicker has two different price tags: $10 for phone usage versus $15 for Palm OS usage. If you want to use it with both your T68i and your Tungsten T, Clicker will set you back $25. But if you're the type who has to give frequent presentations, just being able to see slide notes on your Palm while controlling a PowerPoint presentation on your laptop makes Clicker a must-have.
Using Salling Clicker is beyond the scope of this book; refer to the program's documentation for more information.
6.3.3.2 Romeo
Like Salling Clicker, the open source (and free) Romeo lets you use a cellular phone as a remote, and also includes support for AppleScript. Although Romeo does not have Salling Clicker's Palm support built-in, you can use it with Palm devices, as well as the popular Nokia 3650 (and compatible Bluetooth-enabled Series 60 devices such as the Nokia 7650) using Veta Universal. Romeo supports several models of Sony Ericsson phones without requiring Veta Universal.
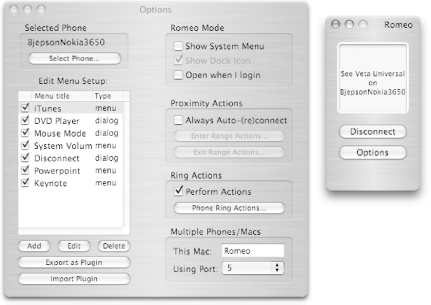
Veta Universal (http://veta.irowan.com/) is a shareware application that allows your Series 60 phone or Palm to emulate enough of the behavior of Sony Ericsson phones to work with Romeo. It does not support Salling Clicker, though. Romeo supports many of the same features as Salling Clicker, and both are well worth trying out. Figure 6-17 shows Romeo's options dialog, along with a window showing a connection to a Nokia 3650 phone.
Figure 6-17. Using Romeo with a Nokia 3650
6.3.4 Moving Data with Bluetooth
There are numerous ways to move data from your Mac to your phone: iSync (covered later in this chapter) and many third party utilities all let you shuttle bits wirelessly. Many of them, however, are just reinventing the wheel, since Mac OS X 10.2 includes Bluetooth File Exchange (found in your Utilities folder) to do just that.
6.3.4.1 Bluetooth File Exchange
Running Bluetooth File Exchange couldn't be simpler: just choose a file to send, pick a connected device to receive it, and off it goes! You can use this program to send homemade wallpaper to your phone. The T68i has a wallpaper resolution of 101 x 80 pixels at 256 colors and will happily accept GIFs. If you edit the GIF on your Mac, be sure to save it without a preview or resource fork, to keep its size down.
You can also use Bluetooth File Exchange to send installers (.jar or .sis files) for games and other applications to a smartphone such as the Nokia 3650 (the file will appear in your messaging inbox; when you open it, the installer will start running).
|
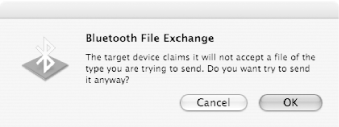
Figure 6-18. Bluetooth File Exchange's often-erroneous warning

 Connectivity


