14.2 Getting Started with J2EE
When starting a new application or development environment, first build the proverbial "Hello World" example. This step is instructional when working with J2EE, as it was for JSP in Chapter 13.
14.2.1 "Hello World" in J2EE
Start by building the simplest of all possible web applications: a "Hello World" JSP file. You created a similar JSP in the last chapter, but deploying a JSP as part of a J2EE application is different from deploying a JSP as a simpler web application. You will get a feel for these differences by working through these basic steps.
Create a file called index.jsp, with the contents shown in Example 14-1.
Example 14-1. A Hello World JSP
<HTML>
    <HEAD>
        <TITLE>Test</TITLE>
    </HEAD>
    <BODY>
    Hello World!<BR>
    <%= new java.util.Date().toString(  ) %>
    </BODY>
</HTML>
To deploy this file, create a WAR file. A WAR is just a ZIP file with a specific encoding, and in this case you can get away with not creating a web.xml file or any other supporting configuration or property files. Copy the index.jsp file to the /usr/local/jboss/server/default/deploy directory, and then issue the following command:
[Localhost:~/Documents] wiverson% ls index.jsp
index.jsp

[Localhost:~/Documents] wiverson% zip test.war index.jsp
  adding: index.jsp (deflated 19%)

[Localhost:~/Documents] wiverson% mv test.war /usr/local/jboss/server/default/deploy/

[Localhost:~/Documents] wiverson%
This command creates the needed WAR file and places it in JBoss's deployment directory (/usr/local/jboss/server/default/deploy). Any WAR or EAR (another type of archive specifically used for J2EE applications) file in this directory is automatically deployed by the JBoss application server without any further user intervention.
The JBoss terminal will notify you that the application has been deployed with the following message:
18:30:29,809 INFO  [MainDeployer] Starting deployment of package: file:/usr/
local/jboss/server/default/deploy/test.war
18:30:30,412 INFO  [jbossweb] Registered jboss.web:
Jetty=0,JBossWebApplicationContext=2,context=/test
18:30:30,618 INFO  [jbossweb] Extract jar:file:/usr/local/jboss/server/
default/tmp/deploy/server/default/deploy
/test.war/58.test.war!/ to /tmp/Jetty_0_0_0_0_8080_  _test/webapp
18:30:31,609 INFO  [jbossweb] Started WebApplicationContext[/test,jar:file:/
usr/local/jboss/server/default/tmp
/deploy/server/default/deploy/test.war/58.test.war!/]
18:30:31,760 INFO  [jbossweb] Internal Error: File /WEB-INF/web.xml not
found
18:30:31,774 INFO  [jbossweb] successfully deployed file:/usr/local/jboss/
server/default/tmp/deploy/server/default/deploy
/test.war/58.test.war to /test
18:30:31,777 INFO  [MainDeployer] Deployed package: file:/usr/local/jboss/
server/default/deploy/test.war
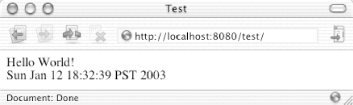
You can open a web browser to view http://localhost:8080/test/ and see the phrase "Hello World!" and the current time displayed. Your output should be similar to that in Figure 14-2.
Figure 14-2. Hello World in J2EE
14.2.2 The JBoss Template Project
As you move beyond "Hello World" and into more complicated applications, you'll find that J2EE is a pretty complex environment. Trying to get all the configuration files, property files, source, images, HTML pages, classes, and JAR files into the right place can be a daunting task.
To help with this process, JBoss 3.0 has a default template for working with J2EE applications, available at http://www.jboss.org/docs/#free-30x. This template application is ideal to start working on, especially for EJB development, as it walks through the development and deployment of a minimal EJB application.
14.2.2.1 Dependencies
The template project uses the open source tools shown in Table 14-1 in addition to JBoss, which you should download before working with the template project.
|
Project |
Version required |
Version used |
Available from |
|---|---|---|---|
|
Ant |
1.4.1+ |
1.5.1 |
http://jakarta.apache.org/ant |
|
XDoclet |
1.1.2+ |
1.1.2 |
http://www.sf.net/projects/xdoclet |
You should already have Ant set up if you followed the instructions back in Chapter 2. I put my installation in /usr/local/ant, and I made sure that I included its bin directory in my path. I placed XDoclet in the ~/xdoclet-1.1.2 directory.
14.2.2.2 The template directory structure
Download and uncompress the default template to a directory of choice; this case assumes that you've installed it in your home directory. You should end up with the directory structure shown in Figure 14-3.
Figure 14-3. Template directory structure
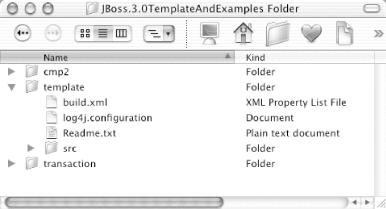
In this case, you'll deal with only the template directory. Copy this directory to your working environment and rename it. You should use the cp command in the Terminal, not the Finder, to copy the template directory (the Finder won't copy files that start with .). This example assumes that you've copied the contents of the template to ~/ejbproject:
[Localhost:~/JBoss.3.0TemplateAndExamples] wiverson% ls
cmp2         template     transaction

[Localhost:~/JBoss.3.0TemplateAndExamples] wiverson% cp -r template ~/ejbproject/

[Localhost:~/ JBoss.3.0TemplateAndExamples] wiverson% cd ~/ejbproject/

[Localhost:~/ejbproject] wiverson% ls
Readme.txt          build.xml           src
build               log4j.configuration template

[Localhost:~/ejbproject] wiverson% ls -a
.                         .ant.properties.example   log4j.configuration
..                        Readme.txt                src
.DS_Store                 build                     template
.ant.properties           build.xml
Now cd to the ~/ejbproject directory and execute an ls -l command. You should see an .ant.properties.example file in the directory listing. If not, you didn't copy the template fully.
|

Make a copy of this file called .ant.properties (note the period at the start of the filename). Update the file to point to your own JBoss configuration. Example 14-2 shows how the configuration is set up on my system.
Example 14-2. Ant properties for the template project
# ATTENTION: this is an example file how to overwrite settings
# in this project Please rename it to ".ant.properties" and adjust
# the settings to your needs
# Set the path to the runtime JBoss directory containing the
# JBoss application server
# ATTENTION: the one containing directories like "bin", "client", "server" etc.
jboss.home= /usr/local/jboss
# Set the configuration name that must have a corresponding directory under
# <jboss.home>/server
jboss.configuration=default
# Set the path to the root directory of the XDoclet distribution (see
# http://www.sf.net/projects/xdoclet)
xdoclet.home=/Users/wiverson/xdoclet-1.1.2/
# Set this to "true" when you want to force the rebuild of the Xdoclet
# generated files (see XDoclet's <ejbdoclet> attribute "force")
xdoclet.force=false
# Set the EJB version you want to use (1.1 or 2.0, see XDoclet's
# <ejbdoclet> attribute "ejbspec")
ejb.version=2.0
# Set the JBoss version you want to use (2.4, 3.0 etc., see XDoclet's
# <jboss> attribute "version")
jboss.version=3.0
# Set the DB type mapping (Hypersonic SQL, PostgreSQL etc., see XDoclet's
# <jboss > attribute "typemapping")
type.mapping=Hypersonic SQL
# Set the DataSource name your are going to use
# (java:/DefaultDS etc., see XDoclet's <jboss> attribute "datasource")
datasource.name=java:/DefaultDS
# Uncomment this and adjust the path to point directly to JAR file
# containing the servlet classes
# Attention: By uncommenting this line you start the creation of a WAR file
servlet-lib.path= /usr/local/jboss/server/default/lib /javax.servlet.jar
|
Next, look at the directory structure of the project's src folder, which is where all the interesting action occurs. Your structure should look like Figure 14-4.
Figure 14-4. Source tree for the template project
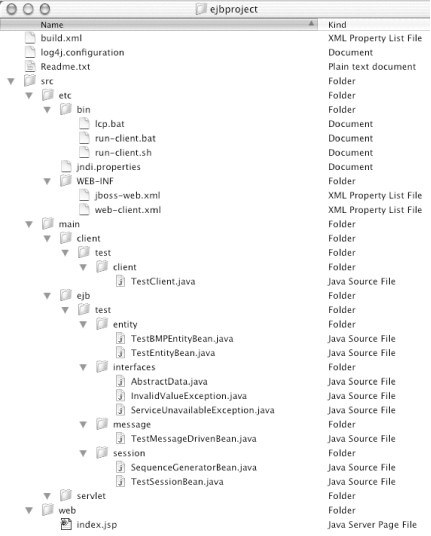
Here is some information on this structure's most important files:
- build.xml
-
This file tells Ant how to build the J2EE application.
- etc/bin
-
This directory contains the run-client.sh file, which executes a test Java client. Ant copies this file to the build/bin directory and updates it when you execute a build.
- etc/WEB-INF
-
This directory contains the base configuration XML files for your application. Ant copies files in this directory into the deployable WAR file when you execute a build.
- main/client/test/client/TestClient.java
-
This source is a very simple command-line test program. It is used to test the TestSession EJB.
- main/ejb/test/entity/TestBMPEntityBean.java
- main/ejb/test/entity/TestEntityBean.java
-
These two beans are examples of entity EJBs. Entity EJBs represent persistent data, such as user accounts and purchase orders. Typically, this data is stored in a database, although other storage mechanisms are possible. Each entity is uniquely identifiable by a number, or key. Entity EJBs fall into one of two categories: bean-managed persistence (BMP), for which the code for the EJB is responsible for saving and loading any persistent data, and container-managed persistence (CMP), for which the hosting server (or container) is responsible for managing, saving, and loading any persistent data.
- main/ejb/test/interfaces
-
The contents of this directory are utility classes. You can inspect them at your leisure, but this chapter doesn't cover them.
- main/ejb/test/message/TestMessageDrivenBean.java
-
This class is an example of a message-driven EJB. One of the newest aspects of the EJB specification, these EJBs represent asynchronous messages.
- main/ejb/test/session/SequenceGeneratorBean.java
-
This class is an example of a session EJB that returns a new sequence number for a given named sequence. It's as much an example and tutorial as anything.
- main/ejb/test/session/TestSessionBean.java
-
This Java class is an example of a minimal session EJB. Client/server sessions use session EJBs to perform nonpersistent operations. A session EJB might be used to handle simple calculations or other runtime utilities, but wouldn't represent something valuable and persistent such as a purchase order. A session EJB could retain some state across calls, but might expire or otherwise disappear.
- web/index.jsp
-
This file is a simple web user interface to the TestSessionBean EJB.
14.2.2.3 Building from the template application
Now build the application. Execute the commands shown here:
[Localhost:~/ejbproject] wiverson% /usr/local/ant/bin/ant
Buildfile: build.xml

check-environment:

check-jboss:
...
omitted for brevity
...

create-client:
     [echo] JBoss Home on Unix: /usr/local/jboss
     [echo] Java Home on Unix: /System/Library/Frameworks/JavaVM.framework/Versions/1.3.1/Home

main:

BUILD SUCCESSFUL
Total time: 26 seconds
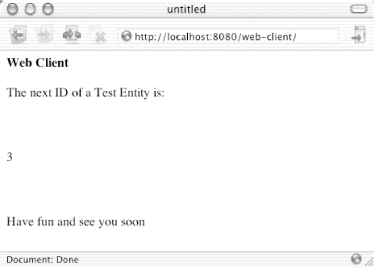
When it's done, a "BUILD SUCCESSFUL" message will appear. You can verify that the build process worked by opening the URL http://localhost:8080/web-client/. You should see the output shown in Figure 14-5.
Figure 14-5. Output from sample application
|
After the running the build for the first time, you will see a build directory next to the src directory in your project's directory structure. This is where the output of your build is placed, although files are also placed in the JBoss deployment directory automatically. Like the src directory, this area is worth exploring.
- build/bin
-
This directory contains the final script files used to run the command-line Java client.
- build/classes
-
This directory contains the compiled classes (both your source files and any autogenerated Java classes).
- build/deploy
-
This directory contains the files that are deployed automatically to your JBoss 3.0 distribution. It's a bit redundant (these files are located both here and in the JBoss deploy directory), but it is a good way to verify which files are published during the build process.
- build/generate
-
This directory contains all the Java source files generated by XDoclet. This directory is important, as stack trace information may point to line numbers of source files in it, or compilation errors in XDoclet generated source.
- build/META-INF
-
This directory contains the deployment descriptors generated by XDoclet.
- build/war
-
This directory contains files used to construct the deployed WAR(s).
14.2.2.4 Adding functionality to the template
Normally, the development of EJB-based applications is complicated. This text will not teach you EJB application development and architecture, but it will show you how to add a simple bit of functionality to this template.
Now add another method to the TestSessionBean session bean and invoke that method from a client. Open the file ~/ejbproject/src/main/ejb/test/session/TestSessionBean.java and add the method shown here:
/**
* @ejb:interface-method view-type="remote"
**/
public String getCurrentTimestamp(  )
{
    return new java.util.Date().toString(  );
}
You'll notice the special comments at the start of the listing. These comments are an XDoclet command that tells the build system to generate the proper wrapper code to make this method visible to the remote client.
|
Next, create a new clock.jsp file as shown in Example 14-3. Place this JSP in the template's /web directory, alongside /web/index.jsp.
Example 14-3. The clock JSP
<%@ page session="false"
   isThreadSafe="true"
   isErrorPage="false"
   import="javax.naming.*, test.interfaces.*"
%>
<HTML><HEAD><TITLE>EJB Clock</TITLE></HEAD>
<BODY>
<h4>World's Most Complex Clock</h4>
<p>The current server time is: </p>
<p><%
   try {
      Context myContext = new InitialContext(  );
      TestSessionHome myHome = (TestSessionHome) myContext.lookup(
         "java:comp/env/ejb/webtest/TestSession"
      );
      TestSession mySession = myHome.create(  );
      %>
<%= mySession.getCurrentTimestamp(  ) %>
     <%
   }
   catch( Exception e ) {
      out.println( "Caught exception: " + e.getMessage(  ) );
      e.printStackTrace(  );
   }
%>
</BODY>
</HTML>
Now open the Terminal, cd to the ~/ejbproject directory, and execute /usr/local/ant/bin/ant. These steps will recompile the TestSessionBean, generate the proper client files, copy over clock.jsp, and rebuild and deploy a new WAR file into JBoss.
|
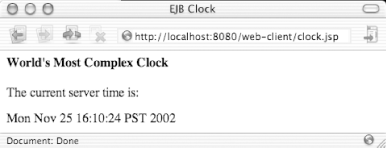
JBoss automatically detects and redeploys the new WAR file (you will see this in the JBoss log if you are watching). You should now be able to open your web browser to the URL http://localhost:8080/web-client/clock.jsp and see the new clock in action, as shown in Figure 14-6.
Figure 14-6. The clock JSP