Adding AutoShapes
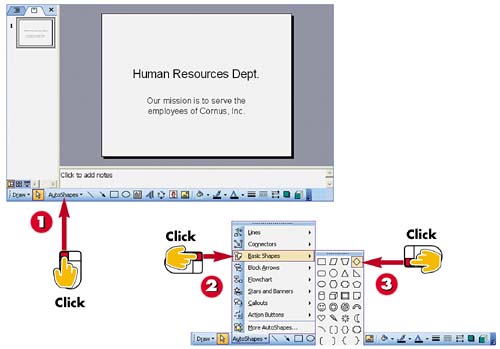

Click the AutoShapes button on the Drawing toolbar.

Click an AutoShape category (in this example, Basic Shapes).

Click an AutoShape.
INTRODUCTION
Rather than drawing your own shapes on your slides, you can choose from dozens of predrawn shapes, called AutoShapes. Among the AutoShapes catalog, you can find callout shapes, block arrows, and basic shapes, such as triangles.
TIP
Setting a Fill Color
You can set the fill color or line style for the AutoShape before drawing it on the slide. To do so, click the Fill Color button on the Drawing toolbar to change the fill color, or click the Line Color and Line Style buttons to change line color or style (for help, see the preceding task). You can now draw an AutoShape using your selections. You can also apply formatting options to a shape you have already created.
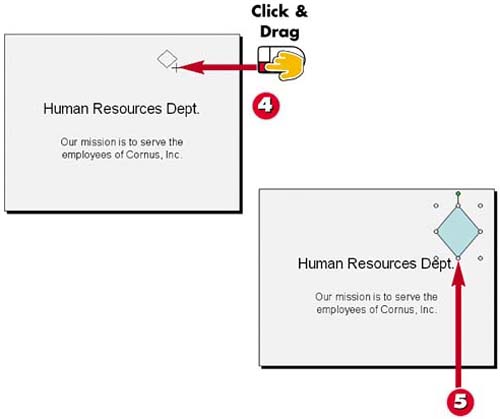

Click and drag on the slide to draw the shape.

Release the mouse button; the shape is created.
TIPAdding Text to an AutoShape Most AutoShapes allow you to add text within the shape. To do so, choose an AutoShape as you did in steps 1?3, click on the slide where you want to insert the shape, then start typing the text you want to appear. |
TIPDeleting an AutoShape To remove an AutoShape object from a slide, click to select the object, and then press the Delete key on your keyboard. |
TIPEditing an AutoShape If you double-click an AutoShape, the Format AutoShape dialog box opens, enabling you to make changes to the shape's fill color or line style. |


