Using Find, Replace, and Go To
If dialog boxes could get worn out, for many users the Find and Replace dialog boxes would be the first to go. They're real workhorses: easy to use and extremely powerful. The next few sections show you how to make the most of them.
In this section, you'll learn the fundamentals of searching for text?but you'll also discover that Find and Replace can work with nearly anything you can put into a Word document: formatting, graphics?you name it. You'll also discover how to use the related Go To command, which can find much more than most users realize.
Word brings together its Find, Replace, and Go To tools in a single dialog box, so it's easy to switch between them if you realize that you need to use a different tool. You can open this Find and Replace dialog box in several ways:
To display the Find tab, press Ctrl+F; or choose Edit, Find; or click Select Browse Object and click the Find button (refer to Figure 2.4).
To display the Replace tab, press Ctrl+H or choose Edit, Replace.
To display the Go To tab, press F5 (or Ctrl+G); or choose Edit, Go To; or click Select Browse Object and click the Go To button.
TIP
To get one-click access to Find, add Word's optional Find button to the Standard toolbar. Click the down-arrow button at the right edge of the Standard toolbar and move the mouse over Add or Remove Buttons. Choose Find from the list of buttons that appears. (It's at the bottom of the list.)
Finding Text Quickly
When all you want to do is find text, Word makes things simple:
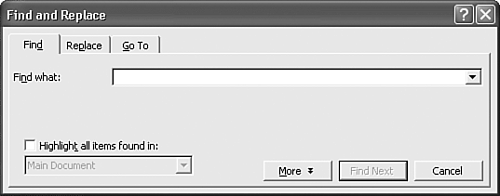
Display the Find and Replace dialog box by pressing Ctrl+F (see Figure 2.27).
Figure 2.27. Word's Find tab, with complex options hidden.
Enter the text you want to locate in the Find What text box.
Click Find Next. If the text is found in your document, Word selects it.
After Word locates the text, the Find and Replace dialog box remains open so that you can search for something else?or edit the document after you locate the text you want to edit.
TIP
Sometimes, after you find text, you might decide that you want to replace it?either in one location or globally.
With the Find and Replace dialog box open, click the Replace tab: The text you originally entered in the Find What text box is still there. The Replace tab is discussed in detail in the next section.
After you close the Find and Replace dialog box, you don't have to reopen it to find the next instance of the same text. Just press Shift+F4, and Word moves to the next location where the text can be found. (This will not happen if you change Browse objects. Choosing a new Browse object resets the Find Next operation to use the Browse setting, not the Find setting.)
Replacing Text Quickly
Often, you know in advance that you want to replace text, not just find it. To replace text without first finding it, follow these steps:
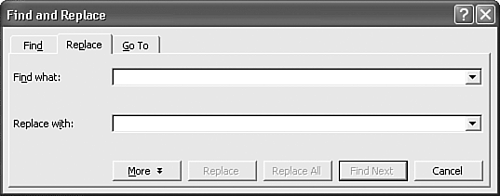
Press Ctrl+H to display the Replace tab of the Find and Replace dialog box (see Figure 2.28).
Figure 2.28. In the Replace tab, you can specify the text you want to find and the text with which you want to replace it.
In the Find What text box, enter the text you want to replace.
In the Replace With text box, enter the text you want to use instead.
You now have a few options as to what you do next:
To find the next occurrence of the text and then decide whether to make the replacement, click Find Next.
To replace the next occurrence of the text and wait for instruction about what to do after that, click Replace.
To replace all occurrences of the text immediately, click Replace All.
When you're finished replacing text, click Close (or Cancel if the search text was not found).
Highlighting All Appearances of an Item in a Document
In Word 2003, instead of displaying found text one instance at a time, you can have Word select them all at once. After you've selected them all, you can cut or reformat them all at once. |
To select all text references at once, press Ctrl+F to display the Find tab of the Find and Replace dialog box and enter what you are looking for in the Find What text box. Check the Highlight All Items Found In check box.
If necessary, you can also select the part of the document where you want to display highlighting. You may have only one option: Main Document. If your document contains headers or footers, these may appear as a second option. If you selected text before displaying the Find dialog box, Current Selection will also appear as an option.
Taking More Control Over Find and Replace
Thus far, all the searches and replaces you've performed have used Word's default settings. For example, Word searches the entire document and disregards capitalization and formatting. (By default, a phrase is found whether or not it is capitalized, and whether or not it is boldfaced.)
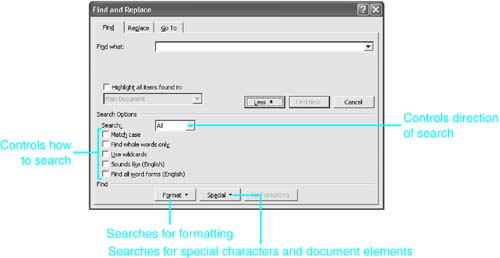
You can, however, exercise much more control over how Find and Replace works. To begin, in either the Find or the Replace tab, click the More button. Word displays several additional options (see Figure 2.29).
Figure 2.29. The Find dialog box with "More" options displayed.
Controlling the Direction of a Search
Usually, you'll want to search an entire document for the text you want?but not always. For example, suppose that you realize partway through editing a document that you've been using a product name incorrectly; you may want to search backward to find incorrect references that appear earlier in your document.
The Search: drop-down list box enables you to control the direction in which Word searches for the text you specify in the Find What box. You can search the entire document by leaving the setting at All. Or you can search forward through the document by choosing Down or backward through the document by choosing Up.
NOTE
When you choose All, Word searches in a circular fashion from the current position of the insertion point forward in your document. When Word reaches the end of your document, it automatically goes to the top of the document and starts searching from there until it reaches your current insertion point.
Performing Case-Sensitive Searches
By default, when you ask Word to find text, Word ignores any capitalization you may have used when specifying words or phrases in the Find What and Replace With text boxes. Similarly, if you ask Word to replace text, Word inserts the new text using the same capitalization it found in the original text. For instance, when Word replaces text at the beginning of a sentence, it capitalizes the sentence properly?even if you lowercased the text when you entered it in the Find and Replace dialog box.
This is usually what you want, but not always. For example, words like "Walker" are capitalized when used as last names but may be lowercased in other contexts. To find only text capitalized a certain way, type the text using the correct case in both the Find What and the Replace With text boxes. Then check the Match Case check box.
Word now finds only selections that match the case you typed in the Find What text box and replaces that text using the case you typed in the Replace With text box.
Finding All Occurrences or Only Whole Words
Sometimes, the word for which you are searching may also be contained within another word. Consider "establish" and "establishment" or "when" and "whenever." This can slow down searches by burdening you with text you don't care to see. Worse, it can lead Word to replace text incorrectly.
If you search with default settings, Word finds every occurrence of the characters you type in the Find What text box. However, to find "establish" without looking at words that contain it?such as "establishment"?place a check in the Find Whole Words Only check box.
Improving a Search with Wildcards
If you've ever played poker, you may be familiar with wildcards; if you pick up a wildcard, you can use it as if it were any card you wanted. In Word searches, a wildcard is a symbol that stands for any character you want. Using wildcards helps you widen your searches. Word also provides several parameters you can use to not just widen searches, but refine them.
Table 2.3 describes the wildcards recognized by Word's Find and Replace dialog box, with examples of how these wildcards can be used. In the table, asterisks (*) are used to represent strings of text, question marks (?) to represent single characters, and exclamation points (!) to represent that you want to find any single character except those specified next to it.
For example, you'll notice that including a ? within the characters in the Find What text box tells Word to find any character in the position of the question mark. Here are a few pointers for using wildcards and parameters:
If the character you're searching for happens to be one of the ones Word uses for wildcards, such as the asterisk (*), type a backslash (\) before the character.
Suppose that you have a name that appears several times in your document, ordered last name first. You can use the \n wildcard, combined with parentheses, to search to rearrange the name so that it appears in first name, last name order. For example, if the name appears as Smith, John, then type (Smith), (John) in the Find What text box and \2 \1 in the Replace With text box. Word finds Smith, John and replaces it with John Smith. Note that placing the comma outside the parentheses in the Find What text box eliminates it when you replace the text.
Use This Wildcard | To Find | Examples |
|---|---|---|
? | Any single character | w?n finds win, wan, and won. |
* | Any string of characters | l*d finds learned and limped |
[ ] | One of the specified characters | s[uo]n finds sun and son. |
[-] | Any single character in this range | [b-d]rown finds brown, crown, and drown. Ranges must be in ascending order. |
[!] | Any single character except the characters inside the brackets | l[!a]st finds list, lost, and lust, but not last. |
[!x-z] | Any single character except characters in the range inside the brackets | cl[!a-m]ck finds clock and cluck, but not clack or click. |
{n,} | At least n occurrences of the preceding character or expression | We{1,}d finds wed and weed. |
@ | One or more occurrences of the preceding character or expression | fe@d finds fed and feed. |
{n} | Exactly n occurrences of the preceding character or expression | we{2}d finds weed but not wed. |
{n,m} | From n to m occurrences of the preceding character or expression | 10{1,3} finds 10, 100, and 1000. |
< | The beginning of a word | <(ex) finds except, exempt, and exercise, but not text. |
> | The end of a word | (al)> finds exceptional and diagonal, but not albatross or alarm. |
CAUTION
If you're not careful about how you specify a wildcard search, you may get more than you bargained for. Searching for l*d will find "learned" and "limped" but will also find "license to d" in "license to drive" and even much longer strings between any l and the next d. And searching for 10{1,3} will find not only 10, 100, and 1000, but also the first four digits of 10000, 100000, and similar numbers.
Finding Words with Spelling Variations
Do you have trouble distinguishing there, their, and they're? How about its and it's? You can review your document for words that sound alike but are spelled differently using Word's Sounds Like (English) feature.
TIP
As an alternative, let Word's Grammar Checker correct mistakes for you.
 For more information on working with Word's grammar checker, see "Using Automatic Spelling and Grammar Checking," p. 254.
Finding Other Word Forms
Have you ever decided, after you're already several pages into a document, that the verb you've chosen to describe an action should be replaced with one that's more precise or effective? Changing each occurrence of the verb, in its various incarnations (for example, singular, plural, or adverbial) can be tedious. Instead, use Word's Find All Word Forms feature.
When you place a check in the Find All Word Forms check box, Word finds all forms of the word you type in the Find What text box. For example, if you type forbid in the Find What box, Word finds "forbid," "forbids," "forbidden," "forbade," and "forbidding."
When Word finds an instance of the word you are replacing, it provides a drop-down list of forms of the word that could be used as replacements. So, continuing with the "forbid" example, if you search and replace "forbid" with "prohibit," when Word finds any form of the word "forbid" listed, the list of possible replacements will include "prohibit," "prohibits," "prohibiting," and "prohibited."
Word selects the form of the word that the grammar rules pick as being the correct form. However, you can pick a different form of the word from the drop-down list. It's a good idea to replace these one by one so that you can review and approve each replaced form.
If you use different parts of speech in the Find What and Replace With text boxes, pay especially close attention to the word forms Word suggests for the replacement. Word conjugates the verb for you if the Replace With word can serve as a verb, even if your target is a noun. Make sure that the result is what you wanted.
NOTE
The Find All Word Forms feature is not available if you have checked either the Use Wildcards check box or the Sounds Like check box. All three of these choices are mutually exclusive.
NOTE
If you don't see the Find All Word Forms check box, you may need to run Setup again to install this feature."
Supercharged Find and Replace Techniques
Although Find and Replace basics are powerful, you can use Find and Replace in even more powerful ways. For example, you can use it to
Clean up imported documents, such as emails containing line breaks after every line
Find and replace formatting; for example, to replace all boldface in a document with italics
Find and replace styles, to improve the visual consistency of a document
Find and replace symbols and other special characters
Cleaning Up Imported Documents
Many documents contain paragraph marks you want to keep, as well as paragraph marks you want to eliminate. Often, imported documents contain two consecutive paragraph marks wherever a new paragraph begins. To eliminate the single paragraph marks you don't need, while retaining the double paragraph marks you do need, follow these steps:
NOTE
Don't use Replace All to replace every paragraph mark with nothing. Word not only strips out the single paragraph marks that appear at the end of every line, but also strips out the double paragraph marks that indicate the end of paragraphs. You obviously need that "end of paragraph" information; the procedure that follows shows you how to retain it.
TIP
In certain documents, you can also use Word's Format, AutoFormat feature to eliminate much of the stray formatting you don't need.
Open the Find and Replace dialog box and select the Replace tab (press Ctrl+H).
Clear any text you see in either the Find What text box or the Replace With text box, and place the insertion point in the Find What text box.
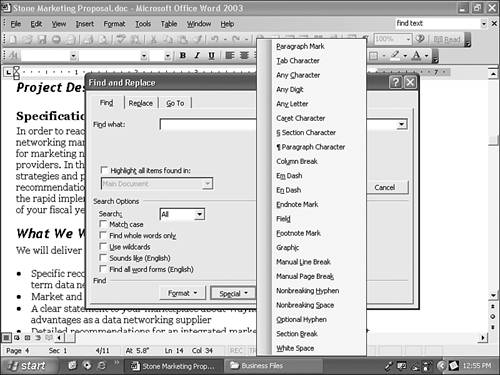
If the Search Options portion is not displayed, click the More button. Then click the Special button. A pop-up list appears, showing you the special characters for which you can search (see Figure 2.30).
Figure 2.30. You can search for any character on this list and even replace it with any other character on the list.
Choose Paragraph Mark from the list; then click More again and choose it a second time. The characters ^p^p should now appear in the Find What text box.
In the Replace With text box, enter placeholder text that doesn't appear elsewhere in your document, such as QQQQ.
Click Replace All to replace every instance of double paragraph marks (^p^p) with QQQQ.
Type ^p in the Find What text box and the appropriate replacement in the Replace With text box. If your document's end-of-line paragraph marks include no spaces, type a space in Replace With; if they do include spaces, type nothing.
Click Replace All to replace every unwanted paragraph mark with a space.
Now type QQQQ in the Find What text box and ^p in the Replace With text box.
Finally, click Replace All to replace every instance of QQQQ with true paragraph breaks.
TIP
Clicking the Special button displays a long list of special characters Word can search for, including
Em dashes, en dashes, and quarter em spaces
Column, line, and page breaks
Graphics
Endnote and footnote marks
Any character, digit, or letter (wildcards)
Column, line, and page breaks
Graphics
Endnote and footnote marks
Ellipses
Tabs
After a while, you may become familiar with the special characters Word inserts when you search for some of these document elements?for example, paragraph marks (^p). You don't have to choose them from the Special drop-down list; you can enter them directly.
Always start with the ^ caret character, and if the second character is a letter, enter the letter as lowercase. For example, to search for a footnote mark, enter ^f, never ^F.
Finding and Replacing Formatting
You can search for formatting of various types and replace it with other formatting. For example, you can search for and replace font and paragraph formatting, tab settings, frames, highlighting, language formatting, and styles. (Finding and replacing language formatting and styles are discussed in the next two sections.)
Place the insertion point in the appropriate text box (Find What or Replace With). If you are searching for text containing formatting, type the text for which you want to search.
TIP
If you want to search for all occurrences of some formatting (for example, italic) don't type any text in the Find What text box.
Click the Format button. A pop-up list appears, showing the categories of formatting for which you can search (see Figure 2.31).
Figure 2.31. You can search for various categories of formatting by clicking the Format button.
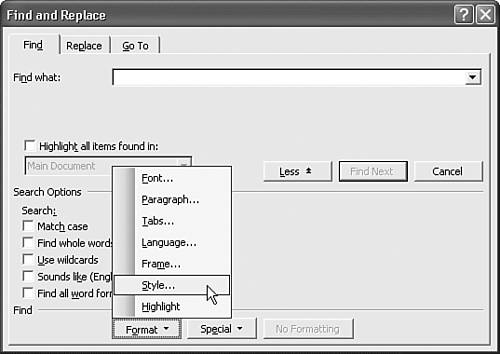
If you choose Font, Paragraph, Tabs, or Frame, Word displays a dialog box similar to the dialog box you would use to apply this type of formatting.
For more information on formatting text in Word, see Chapter 4, "Quick and Effective Formatting Techniques," p. 107.
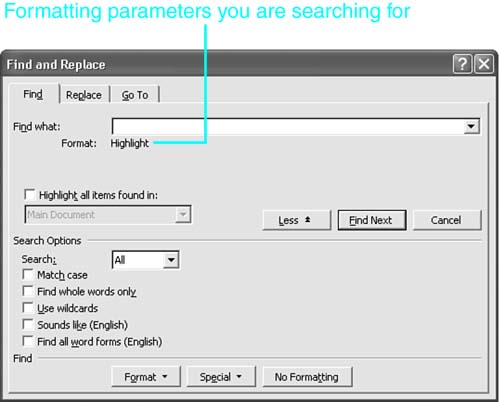
After you've opened the appropriate dialog box, select the formatting you want Word to search for, and click OK. Word then displays the Find and Replace dialog box again, listing the formatting you selected. If you choose Paragraph, the Find Paragraph dialog box appears. If you choose Highlight, you don't see a dialog box; Word simply changes the Find and Replace dialog box to include highlighting in either the search or the replacement (see Figure 2.32).
Figure 2.32. After you select Highlight (or other parameters), Word adds the parameters in the Find and Replace dialog box.
To clear formatting from the Find and Replace dialog box, place the insertion point in the Find What text box or the Replace With text box, as appropriate, and click the No Formatting button.
NOTE
For character formatting (bold, italic, highlight, and so on), you can search for text that does not contain this formatting. For Highlight, select the option twice from the Format menu, and Word changes the Find and Replace dialog box so that you see Not Highlight. (Select it again to clear it entirely.)
For character formatting that you select from the Find Font dialog box, select the opposite of the formatting; that is, select Not Bold or Not Italic, or click any check box twice to remove the check.
Finding and Replacing Styles
In Chapter 10, "Streamlining Your Formatting with Styles," you'll learn how to use styles to make your document formatting easier and more consistent. When you use styles regularly, you'll find occasions when you want to switch some or all occurrences of one style in your document with another style. Using Find and Replace, you can search for styles and replace them with other styles.
Place the insertion point in the Find What text box (make sure that the box contains text only if you want to search for text formatted in a particular style), and click the Format button. A list appears, showing the formatting for which you can search. When you choose Style, the Find Style dialog box appears (see Figure 2.33). Select a style and click OK.
Figure 2.33. From this dialog box, select the style you want to find.

NOTE
You can find not only paragraph and character styles but also list styles. However, you cannot find table styles.
Repeat this process after you place the insertion point in the Replace With text box. When you choose Style, the Replace Style dialog box appears; it looks just like the Find Style dialog box shown in Figure 2.33.
To remove styles from the Find and Replace dialog box, place the insertion point in the Find What text box or the Replace With text box, as appropriate, and click the No Formatting button.
Finding and Replacing Language
As you'll learn in Chapter 35, "Using Word's Multilingual and Accessibility Features," Word text can be tagged with specific languages so that Word knows which set of proofing tools to use with it. You can use Find and Replace to change the language associated with specific blocks of text, or to assign the No Proofing language to certain blocks of text (such as product or company names) that you don't want proofed in any language.
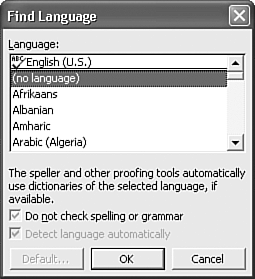
Place the insertion point in the Find What text box (make sure that the box contains text only if you want to search for text formatted in a particular language). Click the Format button; a pop-up list appears, showing the formatting for which you can search. Choose Language, and the Find Language dialog box appears (see Figure 2.34). Select a language and click OK. The selection appears in the Find and Replace dialog box.
Figure 2.34. Use the Find Language dialog box to find portions of the document formatted in another language or with No Proofing.
You can clear the language from the Find and Replace dialog box by placing the insertion point in the Find What text box or the Replace With text box, as appropriate, and clicking the No Formatting button.
Using Find and Replace to Insert the Contents of Your Clipboard
You've already learned how to replace text and formatting. But Word offers a little-known shortcut that lets you use Replace to insert virtually anything in your document. This feature can be invaluable. For instance, you can use it to replace a block of text with
An icon such as the "Note" and "Caution" icons that appear throughout many books and manuals
A field code or a block of text that includes a field code; for example, a standard line of text that contains cross-references or captions that automatically update themselves
A heavily formatted table that might include formulas you intend to reuse in many places
To work with the feature, insert the same block of text throughout your document, wherever you want to replace it with something else. Use a block of placeholder text that isn't likely to appear anywhere else in your document; for instance, QQQQQ. Next, copy the document element you want to insert throughout the document. (You can copy it from a Word document or any other Windows application.) This places the information in the Clipboard?an area of your computer's memory set aside to store information that can be pasted elsewhere.
Choose Edit, Replace and enter the placeholder text in the Find What text box. In the Replace With text box, enter ^c; then click Replace All. Word replaces the placeholder text with whatever appears in your Clipboard.
Go to Practically Anything You Want
No matter what you're doing, there are going to be times when you'll want to go elsewhere in your document. Word's Go To command makes it convenient to go to almost anything. To display the Go To tab of the Find and Replace dialog box (see Figure 2.35), use any of the following techniques:
Press F5.
Open the Find and Replace dialog box and click the Go To tab.
Press Ctrl+G.
Click Select Browse Object and click Go To.
Double-click on the page number in the status bar.
Figure 2.35. Use the Go To dialog box to move around documents quickly.

As you scroll through the Go to What list box, you'll see that you can go to the following objects in a Word document:
Page
Section
Line
Bookmark
Comment
Footnote
Endnote
Field
Table
Graphic
Equation
Object
Heading
Using Bookmarks to Go To a Location
If you expect to return to a location regularly, create a bookmark there. Then you can use the Go To dialog box to find the bookmark. You can get the job done by following these steps:
Place your insertion point where you want the bookmark.
Choose Insert, Bookmark.
In the Bookmark Name text box, enter a name for your bookmark.
Click Add.
Now that you have the bookmark, you can find it like this:
Press F5 to display the Go To tab of the Find and Replace dialog box.
Choose Bookmark in the Go to What list box.
Choose the bookmark you want from the Enter Bookmark Name drop-down box.
Click Go To.
For more information on working with bookmarks, see "Using Bookmarks," p. 755.
TIP
If you know the name of the bookmark you want to locate, just type it in Word's Go To tab, and Word can find it, even if you don't select Bookmark in the Go to What list box. So you can type the bookmark name in the text box even if it reads Enter Page Number, Enter Section Number, or one of the other options.
Going to Your Most Recent Location
If you simply want to return to the location where you were last, press Shift+F5. This key combination recalls the last three locations in which you clicked before your current location. Keep pressing Shift+F5 until you arrive at the location you want.
TIP
Many Word users get in the habit of using only a few of the navigation tools available to them. But an eclectic mix of keyboard and mouse may well get the job done fastest.
For example, you may want to try a strategy such as this:
Use the arrow and Ctrl+arrow combinations to move a few letters or words.
Use the scrollbar (or mouse wheel) to move large distances if you don't know the exact location to which you're going.
Use the Go To tab of the Find and Replace dialog box if you do know where you're going.
Searching for Items
Regardless of what you choose to go to, you can go to the next or preceding occurrence of the same type of object using the navigator buttons that appear on either side of the Select Browse Object button at the bottom of the vertical scrollbar (refer to Figure 2.4).
But what if you want to go to a specific numbered item or location? Earlier in this chapter, you learned how to use a bookmark to mark your place in a document. When you use the Go To command to return to that location, you go to a named location. The same method works if you want to go to a comment (you enter the reviewer's name), a field (you enter the field's name), or an object (you provide an object type, such as an Excel worksheet).
You also can use the Go To tab of the Find and Replace dialog box to move the insertion point to a specific numbered item or location. For example, if you want to go to page 4, select Page from the Go to What list box and type 4 in the text box to the right. You can use numbers for pages, sections, lines, footnotes, endnotes, tables, graphics, equations, or headings.
Word numbers these items sequentially as they appear in your document. For example, to go to the 23rd graphic in your document, choose Graphic in the Go to What scroll box and enter 23 in the Enter Graphic Number text box.
Similarly, you can use plus and minus signs to move your cursor a specific number of items forward or backward in your document. For example, to move forward three footnotes, choose Footnote in the Go to What scroll box, and type +3 in the Enter Footnote Number text box.
TIP
You also can specify how far into a document you want to go as a percentage of the whole document. For example, to move to a location 25% from the beginning of the document, type 25% in the Enter Page Number text box and click Go To.


