Using Print Preview
When you want to preview a document as it will be printed, use Word's flexible Print Preview feature. To display it, click the Print Preview button on the Standard toolbar. |
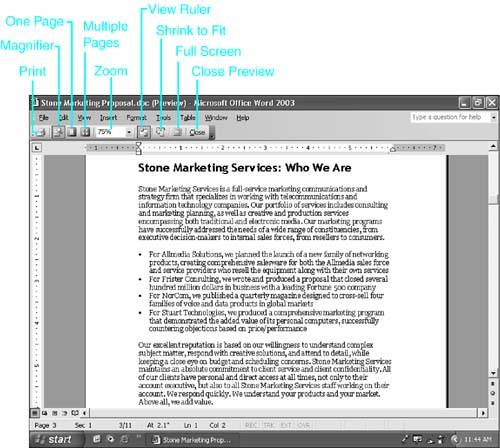
You can perform many tasks in Print Preview, including viewing, editing, and printing. But first, here are the basics. Figure 6.17 shows the Print Preview screen. You can see a miniature version of your current document, as well as a toolbar containing several useful options. Whenever you're ready to leave Print Preview, click Close, and Word returns you to the view of the document you were using before you selected Print Preview.
Figure 6.17. The default Print Preview screen, including the Print Preview toolbar.
Viewing Rulers and Margins in Print Preview
Horizontal and vertical rulers are displayed by default in Print Preview. On the rulers, the document's active text areas are displayed in white; nonprinting areas are displayed in gray.
If you want to toggle the rulers on or off, click the View Ruler toolbar button.
Printing from Within Print Preview
To print one copy of a document from within Print Preview, click the Print button. If you want more control over how your document prints, choose File, Print to display the same Print dialog box discussed earlier in this chapter.
Zooming In and Moving Around
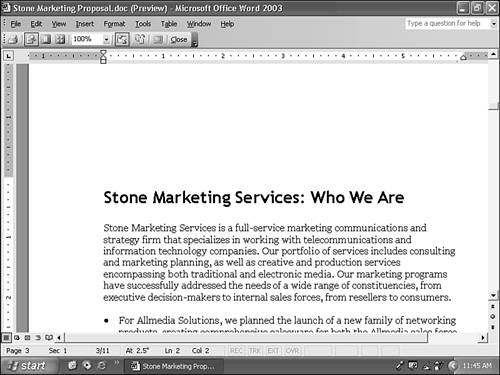
While you are viewing the document in Print Preview, the mouse pointer becomes a magnifying glass with a plus symbol. To zoom the document to full size, move the pointer to the region of the page you want to look at more closely, and click. The text enlarges to full size, as shown in Figure 6.18. You can adjust the exact proportion of the text by entering a new percentage in the Zoom box.
Figure 6.18. A document shown at 100% size in Print Preview.
If you want to view enlarged text elsewhere on your page and the text extends beyond the current boundaries of your screen, scroll to it with the vertical or horizontal scrollbars. Keep in mind that the scrollbars take you through the entire document, not just to the top and bottom of the visible page.
NOTE
To move forward one page in Print Preview, click the double down arrow button at the bottom of the vertical scrollbar. To move back one page, click the double up arrow.
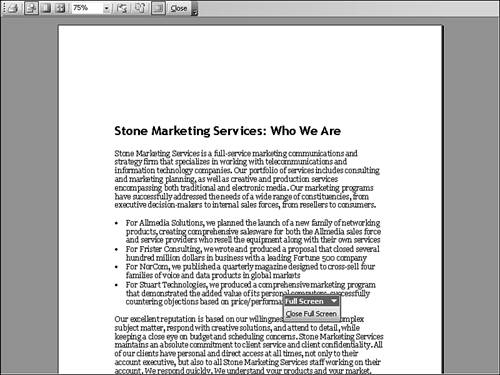
You can make your text area appear a little bigger by hiding screen elements you may not need. For example, to hide everything except the Print Preview toolbar (see Figure 6.19), click the Full Screen button on the Print Preview toolbar. When you need a menu, you can make it appear by moving your mouse pointer up to the top of the screen.
Figure 6.19. Previewing a document in Full Screen view.
When you want to switch from Full Screen view back to the standard Print Preview screen, click the Full Screen button again or click the Close Full Screen button on the Full Screen toolbar.
Viewing Multiple Pages at Once
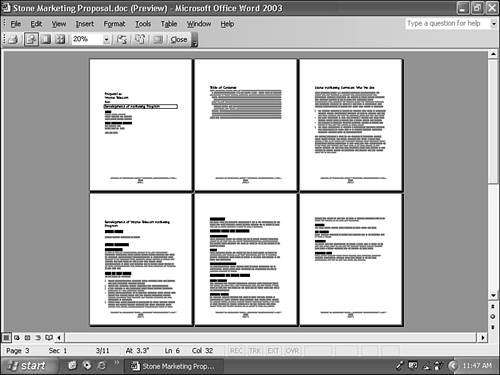
You can view up to 24 thumbnail (miniature) pages at once in Print Preview. To do so, click the Multiple Pages button in the Print Preview toolbar. A box opens, as shown in Figure 6.20. Select the number of pages you want to appear by dragging the mouse across the selection grid. You can display up to three rows of pages in as many as six columns. Figure 6.21 shows six pages displayed at once.
Figure 6.20. Dragging the selection grid to display several pages at once.
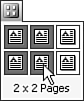
Figure 6.21. Six pages displayed at once.
To switch back to a single-page Print Preview, click the One Page button.
NOTE
Realistically, you won't see much detail if you display 24 pages, especially if they're text pages. However, showing many pages at once can give you a good feel for the high-level organization and appearance of a section of a large document.
Shrinking Your Document Automatically
At one time or another, you've probably created a document that was just slightly too long. You hoped that report would fit on three pages, but a few lines jumped onto the fourth page. Or someone told you to make your argument in a single page, but you couldn't quite make it fit. In the past, you might have cheated by manually shrinking the type size and space between lines. Now Word does the cheating for you.
Rather than shrink your document by trial and error, you can have Word calculate and make the changes necessary to reduce your document's length by one page. Click on the Shrink to Fit button in the Print Preview toolbar.
Be warned, though, that using Shrink to Fit can be a little like setting the water temperature too hot on your washing machine. Use Shrink to Fit only when you need to save a few lines, because if you try to do more it can shrink things way too much. It can shrink text to 4-point without batting an eyelash. (On occasion, Shrink to Fit gives up and tells you it can't remove a page. But that's rare. It's pretty zealous about trying.)
NOTE
You can undo the effects of shrinking if you click the Undo tool; however, after you save the document, you cannot undo Shrink to Fit.
Editing in Print Preview
You can edit your document in Print Preview. Place the magnifying glass on the part of the page you want to edit, and click to zoom to 100% (or whatever other measurement you find most readable). Then click on the Magnifier button in the toolbar. This turns off the magnifier, leaving the current zoom in place. Now you can select text, edit it, move it around, and reformat it as if you were still in Normal or Print Layout view.
Most of the usual Word menu items are available while you're editing in the Print Preview screen, including Find and Replace, and nearly everything on the Format menu.
Changing Margins and Indents in Print Preview
You can use Word's rulers to change margins and indents in Print Preview, just as you can in the normal document window. To change any of the page's margins, click the Ruler button in the Print Preview toolbar to display the ruler; then drag the margin boundary with the mouse. (Your mouse pointer changes to a double-headed arrow when it touches the margin boundary on the ruler.)
Dragging works for both horizontal and vertical margins, but on the horizontal margins you need to be careful not to inadvertently move an indent instead.


