Using Themes to Change the Styles in Your Template
In addition to templates, Word 2003 provides several dozen themes: sets of styles that you can copy into your current document, immediately giving it a different appearance. Themes are helpful for communicating the tone of your document. Although they're designed primarily for Web and intranet pages (or for Word documents viewed electronically), they can also be used for printed documents if you want.
CAUTION
Backgrounds in themed documents don't print. Some themes use white text against a darker background; when these print, the white text will be invisible with the background absent.
Word themes are purely concerned with the visual appearance of your document. In contrast to templates, themes do not include editing customizations, AutoText entries, macros, or other elements that may be included in templates. They do include
Background colors and/or graphics (intended purely for online viewing; these backgrounds do not print)
Formatting for heading styles and body text
Formatting for Web hyperlinks and table borders
Custom bullets and horizontal lines
Although you can switch among Word's themes, you can't change the contents of a theme. There is a workaround, however: You can create a document with a theme, change the styles in that document, and save the revised document as a template.
TIP
If you've installed FrontPage 2003, which comes with certain versions of Office 2003, you can also use the themes provided by FrontPage.
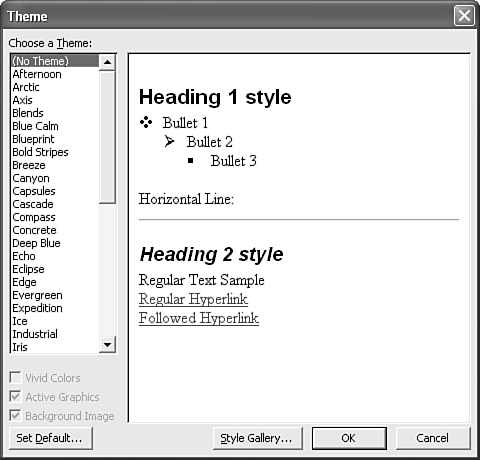
To apply a theme to your document, choose Format, Theme. The Theme dialog box opens (see Figure 11.8).
Figure 11.8. You can choose among several dozen predefined themes in the Theme dialog box.
NOTE
If Theme is grayed out on the Format menu, you need to install the feature by running Microsoft Office 2003 Setup again, in Maintenance Mode, using the Office 2003 or Word 2003 CD-ROM (or the network location where your installation files can be found). The Theme components are found in Office Shared Features, not in the Word section. You also need to choose which sets of themes to install: Typical Themes, Additional Themes, or both.
Click on each set of themes you want to select, and choose Run All from My Computer. After you've selected all the themes you want to install, click Update.
To select a theme, choose it from the Choose a Theme scroll box. You see a preview in the Sample scroll box, showing you how first- and second-level headings, text, hyperlinks, bullets, and horizontal lines will appear in your document if you choose this theme. You can also control three elements of your theme, through check boxes at the lower-left corner of the dialog box:
Vivid Colors tells Word to use brighter colors for text than it would normally.
Active Graphics, which is turned on by default, tells Word to use animated bullets rather than regular graphical bullets. You won't see the difference until you load your page in a Web browser, however: Word does not display animated graphics.
Background Image, also turned on by default, tells Word to include a background. If you do not want to include the background, you can clear this check box.
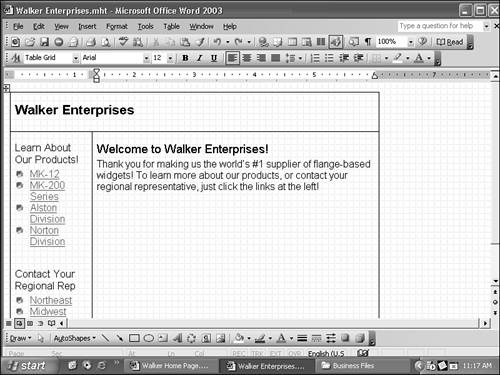
Figure 11.9 shows a document created with Word's Blocks theme.
Figure 11.9. A Web page created with the Blocks theme.
CAUTION
Note that some themes use Microsoft fonts such as Trebuchet that, though widely available, aren't available on all platforms. For example, many Linux users will not have access to these fonts. If you need strict cross-platform font compatibility, stay with basic fonts such as Arial and Times New Roman.
If you need headlines to appear in fonts that aren't available on all platforms, consider creating your headlines as GIF graphics. Word is not the ideal tool for doing this. However, one possible solution is to use WordArt, and save the document containing your WordArt text as a Web Page. Word will create a separate GIF from the WordArt text.
 For more information on using WordArt, see "Using WordArt," p. 468.


