Adding Table Borders and Shading
You can format tables with borders and shading any way you want, calling attention to specific cells or headings.
NOTE
Don't overdo borders and shading. For instance, if you have a table in which all the cells contain approximately the same amount of text, try simply placing one horizontal line under the headings and another at the end of the table. The whitespaces formed by the cell padding can create the illusion of vertical lines separating the columns.
This works best on tables when the cell contents within each column are relatively close to the same widths.
Controlling the Borders of Tables and Individual Cells
By default, Word inserts tables with a .5-point border around each cell. You can adjust or remove these borders, or specify which cells are bordered and which ones are not.
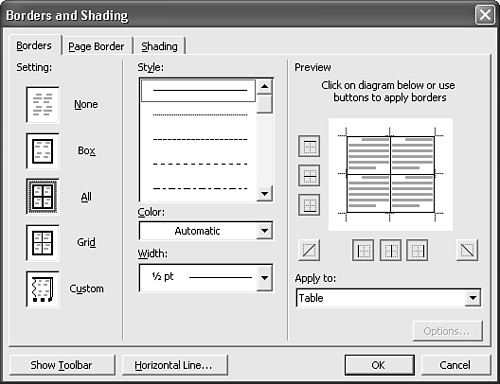
To work with the borders of a table, select the table by clicking the Select Table icon at the upper-left corner of the table, or by clicking inside the table and typing Alt+NumPad5 on your keyboard. You can also select specific cells for which you want to change bordering. Then choose Format, Borders and Shading, and choose the Borders tab (see Figure 12.18).
Figure 12.18. Working in the Borders and Shading dialog box.
TIP
The Borders and Shading dialog box is also accessible by right-clicking on a table and choosing Borders and Shading from the shortcut menu.
Yet another way to reach this dialog box is to choose Table, Table Properties; click the Table tab; and click Borders and Shading.
At the left, Word presents the border approaches it expects you to use most often: None, Box, All, Grid, and Custom.
None clears all borders from the cells you've selected.
Box places a border around the edges of the block of cells you've selected. If you select the entire table, a border appears around the outside edges of the table but not around each individual cell.
All is the default setting. Word places a border at the top, bottom, left, and right of every cell you've selected.
Like All, Grid places a .5-point border around the edge of the table. However, it allows you to specify a different border line around the edges of the table than is used around interior cells. For example, you might specify a 1.5-point border around the edges of the table, and a .5-point border around every cell.
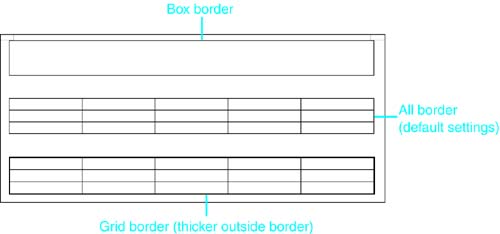
The Grid and All boxes appear only if you choose multiple cells within a table and nothing else. If you choose one cell, or if you choose text inside and outside a table, the Shadow and 3-D boxes appear instead. Samples of Box, All, and Grid borders are shown in Figure 12.19.
Figure 12.19. Samples of each type of table border.
You can also individually control the left, right, top, and bottom borders of your table or any cells within it. To set or clear the border of one side of a table, click the edge you want to change in the Preview box. If you've chosen to set the border, after you select it, you can control its appearance through the other tools in this tab: Style, Color, and Width.
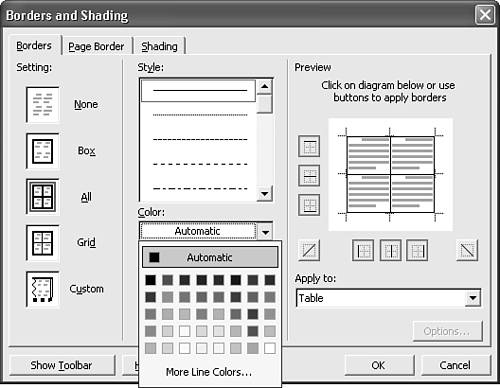
You also can choose a color for your border. Click on the Color drop-down box and select from the options listed there (see Figure 12.20), or click More Line Colors to create a custom palette.
Figure 12.20. Choosing a line color.
Although Word has default settings for its boxes and grids, you can change them. To change the Box border, first select it and then choose a different border from the Style area.
To change the Grid area, first select it. To change the outside borders, choose a different border from the Style area. To change the inside borders of each individual cell, click in the middle of the thumbnail sketch and then choose a new border from the Style area.
NOTE
If you use tables without borders, you may find it difficult to recognize where one cell ends and another begins. Choose Table, Show Gridlines to display light gray lines that show the edges of each cell onscreen but do not print.
Controlling the Shading of Tables and Individual Cells
Often, you'll want to call attention to the contents of a specific cell or portion of a table. One of the most powerful ways to do so is with shading.
To use shading, select the cell or cells you want; then choose Format, Borders and Shading, and choose the Shading tab, as shown in Figure 12.21.
Figure 12.21. Creating shading for a table or specific cells.
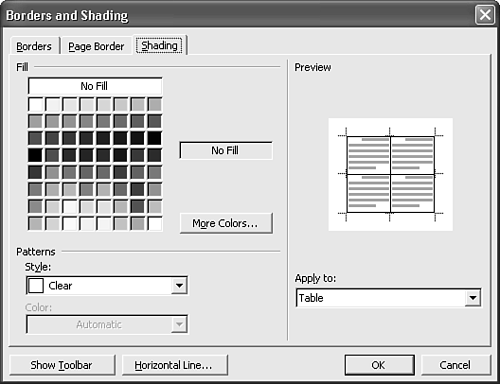
To choose a color, click the color in the Fill area; the name of the color appears to the right, and a sample of the color appears in the Preview area. If you cannot find a satisfactory color, click More Colors to choose a custom color.
 For more information about creating custom colors, see "Controlling Colors," p. 497.
You can also superimpose a pattern over a color. To choose one, click the Style drop-down box. The patterns showing percentages (5%, 10%, and so on) can be used to lighten the color you've selected. Additional patterns (such as Dk Horizontal and Lt Trellis) can be used as design elements.
NOTE
Be careful with shading. Text that is printed over shading is much less readable?especially text printed over patterns such as Dk Horizontal.
For most printers, unless the cell is intentionally left blank (as, for example, some cells on tax forms are), don't use more than 20% shading for text that is to be printed on a laser or inkjet printer. However, the higher the resolution of your printer, the more shading you can use without compromising readability.
If you are working on a Web page and you plan to add shading to individual cells, test the results on the browsers your site's visitors are likely to use. Some old browsers cannot recognize colors applied to only portions of a table.


