Changing Organization Chart Layouts
By default, Word formats its organization charts using a Standard format in which all employees at the same level of the organization appear on the same horizontal level of the chart. This layout works well in many, but not all, circumstances. For example, it can be problematic when you have many employees at the same level: Either your organization chart will become too wide for practical use, or each box will become illegibly narrow.
In these cases, you may want to stack some or all of your organization chart vertically, facing to the left, to the right, or both. Word provides both options. To change the layout of an organization chart, follow these steps:
Click on the box at the top of the branch containing all the boxes you want to change. If you want to change the entire organization chart, click on the box at the top of the organization chart; for example, your company's top executive.
Click the Layout button on the Organization Chart toolbar and choose the setting you want.
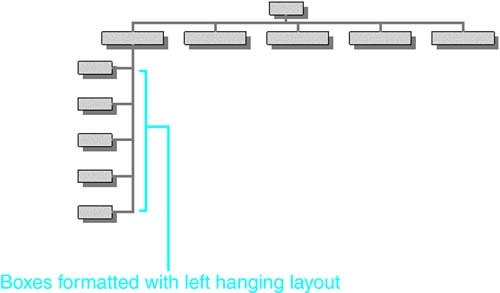
Figure 15.27 shows a portion of an organization chart that has been reformatted with a Left Hanging layout.
Figure 15.27. A portion of an organization chart formatted with a Left Hanging layout.

Word provides three other layout options. Unlike the hanging layouts used in the figure, these do not affect the structure of the chart.
Fit Organization Chart to Contents shrinks the drawing canvas to fit snugly around whatever boxes you have placed in your cell.
Expand Organization Chart slightly increases the size of your organization chart.
Scale Organization Chart places circular sizing handles around the edges of your organization chart's drawing canvas. You can then drag any of these handles to enlarge or shrink the organization chart.
You can also control the way text wraps around an organization chart, just as you can control how text wraps around any other drawing canvas. To do so, click the Text Wrapping button on the Organization Chart toolbar and select the text wrapping option you prefer.

Manually Controlling the Layout of Diagram Elements
By default, when you create a diagram or an organization chart, Word controls most of the layout features for you. You may at times, however, want more control over the layout than Word is providing. For example, you might want to move, resize, or reshape a circle in a Venn diagram, or add spaces between the triangles in a pyramid diagram.
To gain access to this control, click Layout on either the Diagram or the Organization Chart toolbar, and clear the AutoLayout check box.
CAUTION
While clearing AutoLayout gives you more control over the appearance of individual shapes, it prevents you from performing several other key tasks, including inserting additional shapes, or changing the type of diagram (for example, from a pyramid to a cycle diagram).
If you try to perform one of these tasks, Word prompts you to turn AutoLayout back on. Doing so eliminates all the customizations you have made with AutoLayout turned off.
The best way to handle this is to make sure you have included all the shapes you need, and have chosen the correct diagram, before turning AutoLayout off to make any final layout tweaks you may need.
Selecting Elements of an Organization Chart
At times, you may want to select elements of an organization chart to make global formatting changes to them. You've already learned that you can select an individual box by clicking on it. You can also select
An entire branch of an organization chart: everyone who reports to a specific individual
An entire level of an organization chart: everyone at the same level in the organizational hierarchy
All assistants, regardless of their level or location in the organization
NOTE
Word defines assistants as individuals whose primary job responsibility is to support one individual, rather than to operate as a manager in the corporate hierarchy?for example, executive and administrative assistants.
All connecting lines. Having done so, you can then right-click, choose Format AutoShape, and adjust line colors and line weight.
To select one of these elements, click the Select button on the Organization Chart toolbar and choose what you want to select from the drop-down list. After you've selected an element of your organization chart (or other diagram), round gray selection handles appear around all the boxes you've selected, as shown in Figure 15.28.
Figure 15.28. Gray selection handles appear around organization chart elements you've selected.

These selection handles are different from the sizing handles Word's drawing tools provide, and they cannot be used to resize elements of an organization chart or a diagram.

TIP
Using Format AutoShape, you can also change solid lines into dotted lines, indicating that one individual has certain reporting responsibilities to another but is not a direct report. Of course, it's more likely that you'll want to do this with only one or a few connecting lines, rather than the entire organization.
Changing the Overall Format of an Organization Chart
Word's default style for organization charts displays every box in turquoise with a 3/4-point solid black border. Although you can change the formatting of individual boxes by choosing Format AutoShape from the Organization Chart shortcut menu, Word also provides 15 predefined AutoFormats that can give your organization chart an entirely new look with just a few clicks. To choose one, follow these steps:
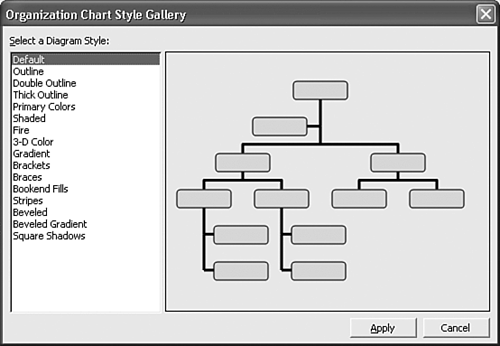
Click the AutoFormat icon on the Organization Chart toolbar. The Organization Chart Style Gallery opens (see Figure 15.29).
Figure 15.29. Choose a new AutoFormat from the Organization Chart Style Gallery.

In the Select a Diagram Style box, choose a style. If you're unsure which style fits your needs or if you want to experiment, use the preview window on the right side of the dialog box to see a sample representation of the selected style.
After you've selected the style you want, click Apply.
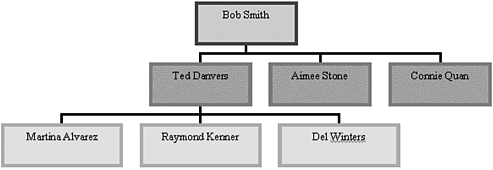
Figure 15.30 shows an organization chart created with Word's Vibrant format.
Figure 15.30. An organization chart in Vibrant format.


