Using Bookmarks
When you're working in a long or complex document, you often want a quick way to move back to a specific location?without having to remember page numbers, headings, or exact search text. That's where Word's bookmarks feature comes in handy.
Bookmarks don't just allow you to track blocks of text, but they allow Word itself to track blocks of text. By using the bookmarks you create, Word can
Compile index entries that span multiple pages (see the section "Setting Page Numbers for Multiple-Page Index Entries" in Chapter 21).
Build formulas that include references to numbers elsewhere in a document (see Chapter 12, "Structuring and Organizing Information with Tables").
Create custom properties that reflect the changing contents of a document (see Chapter 34, "Managing Word More Effectively").
Manage internal cross-references (discussed later in this chapter).
Ask users for input and then display that input throughout the document (discussed later in this chapter).
Build hyperlinks that connect to specific locations in external documents or the current document (see Chapter 24, "Using Word to Develop Web Content").
Mark locations for later retrieval by a field or macro.
 For more information about working with field codes, see Chapter 23, "Automating Your Documents with Field Codes," p. 771.
Inserting Bookmarks
Word's bookmark feature allows you to flag any location or text in your document so that you can find the text later?or so that Word itself can find the text. This can be especially valuable if you're automating your document with cross-references, which are covered later in this chapter.
Follow these steps to insert a bookmark:
Select the text you want to associate with a bookmark, or click in your document at the location where you want to create a bookmark.
Choose Insert, Bookmark. The Bookmark dialog box opens (see Figure 22.12).
Figure 22.12. You can name and manage bookmarks from the Bookmark dialog box.
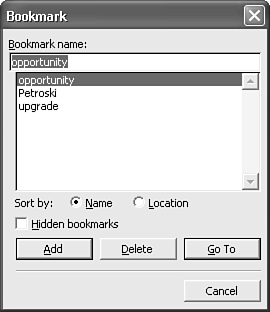
Enter a bookmark name. Bookmark names cannot exceed 40 characters, must begin with a letter, and can't include spaces or most punctuation?though they can include underscore characters (_).
Click Add.
Viewing Bookmarks in Your Document
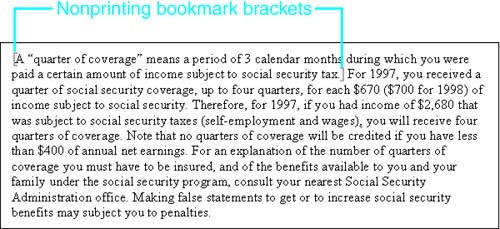
You may, at some point, want to view the borders of the bookmarks in your document. (For example, you may be editing text that you suspect is near the boundary of a bookmark. You also may want to know whether the text you add or delete is part of the bookmark.) To view the bookmarks in your document, choose Tools, Options, View; check the Bookmarks check box; and click OK. Text you bookmarked is now displayed within gray or black nonprinting brackets, depending on your computer and video card (see Figure 22.13).
Figure 22.13. Gray brackets mark the boundaries of bookmarks within your document.
NOTE
If you edit text that appears entirely within bookmark brackets, the bookmark will encompass all the text as you've edited it. However, if you cut text from within a bookmark and paste that text outside the bookmark, that text will no longer be encompassed by the bookmark.
Finding Bookmarks
One of the key reasons to create a bookmark is to make it easy for you to find the bookmarked location or text later. There are two ways to find a bookmark after you've created it:
You can choose Insert, Bookmark; select a bookmark; and click Go To.
You can press F5 (or double-click on the page number in the status bar) to display the Go To dialog box. Then, choose Bookmark in the Go To What scroll box, select a bookmark name from the Enter Bookmark Name text box, and click Go To.
In both cases, when you go to a bookmark, Word selects all the text contained in the bookmark.
Moving from One Bookmark to the Next
To browse your bookmarks, choose Insert, Bookmark to display the Bookmark dialog box; then sort your bookmarks by Location. One at a time, click each bookmark in the list and click Go To. The Bookmark dialog box remains open as you work (although you may want to drag it out of your way).
TIP
You can also browse for bookmarks using the Select Browse Object button under the vertical scrollbar. Click and hold the button; then choose Browse by Footnote or Browse by Endnote from the icons that appear. After you've done so, you can continue browsing to the next or preceding notes by clicking the double-arrows above or below the Select Browse Object button. |
Deleting Bookmarks
Perhaps you created a bookmark temporarily, to track specific text while you were focusing on one element of your document. Now you want to delete the bookmark so that it no longer clutters up your bookmark list. To delete a bookmark, choose Insert, Bookmark; select the bookmark; click Delete; and click Close.
NOTE
If you delete all the text associated with a bookmark, the bookmark is deleted automatically.
NOTE
When you use certain Word features, Word adds its own hidden bookmarks; for example, if you cross-reference a heading, Word places a hidden bookmark where the heading appears in your document.
You'll rarely need to see hidden bookmarks, but if you need to, you can. Add them to your list of bookmarks by checking the Hidden Bookmarks check box in the Bookmark dialog box.


