Using Permissions to Restrict Who May Use Your Documents
Traditionally, you protected a document by restricting access to its location or contents via a password. However, after a document was opened with the correct password, you had no other way to restrict its usage or dissemination. The new Information Rights Management (IRM) feature built into Microsoft Office Professional Edition 2003 and standalone versions of Word 2003 changes that. |
Using IRM, you can now associate specific permissions and restrictions with any document, giving users only the permissions they need to get their jobs done. For example, you can prevent people from
Printing a document
Copying content from a document
Accessing the content of a document programmatically, with Visual Basic for Applications
Accessing a document after a specific expiration date
You can establish different sets of permissions for each user. For example, you might allow one user to change a document but not print it; you might allow another user to use a specialized application to access selected document content, but not allow him to edit the document.
After you set permissions for a document, recipients will have only the permissions you give them, and individuals who have received no permissions will not be allowed to read, change, copy, or print your document.
You need significant Microsoft infrastructure to make full use of IRM. To authenticate users' identities, Microsoft requires you to be running either Windows Server 2003 (with appropriate Client Access Licenses) or Microsoft's Internet-based authentication service, which utilizes Microsoft Passport authentication.
Because older versions of Word and Office do not support IRM, they cannot be used to read and edit files with permissions. However, Microsoft is making available add-on software that will allow users with appropriate permissions to view IRM-protected files with Internet Explorer.
Setting Read or Change Permissions
To set permissions for a document, click the Permissions button on the Standard toolbar. The Permission dialog box opens. Check the Restrict Permission to This Document check box (see Figure 33.5). |
Figure 33.5. The Permission dialog box displays access control options after you check the Restrict Permission to This Document check box.
To restrict one or more users to reading a document but not changing, printing, or copying its content, enter their email addresses in the Read box. You may also click Read and select their names from the Select Names dialog box, which displays the names in your default Address Book, as shown in Figure 33.6. (If you are running Outlook, the default Address Book is probably your Outlook contact list.)
Figure 33.6. Selecting names from your address book.
CAUTION
Note that users who have permission to read a document but do not have permission to copy or print from it can still capture screens containing document text. Having done so, they can save those screens in a graphics program such as Microsoft Paint or Microsoft Document Imaging, and print from there.
Similarly, to permit users to read, edit, or save changes to the document?but prevent them from printing content?enter their names in the Change box. You may also click Change and select their names from the Select Names dialog box (refer to Figure 33.6).
Providing Additional Permissions and Restrictions
In addition to the permissions you have already set, you can set additional permissions and Restrictions by clicking More Options. The Permission dialog box appears (see Figure 33.7). |
Figure 33.7. You can provide additional permissions through the Permission dialog box.
Setting a Document Expiration Date
You can set an expiration date for your document. After this date, your document will become inaccessible to everyone but you, even people you have given permissions to. |
To set an expiration date, display the Permission dialog box shown in Figure 33.7. Check This Document Expires On. Then, enter a new date in the text box, or click the down arrow to choose a date from the built-in calendar. Then click OK.
Giving Users Additional Rights to Print Content
By default, if you give users Read rights, they cannot print your document. In certain cases, you may want to give them the right to print. |
To do so, display the Permission dialog box shown in Figure 33.7. Check Print content; then click OK.
Giving Users Additional Rights to Copy Content
By default, if you give users Read rights, they cannot Copy your document's content into the Clipboard for use in other Windows programs. In certain cases, you may want to give them the right to do so. Display the Permission dialog box shown in Figure 33.7. Check Allow Users with Read Access to Copy Content; then click OK. |
Giving Users Additional Rights to Access Content via Macros or Custom Programs
By default, if you give users Read rights, they cannot use custom VBA macros or programs that rely on information in your document. In certain cases, you may want to allow them to run such programs. Display the Permission dialog box shown in Figure 33.7. Check Access Content Programmatically; then click OK. |
Giving Users a Way to Request Additional Permissions
Occasionally, one of your colleagues may legitimately need permissions you have not provided. You can give them a way to request those permissions. Check the Users Can Request Additional Permissions From check box, and enter mailto: followed by the email address where they can reach you. |
By default, this check box is enabled, and the email address you are currently using for authentication purposes is entered in the text box under it. If you do not want to provide contact information for requesting permissions, clear the check box.
Allowing Read Access to Users Without Word 2003 or Office 2003
As mentioned earlier, Office 2003 Professional and the standalone Word 2003 are the first versions of Office and Word to support IRM. Therefore, users of older versions of Office or Word cannot use them to read IRM-protected documents. If a user attempts to open such a document, he or she will see the message shown in Figure 33.8. |
Figure 33.8. The message that appears when a user attempts to open a document with permissions in an older version of Word.
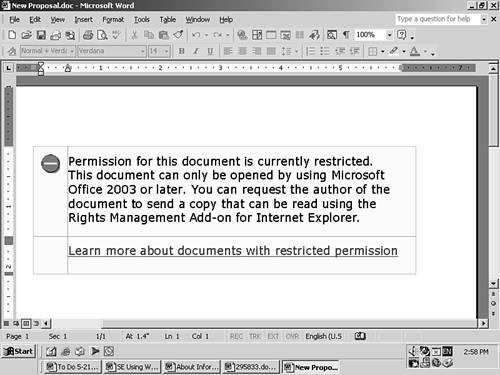
Microsoft does provide an add-in that allows these users to read (but not edit) IRM-protected documents through the Internet Explorer Web browser. If you want to permit this, check the Allow Users with Earlier Versions of Office to Read with Browsers Supporting Information Rights Management check box.
Setting Defaults for Documents with Permissions
After you've established a complicated set of permissions, you may want them to serve as the defaults for all Word documents, Excel workbooks, and PowerPoint presentations for which you assign permissions. To do so, establish all your permissions settings through both Permission dialog boxes (Figure 33.5 and Figure 33.7). Then, click the Set Defaults button, and click OK. |
After you do so, when you click the Permission button on the Standard toolbar, your new settings will appear in the Permission dialog box. You can then adjust them as necessary.
Working with a Document Containing Permissions
When you open a document containing permissions, the permissions appear in the Shared Workspace task pane (see Figure 33.9). If you own the document, you can change permissions by clicking Change Permission and working in the Permission dialog box (refer to Figure 33.5). |
Figure 33.9. You can view your existing Permissions in the Shared Workspace task pane.
If you have been sent material that requires you to authenticate using an account different from the one you are currently working with, click Change User. The Select User dialog box appears (see Figure 33.10). Select a different user account.
Figure 33.10. Changing the user account you use to access a document that has been protected by permissions.
If only one account is available, click Add to select or establish another account. Then return to this dialog box, and select the appropriate account. When you're finished, click OK.
Using Digital Signatures
A digital signature is a unique piece of encrypted code associated with a specific individual. Individuals can attach this code to their documents, thereby verifying that they have in fact created the documents and that the documents have not been tampered with.
Digital signatures are issued by commercial certification authorities, notably Verisign, Inc., and Thawte; some companies also maintain their own in-house digital certificate providers. Digital signatures are now legally binding in the United States in the same ways traditional handwritten signatures have been; in 1999, the European Union also agreed to phase in legal support for digital signatures. Word 2003 allows you to digitally sign any document.
NOTE
If you want to experiment with digital certificates and signatures at no cost, you can create your own using Microsoft's free Selfcert.exe tool. Of course, nobody vouches for digital certificates you create yourself, and you cannot count on trusting digital certificates others create with Selfcert.exe.
This tool is typically found in C:\Program Files\Microsoft Office\Office 11. If it is not present, you can install it by running a maintenance setup. (It appears under Office Shared Features, as Digital Signature for VBA Projects.)
After you have purchased or created your own digital certificate and installed it, you can add a digital signature to a document like this:
Choose Tools, Options, Security.
Click Digital Signature. The Digital Signature dialog box opens (see Figure 33.11).
Figure 33.11. The Digital Signature dialog box.
Click Add to display the digital certificates installed on your computer (see Figure 33.12).
Figure 33.12. The Select Certificate dialog box.
Select the digital certificate you want to use.
If you want to view information about a certificate, click View Certificate (see Figure 33.13). Note that the certificate shown here is self-signed and therefore not truly secure.
Figure 33.13. Viewing a digital certificate.
Click OK in the Certificate dialog box when you are finished viewing your certificate.
Click OK in the Digital Signature dialog box to select the certificate.
Click OK in the Security tab to apply your digital signature to the open document.
After you have signed a document, Word's title bar will include the word "(Signed)" whenever that document is open.
Understanding Security Issues Associated with Fast Saves and Other Save Features
Word 2003 provides several features designed to allow users to control how and where they save files. These features are controlled through the Save tab of the Options dialog box (see Figure 33.14).
Figure 33.14. The Save tab of the Options dialog box includes Save features that have security implications.
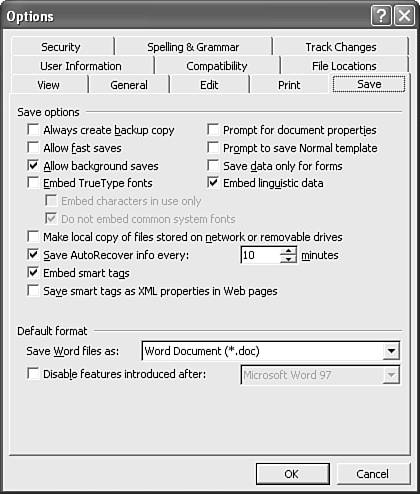
Some of these features have security implications you should know about:
Always Create Backup Copy stores a copy of the previous version of your document in the same folder as the original, using the file extension .wbk.
Allow Fast Saves allows Word to save files more quickly, by storing all changes to a document at the end of a document. This means that text you have deleted from a document may still remain in the .doc file when that file is viewed from another program, such as a text editor.
Make Local Copy of Files Stored on Network or Removable Drives allows users to automatically keep local copies of any files they create and store on the network.
Save AutoRecover Info Every sets the elapsed time, in minutes, at which Word automatically saves unsaved information that might otherwise be lost in the event of a computer crash.
If you are concerned about security, you may want to establish organization-wide policies concerning the use of these features.
CAUTION
Be aware that regardless of how you use these Save options, older versions of your documents are likely to exist on your backup media. These should be carefully secured; many organizations also destroy old backup media after a certain period.
Limiting the Changes Users Can Make to a Document
You may want to allow a document to be edited but limit the types of changes that can be made?thereby making it easier to review or use the document later. With Word's Protect Document feature, you can limit users to any one of the following:
Tracked changes? Users can only make revisions that are tracked by Word's Track Changes feature.
Comments? Users can only add comments to a document, using Word's Comments tool.
Filling In Forms? Users can only fill in the blanks in electronic forms but cannot change any other aspects of the form.
To protect a document for any of these elements, follow these steps:
Choose Tools, Protect Document (see Figure 33.15).
Figure 33.15. In the Protect Document task pane, you can protect a document for tracked changes, comments, or forms, and add a password, if you choose.
If you want to protect only part of the document, select the portion of the document you want to protect.
Check the Allow Only This Type of Editing in the Document check box. New options appear (refer to Figure 33.15).
Click the Allow Only This Type of Editing in the Document drop-down box, and choose Tracked Changes, Comments, or Filling In Forms.
If you want to identify specific users who will be exempt from your editing restrictions, click More Users; then enter the users' names by email address or Microsoft Windows user account:
If you intend to use Word 2003's strongest available protection (Prevent Intentional or Malicious Changes), use email addresses.
If you intend to use weaker password protection (Prevent Accidental Changes), use Microsoft Windows user accounts.
Click OK.
To give another individual (or individuals) editing rights to a different block of text, select the text, and repeat steps 2?4.
In the Protect Document task pane, click Yes, Start Enforcing Protection. (You may have to scroll down in the task pane to see this option.)
The Start Enforcing Protection dialog box opens. Choose the form of document protection you want: Password or User Authentication:
If you specify Password protection, the document is not encrypted, which means that it may be at least partly readable by a text editor. It also means that users with the correct password can remove the password protection entirely.
If you specify User Authentication, Word encrypts the document and relies on your Windows Server's authentication services to ensure that the reader is who he or she claims to be. The document is encrypted, though authenticated users may remove the encryption.
Click OK. The protection is applied.
If you protect a document, any user can make the limited edits you've allowed without having the password. If you've specified a password, the user needs the password to make any other edits.
To remove protection from a document for additional editing, choose Tools, Unprotect Document, enter the password, and click OK. If no password was specified, choosing Tools, Unprotect Document automatically unprotects the document.


