Section 4.1. Installing Radio UserLand
Installing Radio is your first step toward using it as your blogging environment. Radio can be easily downloaded and installed in about 10 minutes, using a cable modem. Your time may vary if you have a dialup connection or a slow Internet link. Directions for installing, on both Windows and Macintosh, platforms are covered in the following sections.
4.1.1 Downloading
Radio, like many Internet applications, is not sold in stores. It is available for download directly from UserLand Software. You can download it via the download link at http://radio.userland.com.
Choose the right version for your computer and click the download link to begin. For convenience, you probably want to save it to your desktop. Once you download Radio, you can use it for 30 days under the evaluation license. After 30 days, your copy of Radio will stop working, and you can then either uninstall it or purchase it for full use. At the time of this writing, the cost for a copy of Radio is $39.95 per year. This covers the Radio software and hosting your blog at http://radio.weblogs.com/YourUserNum/. The YourUserNum is a unique user number that is issued to every Radio download and distinguishes your blog from that of another user. For example, a UserNum of 0103087 gives the blog a location of:
- http://radio.weblogs.com/0103807/
If you download Radio and start using it but decide not to purchase it, UserLand maintains the data on your blog for 30 days following the 30 day evaluation period to give you the opportunity to change your mind. After this it is deleted.
4.1.2 Installation
These download instructions are for Radio 8.07. There might be a slightly more advanced version available by the time that you read this. The same basic steps, however, should apply.
4.1.2.1 Windows
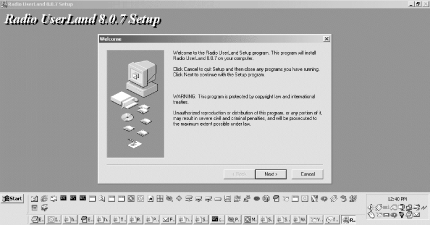
From your desktop, double click the Radio installer (it should be named something like RadioUserLand807Setup.exe). Your screen should look like Figure 4-1.
Figure 4-1. Radio UserLand setup screen

Click the Next button to advance to the Install program to view the license agreement. If you agree with the license agreement, click the Next button.
Choose where you want to Install Radio. Using the default C:\Program Files\Radio UserLand\ is generally best. Click the Next button two more times to start actually copying the Radio files to your computer.
When the files are done copying, click the Close button to end the installer. Radio will start for you.
4.1.2.2 Macintosh
Radio for the Macintosh comes as a self extracting Stuffit file. Double click the Stuffit file and follow the prompts to install Radio.
If you need to uninstall Radio, first backup your data (very specific instructions are later in Chapter 7) and then drag the Radio UserLand folder to the Trash.
To install under Mac OS X, extract the downloaded archive. Double-click the extracted disk image to mount it on your desktop then copy the Radio UserLand folder into the Applications folder. Make sure your web browser is running, and then double-click the Radio UserLand application icon. The browser will open the Radio UserLand Setup page.
To install under Mac OS 9, unstuff the archive if it hasn't been unstuffed automatically. Launch Radio UserLand 8.0.7 Installer and follow the straightforward instructions. At the end of the installation process, the installer will offer to launch the program for you. Accept this offer. Your web browser will open the Radio UserLand Setup page.
4.1.3 Registering
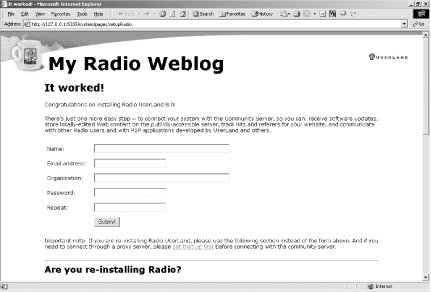
When Radio starts up, it displays the form shown in Figure 4-2.
Figure 4-2. Successful installation of Radio UserLand

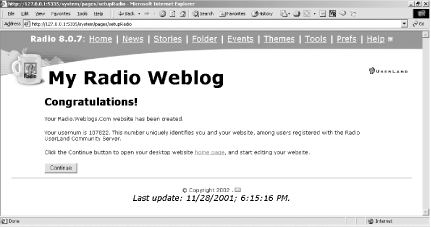
Before you can begin using Radio, you need to fill out this web form to finish configuring Radio. This creates an account on the UserLand server for you. Obviously, you want to make note of your password (and remember which email address you specified if you have more than one). Once you click the Submit button, you should see the page shown in Figure 4-3.
Figure 4-3. Successful creation of a UserLand account

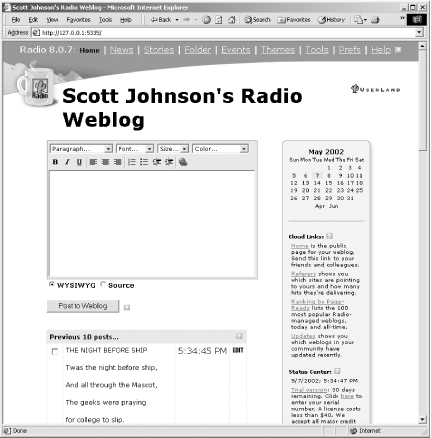
Click the Continue button to begin using Radio and you should see the page shown in Figure 4-4.
Figure 4-4. Installed and ready to blog

Congratulations! You have now installed Radio and are ready to begin blogging.


