Section 4.3. A Visual Tour of Using Radio
In this section, we walk through Radio, illustrating all the common steps that a new user takes. This starts with making your first post, checking that it gets to the Internet correctly, changing your preferences, switching your theme, and using the News feature to post to your blog. View this section as an introduction only ? these features are covered in more detail later in this chapter and in Chapter 7.
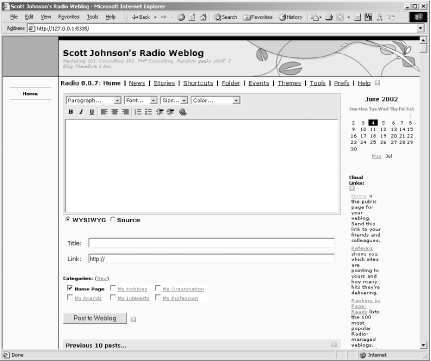
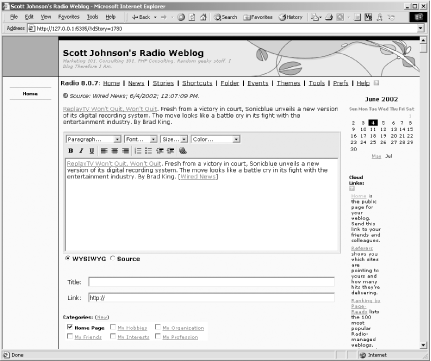
To make your first post, type anything you want into the editing box you see on the Desktop Website home page (shown in Figure 4-7).
Figure 4-7. Desktop Website home page
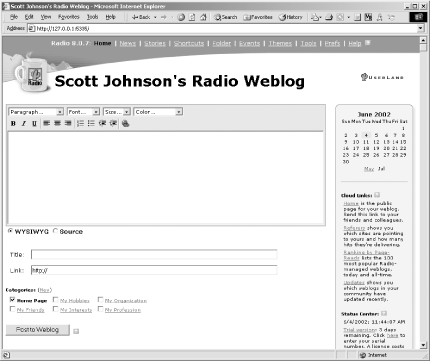
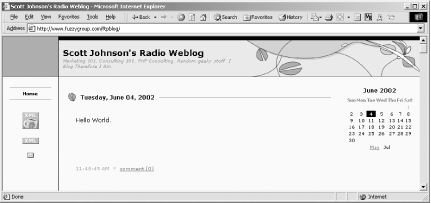
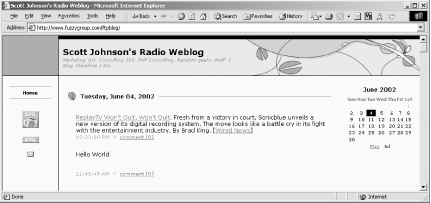
"Hello World" is a fine first blog entry. Once you're done, click the Post to Weblog button to your blog entry only. Radio immediately posts your entry to the Internet. You can view it by clicking the Home link shown in the Cloud section of the gray sidebar. While your URL and title will be different, you should see something pretty much like Figure 4-8.
Figure 4-8. Blog with a successfully posted entry

Now that you know how to make a basic post, the next step is to customize the title and description for your blog. These are preference settings, or Prefs. Click the Prefs link at the top righthand side of your Radio window (first return to the Desktop Website with the Back button in your browser). Figure 4-9 shows the Prefs page.
Figure 4-9. The Prefs page
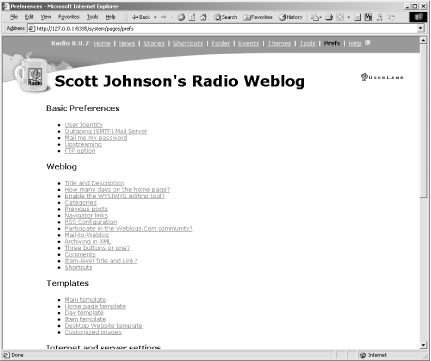
The Prefs page shows the different preferences you can set. Click on Title and Description in the second grouping. Figure 4-10 shows the Title and Description preferences.
Figure 4-10. Title and Description preferences
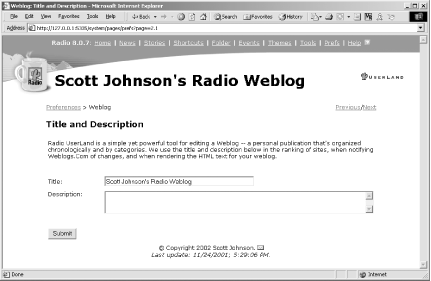
Change the Title and Description as you need to and then click the Submit button. Radio will make these changes and then return you to the Prefs page so you can make additional changes if needed.
The next change you probably want to make will be to upgrade the look and feel of your blog ? its theme. Click on the Themes link at the top of the screen. The Themes page looks like Figure 4-11.
Figure 4-11. The Themes page
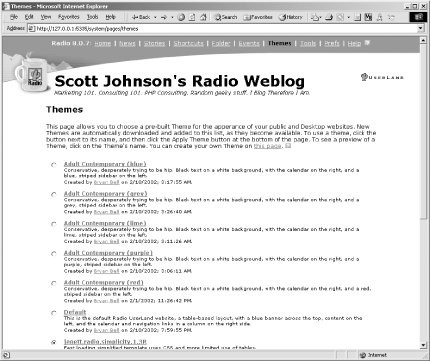
Select a theme that sounds appealing to you and click its radio button. Scroll down the page and select the Submit button. The resulting page is shown in Figure 4-12.
Figure 4-12. Theme change confirmation page
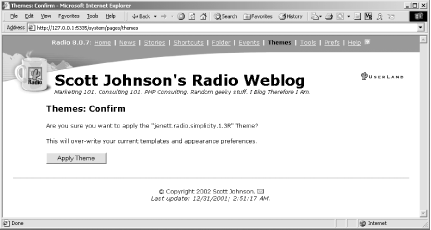
Before you change your template, Radio warns you that you could lose any customizations that you might have made. Click Apply Theme to continue.
Radio applies the theme and returns you to the main Themes page in case you want to try another theme. Click the Home link to return to the main Radio page to see the theme in action. You may need to click Refresh or Reload in your browser to see the new theme as in Figure 4-13.
Figure 4-13. A new theme, Woodlands
As you can see, the new theme, Woodlands, is now used for your blog. Click Home in Cloud links to see it applied to your blog, as in Figure 4-14.
Figure 4-14. Woodslands-themed blog
The final step in your tour is to use Radio's news feature, the News Aggregator, to post content to your blog from another source. Return to the Desktop Website and click the News link. The News Aggregator page is shown in Figure 4-15.
Figure 4-15. News Aggregator
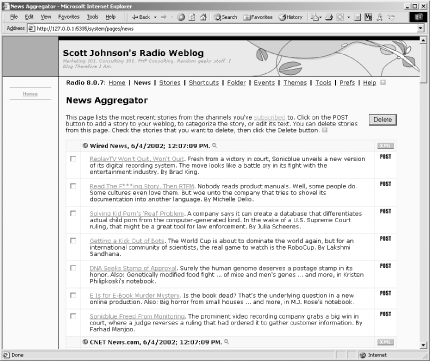
What you see above is a set of news items from different feeds to which you subscribe. Click the Post button next to any news item, and Radio will add it to your editing window so you can post it to your blog, as in Figure 4-16.
Figure 4-16. Item from News Aggregator in post editing window
Click the Post button and Radio will publish this entry out to the Internet complete with all links and any changes you made. See Figure 4-17 for an example.
Figure 4-17. Blog post from News Aggregator
4.3.1 Writing Original Content
From the home page of the Desktop Website, type or paste your blog content into the editing window (the text box). Then hit the Post to Weblog button. Your post is stored in Radio's database, and the web pages are rebuilt and uploaded to the server where you can view them.
This is where most Radio users make their first wrong turn. Radio is a browser-based application. This means that the browser does not save your information unless you hit Post to Weblog. If you have text typed in the Editing window and you move away from it by using the Back button or any other link, that text just goes away. Given that everything that controls Radio is a hyperlink, its surprisingly easy to lose content.
4.3.2 Reading Your Weblog
If you use the provided hosting at http://radio.weblogs.com, the URL for your blog is http://radio.weblogs.com/usernum/where usernum is your user number padded with leading zeros to make it seven digits long. For example:
- http://radio.weblogs.com/0107822/


