Section 5.7. Uploading an Image
Movable Type makes it simple to upload images to your web server and can even automatically create thumbnails of the images that you upload. For example, if you have a digital camera or a scanner, you might want to place pictures that you have taken onto your web site.
In the left-hand navigation, click Upload File. In the pop up window (Figure 5-27), click the Browse... button to select an image you would like to upload from your hard drive. Then click Upload to upload the file.
Figure 5-27. Uploading a file

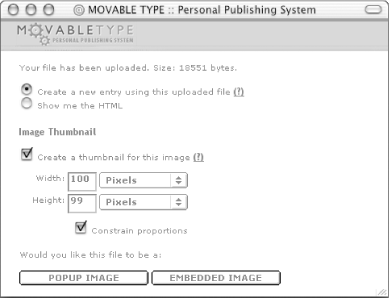
Movable Type tells you the size of the uploaded image and gives you the option to create a new entry, with either a link to the image or an embedded version of the image (Figure 5-28). In addition, the system gives you the option to create a thumbnail. To do so, click the Create a Thumbnail checkbox, and adjust the size of the thumbnail using the form. For example, to create a thumbnail that is half as wide and half as tall as the original image, select Percent from the Width pull-down menu, then enter "50" into the input box.
Figure 5-28. Image thumbnail screen
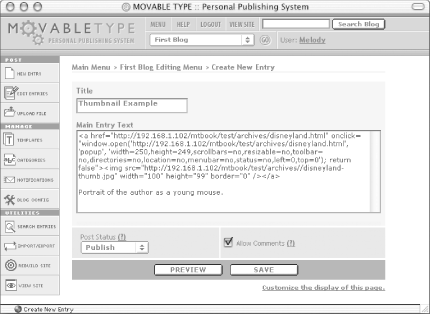
Click Pop-up Image to create a link to the full-sized image in a pop-up window. The system displays the new entry screen (Figure 5-29), and the HTML needed to include your thumbnail is automatically included in the entry body.
Figure 5-29. New entry linking to thumbnail
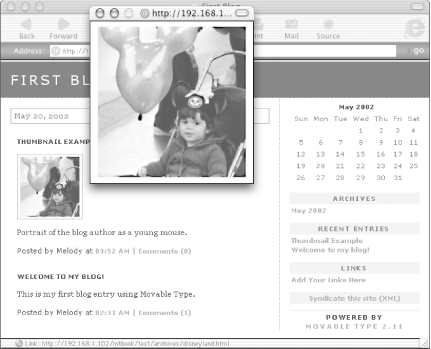
You can type in some text below the HTML that the system has inserted, and save the entry by pressing Save. The thumbnail appears on your public site (Figure 5-30), and visitors can view the full-size image in a pop-up window by clicking on the thumbnail.
Figure 5-30. Entry, image, and thumbnail