Lock-and-Key Example
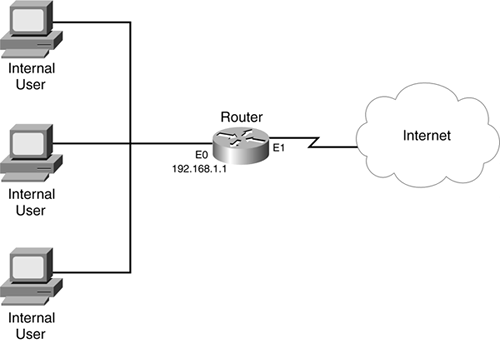
Now that you have a basic understanding of the commands to configure lock-and-key, take a look at an example that uses this feature to restrict access through the router. This example uses the network shown in Figure 13-2. In this example, users will be authenticated before they are allowed access to the Internet from the internal network.
Figure 13-2. Lock-and-Key External Access Example
Example 13-6 shows the configuration for the router.
Example 13-6. Simple Lock-and-Key Authentication Configuration
Router(config)# ip access-list extended allowed-out

Router(confix-ext-nacl)# permit tcp 192.168.1.0 0.0.0.255

                        host 192.168.1.1 eq 22                    (1)

Router(config-ext-nacl)# dynamic dynamic-out permit ip any any    (2)

Router(config-ext-nacl)# deny ip any any

Router(config)# interface etherent0

Router(config-if)# ip address 192.168.1.1 255.255.255.0

Router(config-if)# ip access-group allowed-out in                 (3)

Router(config)# username admin1 secret secretadmin1

Router(config)# username user1 secret secret1

Router(config)# line vty 0 4

Router(config-line)# login local                                   (4)

Router(config-line)# transport input ssh

Router(config-line)# autocommand access-enable host timeout 10    (5)

Router(config-line)# exit

Router(config)# line vty 5                                         (6)

Router(config-line)# login local

Router(config-line)# rotary 1

Router(config-line)# transport input ssh

Router(config-line)# exit

Router(config)# ip ssh port 2000 rotary 1
The configuration in Example 13-6 focuses only on the lock-and-key configuration. The following is an explanation of this configuration. The numbers on the right side of Example 13-6 correspond to the following numbers:
This statement grants SSH access to the internal interface of the router, which is necessary to authenticate the internal users.
This statement is the dynamic ACL entry that is the placeholder for the temporary ACL entries after a user is authenticated. Notice that, with the exception of the SSH connection, no traffic is allowed until a user is authenticated.
Notice the placement of the ACL?it is on the internal interface applied inbound, which restricts traffic leaving the network.
This statement specifies that username commands are used for the authentication. The statement below this restricts VTY access to SSH.
This statement enables lock-and-key for SSH authentication, setting the idle timer to 10 minutes.
This part of the configuration sets up a backdoor so that the administrator can access the router remotely from the internal network. I sometimes use this method instead of specifying lock-and-key in the username commands. This makes it more difficult for a hacker to figure out that remote management is allowed (albeit, this is a nonstandard port number).
Note that this example requires a lot more configuration than what is shown, such as an external ACL, address translation, CBAC or reflexive ACLs, and so on. Also note that, unfortunately, because only one user can authenticate, this configuration only allows the first authenticated user access to the Internet; if you remove the host keyword in Reference 5, when one user authenticates, the dynamic ACL entry is activated and all users can access the Internet.


