Networking on the PocketPC
To demonstrate networking on the PocketPC, we will write an application with a very simple user interface. It consists of a button to send the request to retrieve the HTML page, and a text area in which to display the page. The constructor sets it up:
private TextArea textArea = null;
private DataInputStream dis = null;

  public HttpNetworking(String title) {
    super(title);
    // handle frame closing events
    addWindowListener(new WindowAdapter() {
      public void windowClosing(WindowEvent e) {
        System.exit(0);
      }
    } );
    setLayout(new FlowLayout(FlowLayout.LEFT, 10, 10));
    Button button = new Button("Open");
    add(button);
    button.addActionListener(this);
    textArea = new TextArea(12,28);
    add(textArea);
  }
Pressing the Open button triggers an ActionEvent, sent to the application with an invocation of the actionPerformed method.
public void actionPerformed(ActionEvent evt) {
  String cmd = evt.getActionCommand();
  if (cmd.startsWith("Open")) {
    try {
      URL url = new URL("http://users.bigpond.com/ripple/JavaOnPDAs/HttpNetworking.html");
      HttpURLConnection c =
        (HttpURLConnection)url.openConnection();
      dis = new DataInputStream(c.getInputStream());
      byte[] buffer = new byte[c.getContentLength()];
      dis.readFully(buffer);
      String result = new String(buffer);
      textArea.setText(result);
    }
    catch (Exception e) {
      textArea.setText(e.getMessage());
    }
    finally {
      try {
        if (dis != null) dis.close();
      } catch (IOException e) {}
    }
  }
}
Note the use of URL and HttpURLConnection, which are available on PersonalJava but are replaced by the GCF in J2ME MIDP on the Palm.
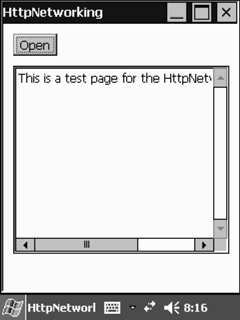
Running the application and pressing the Open button shows a screen like the one in Figure 7.8.
Figure 7.8. HttpNetworking

Using a Mobile Phone Infrared Connection on the PocketPC
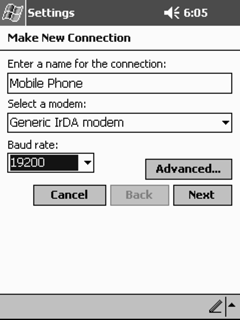
To use an infrared connection between the PocketPC and a mobile phone, we first need to set up the Generic IrDA modem on the PocketPC. In Settings | Connections, set up a new connection and call it "Mobile Phone" (Figure 7.9).
Figure 7.9. Setting up the IrDA connection
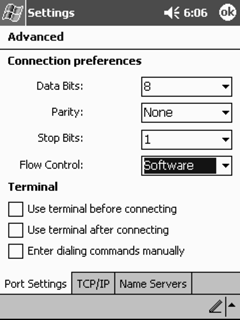
Select the Generic IrDA modem and the baud rate. Click on Advanced and make sure that Software flow control is selected (Figure 7.10).
Figure 7.10. Setting software flow control
Click OK.
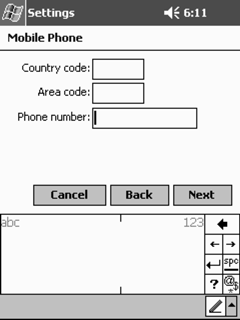
Now enter the phone number of your ISP (Figure 7.11).
Figure 7.11. Entering the ISP phone number
Deselect "Wait for dial tone" (Figure 7.12).
Figure 7.12. Disabling wait for dial tone

Enable the IrDA connection on the mobile phone. On the Nokia 8210, this is done by selecting Menu | Infrared.
On the PocketPC, make the connection, making sure that the IrDA ports on the two devices are reasonably aligned. The PocketPC should dial the ISP on the mobile phone (Figure 7.13).
Figure 7.13. Connecting to the ISP through the IrDA port

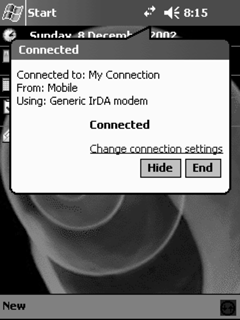
When the PocketPC is connected to the ISP, it will display the screen as shown in Figure 7.14.
Figure 7.14. A successful connection to the ISP
Once a connection to the Internet is made, we can start the HttpNetworking application as before, and press the Open button to retrieve the test HTML page (Figure 7.15).
Figure 7.15. Running HttpNetworking with a network connection via the IrDA port and a mobile phone
Using a Bluetooth Connection on the PocketPC
In a Bluetooth-enabled PocketPC such as the iPaq 3870, it is possible to connect to the Internet through a Bluetooth-enabled PC or network access point. Note that for many Bluetooth adaptors for PCs running Windows, Internet Connection Sharing (ICS) must be enabled for the Bluetooth network to access work.
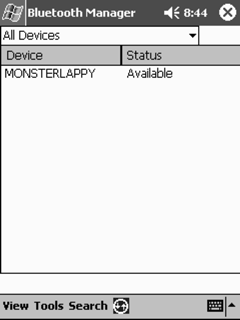
To connect to the network, turn on the Bluetooth radio and start Bluetooth Manager (Figure 7.16).
Figure 7.16. The Bluetooth Manager screen
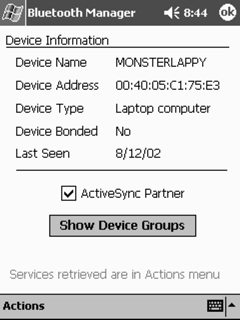
Click on the remote Bluetooth device to show its device information (Figure 7.17).
Figure 7.17. Device information for a remote device
Click on Actions, and the menu as shown in Figure 7.18 will be displayed.
Figure 7.18. The selection of actions available for the remote device
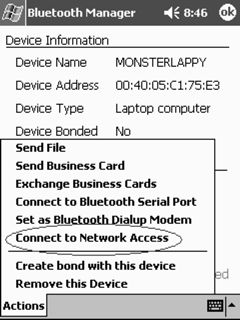
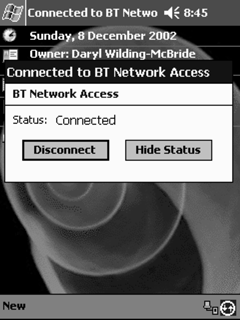
Selecting Connect to Network Access will connect to the remote device, with progress shown in the Figure 7.19 popup window.
Figure 7.19. Establishing network access through the remote device
Once connected, we can start the HttpNetworking application again and this time retrieve the test HTML page via a wireless Bluetooth connection (Figure 7.20).
Figure 7.20. Running HttpNetworking with a network connection via Bluetooth


