PocketPC Version
Because the PocketPC is far less constrained in terms of memory and processing capability, a direct SOAP connection to the Web service makes more sense than using the proxy that proved best for a Palm OS implementation. The PocketPC application com.javaonpdas.webservices.clients.wingfoot. ImageViewer takes this approach.
The constructor sets up the Frame. As before, we have a way to select between local and remote, a selection of image names, a button for saving remote images locally, and a component to display the selected image. In the PocketPC case, we will use a radio button for the local/remote selection, and a list box for the image names.
[View full width]public ImageViewer(String title) { super(title); // handle frame closing events addWindowListener(new WindowAdapter() { public void windowClosing(WindowEvent e) {System.exit(0); } } ); // add components setLayout(new GridLayout(2,1)); Panel topPanel = new Panel(); CheckboxGroup checkBoxGroup = new CheckboxGroup(); localCheckbox = new Checkbox("Local", checkBoxGroup, true); remoteCheckbox = new Checkbox("Remote", checkBoxGroup, false); localCheckbox.addItemListener(this); remoteCheckbox.addItemListener(this); topPanel.add(localCheckbox); topPanel.add(remoteCheckbox); saveButton = new Button("Save"); saveButton.setEnabled(false); topPanel.add(saveButton); saveButton.addActionListener(this); list = new List(4); list.addItemListener(this); topPanel.add(list); add(topPanel); imageCanvas = new ImageCanvas(); add(imageCanvas); String[] names = getNames(true); if (names != null) for (int i=0; i<names.length; i++) list.add(names[i]); }
Note that the Save button is disabled when the Local radio button is selected, as it is only possible to save remote images.
The component used for displaying the image is a separate class called ImageCanvas. ImageCanvas is a subclass of Canvas, and separates the job of setting the image and repainting away from the ImageViewer class.
package com.javaonpdas.webservices.clients.wingfoot;

import java.awt.Canvas;
import java.awt.Image;
import java.awt.Graphics;
import java.awt.Dimension;

public class ImageCanvas extends Canvas {
   private Image image = null;

   public ImageCanvas() {
      super();
   }

   public void setImage(Image image) {
      this.image = image;
   }

   public Image getImage() {
      return this.image;
   }
   public void update(Graphics g) {
      paint(g);
   }

   public void paint(Graphics g) {
      if (image != null) {
         Dimension size = getSize();
         g.clearRect(0, 0, size.width, size.height);
         g.drawImage(image, 0, 0, this);
      }
   }
}
There are three events in which we are interested: when the Save button is pressed (triggering an ActionEvent), when the user makes a change in selection between Local and Remote, and when an image name is selected (both of which trigger an ItemEvent).
The ItemEvent is handled by the itemStateChanged method:
public void itemStateChanged(ItemEvent evt) {
   if (evt.getItemSelectable().getClass() == new Checkbox().getClass()) {
      local = localCheckbox.getState();
      if (local) saveButton.setEnabled(false); else saveButton.setEnabled(true);
      String[] names = getNames(local);
      list.removeAll();
      if (names != null)
         for (int i=0; i<names.length; i++)
            list.add(names[i]);
   }
   else {
      String name = list.getSelectedItem();
      Image image = getImage(name, local);
      imageCanvas.setImage(image);
      imageCanvas.update(imageCanvas.getGraphics());
   }
}
If the ItemEvent corresponds to the Local/Remote radio button, we get the image names either stored locally or remotely, depending on the state of the Local button. If the button is set to Local, the Save button is disabled.
If the ItemEvent corresponds to the list of image names, we find the current selection and get the image of that name, and display it on the ImageCanvas.
The ActionEvent is handled by the actionPerformed method:
public void actionPerformed(ActionEvent evt) {
   String cmd = evt.getActionCommand();
   if (cmd.startsWith("Save")) {
      Image image = imageCanvas.getImage();
      String name = list.getSelectedItem();
      FileOutputStream ostream = null;
      try {
        ostream = new FileOutputStream(LOCAL_DIRECTORY + "\\" + name);
        ostream.write(imageByteArray);
        ostream.close();
      }
      catch (Exception e) {
         System.out.println("Error:" + e);
      }
      finally {
         try { if (ostream != null) ostream.close(); } catch (Exception e) {}
      }
   }
}
If the Save button is pressed, the current image byte array is written to a file in the local image directory using FileOutputStream.
The names are retrieved by the getNames method, which takes a Boolean parameter to indicate whether to retrieve the names from the local or remote repository. In the local case:
FilenameFilter filter = new FilenameFilter() {
   public boolean accept(File dir, String name) {
      return name.endsWith(".jpeg");
   }
};
File dir = new File(LOCAL_DIRECTORY);
files = dir.list(filter);
Note that we are only interested in JPEG images, where in the Palm ImageViewer we used PNG image files. This is because PersonalJava 1.2 is only required to support a minimum set of image types (GIF, XBM, and JPEG). J2ME MIDP, on the other hand, is required at a minimum to support PNG images.
In the remote case, we use the J2SE version of the Wingfoot SOAP client. This version of the SOAP client has the same APIs, except for the transport used. Recall that in the Palm SOAPClient we used HTTPTransport, which underneath uses MIDP's GCF. PersonalJava is J2SE, and so it does not have GCF. Wingfoot gets around this difference by providing a different transport class: J2SEHTTPTransport.
try {
   // Prepare the Envelope
   Envelope requestEnvelope = new Envelope();
   requestEnvelope.setBody("extension", ".jpeg");

   // Prepare the call
   Call call = new Call(requestEnvelope);
   call.setMethodName("getNames");
   call.setTargetObjectURI("ImageService");

   // Prepare the transport
   J2SEHTTPTransport transport =
      new J2SEHTTPTransport(SOAP_ENDPOINT, null);
   transport.getResponse(true);

   // Make the call
   Envelope responseEnvelope = call.invoke(transport);

   // Parse the response
   if (responseEnvelope != null) {
      if (responseEnvelope.isFaultGenerated()) {
         Fault f = responseEnvelope.getFault();
         System.out.println("Error: " + f.getFaultString());
      }
      else {
         Object[] parameter =
           (Object[])responseEnvelope.getParameter(0);
         String[] temp = new String[parameter.length];
         for (int i=0; i<parameter.length; i++)
            temp[i] = (String)parameter[i];
         files = temp;
      }
   }
}
catch (java.net.ConnectException e) {
   (new ImageDialog(this, "Error", "Could not connect to " + SOAP_ENDPOINT)).show();
}
catch (Exception e) {
   (new ImageDialog(this, "Error", e.toString())).show();
}
Note that the code is very similar to the Palm SOAPClient, except for the different transport class.
To retrieve a local image, we load a byte array from a file with the image name, and create an image:
[View full width]FileInputStream fis = null; try { // read the file into a byte array File imageFile = new File(LOCAL_DIRECTORY + "\\" + name); if (imageFile.exists()) { fis = new FileInputStream(imageFile); int length = fis.available(); imageByteArray = new byte[length]; fis.read(imageByteArray); imageCanvasDimension = imageCanvas.getSize(); image = Toolkit.getDefaultToolkit().createImage(r imageByteArray).getScaledInstance(
Note the use of MediaTracker. Because createImage can spawn a separate thread to do its work, as it can take a long time to do some image tasks, we want to make sure that the task is finished before we go to the next step. This is done by using a MediaTracker that waits for a task with a given identifier (in this case, 0) to complete.
Again the code that retrieves an image from the ImageService Web service is quite familiar, except for the use of J2SEHTTPTransport:
try {
   // Prepare the Envelope
   Envelope requestEnvelope = new Envelope();
   requestEnvelope.setBody("name", name);

   // Prepare the call
   Call call = new Call(requestEnvelope);
   call.setMethodName("getImage");
   call.setTargetObjectURI("ImageService");
   TypeMappingRegistry registry = new TypeMappingRegistry();
   registry.mapTypes("urn:BeanService", "ImageValue", new ImageValue().getClass(),
      new BeanSerializer().getClass(),
      new BeanSerializer().getClass());
   call.setMappingRegistry(registry);

   // Prepare the transport
   J2SEHTTPTransport transport = new J2SEHTTPTransport(SOAP_ENDPOINT, null);
   transport.getResponse(true);

   // Make the call
   Envelope responseEnvelope = call.invoke(transport);

   // Parse the response
   if (responseEnvelope != null) {
      if (responseEnvelope.isFaultGenerated()) {
         Fault f = responseEnvelope.getFault();
         System.out.println("Error: " + f.getFaultString());
      }
      else {
         ImageValue imageValue =
            (ImageValue)responseEnvelope.getParameter(0);
         Date date = new Date(imageValue.getDateAsLong().longValue());
         Base64 encodedImage = new Base64(imageValue.getEncodedImage());
         imageByteArray = encodedImage.getBytes();
         imageCanvasDimension = imageCanvas.getSize();
         image =
            Toolkit.getDefaultToolkit().createImage(
            imageByteArray).getScaledInstance(-1,
            imageCanvasDimension.height, Image.SCALE_FAST);
         MediaTracker tracker = new MediaTracker(this);
         tracker.addImage(image,0);
         try {tracker.waitForID(0);}
         catch (InterruptedException e){};
      }
   }
}
catch (Exception e) {
   (new ImageDialog(this, "Error", e.toString())).show();
}
We can test the ImageViewer application on the desktop prior to deploying it to a PocketPC device. The Ant build target TestImageViewer performs this task:
<target name="TestImageViewer" depends="CompilePocketPC">
  <java
     classname="com.javaonpdas.webservices.clients.wingfoot.ImageViewer"
     dir="."
     fork="true"
     failonerror="true">
      <classpath>
        <pathelement location="${pocketpclib}\$ {pocketpcsoaplib}"/>
        <pathelement location="${pocketpcdestination} \pocketpc.jar"/>
      </classpath>
   <arg line=""/>
  </java>
</target>
To deploy the application to the PocketPC, we use the Ant target DeployPocketPC, which copies the pocketpc.jar to the PC's PocketPC synchronization folder.
<target name="DeployPocketPC" depends="CompilePocketPC">
  <copy file="${pocketpcdestination}\pocketpc.jar"
    todir="${pocketpcdeploy}" />
  <copy todir="${pocketpcdeploy}">
    <fileset dir="${pocketpclib}"/>
  </copy>
</target>
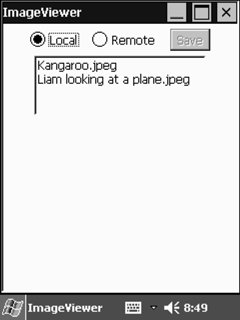
On starting the application, we see the frame as shown in Figure 8.17.
Figure 8.17. The PocketPC version of ImageViewer, showing image names
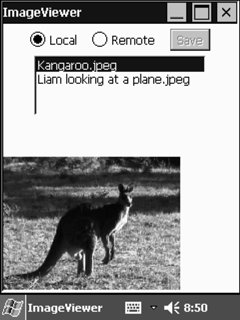
Selecting an image name retrieves the image from local storage and displays it on the screen, as shown in Figure 8.18.
Figure 8.18. The PocketPC version of ImageViewer, showing an image from local storage
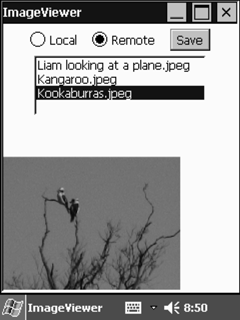
Selecting the Remote button and selecting an image name retrieves that image from the ImageService Web service, and displays it on the screen, as shown in Figure 8.19.
Figure 8.19. The PocketPC version of ImageViewer, showing an image from remote storage