4.3 Running JUnit
4.3.1 Problem
You want to run your tests.
4.3.2 Solution
We have already demonstrated how to run JUnit using Ant, back in Chapter 3. In order to run tests from a script or in an IDE, include junit.jar in your classpath and then use the junit.textui.TestRunner class to run your tests in text mode. Use junit.swingui.TestRunner to run the tests in a Swing GUI.[3]
[3] Use junit.awtui.TestRunner for an older, AWT-based test runner.
4.3.3 Discussion
JUnit can run tests in text or graphical mode. Text mode is faster, and is excellent for running tests as part of an automated build process. Graphical tests are more interesting to run, and can make it easier to analyze output from a large number of tests.
4.3.3.1 Text testing
Here's an example session using the text-based TestRunner. The first line is typed at the prompt; the rest is output. The TestPerson class is the test case from the previous recipe.
java junit.textui.TestRunner com.oreilly.javaxp.junit.TestPerson

.F.F
Time: 0.02
There were 2 failures:
1) testGetFullName(com.oreilly.javaxp.junit.TestPerson)junit.framework.
AssertionFailedError: expected:<Aidan Burke> but was:<AidanBurke>
        at com.oreilly.javaxp.junit.TestPerson.testGetFullName(C:/cvsdata/java_xp_
cookbook/examples/src/com/oreilly/javaxp/junit/TestPerson.java:24)
2) testNullsInName(com.oreilly.javaxp.junit.TestPerson)junit.framework.
AssertionFailedError: expected:<? Burke> but was:<?Burke>
        at com.oreilly.javaxp.junit.TestPerson.testNullsInName(C:/cvsdata/java_xp_
cookbook/examples/src/com/oreilly/javaxp/junit/TestPerson.java:29)

FAILURES!!!
Tests run: 2,  Failures: 2,  Errors: 0
The first line of output shows a dot (.) as each test runs. Once you have dozens or hundreds of tests, the dots allow you to see that tests are progressing. JUnit also shows "F" for each failure:
.F.F
JUnit displays the cumulative time (in seconds), followed by a summary report of failures and errors. Both unit tests failed. The expected text didn't match the existing text:
expected:<Aidan Burke> but was:<AidanBurke>
Either our test is incorrect, or the Person class failed to insert a space between the first and last names. It's the latter.. The final line shows cumulative totals from the unit tests:
Tests run: 2, Failures: 2, Errors: 0
This indicates that a total of two tests ran, and both had failures. No tests had errors.
|
After fixing the Person class, we can run the tests again. We see the following output:
java junit.textui.TestRunner com.oreilly.javaxp.junit.TestPerson

..
Time: 0.01

OK (2 tests)
4.3.3.2 Graphical testing
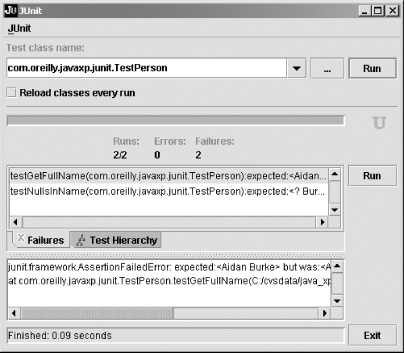
While text-mode testing is great for automated testing, it can be more interesting to watch your tests graphically, as in Figure 4-1. Here is the command to run the GUI:
java junit.swingui.TestRunner com.oreilly.javaxp.junit.TestPerson
Figure 4-1. The JUnit Swing GUI

The black-and-white figure does not illustrate the fact that the progress bar near the top of the screen is red, indicating one or more errors or failures. As the tests run, the progress bar fills from left to right.
The output is essentially the same as JUnit's text UI; however, you can click on lines to see the message associated with each problem. This is a particular advantage of the graphical TestRunner when you have to sift through large numbers of problems.
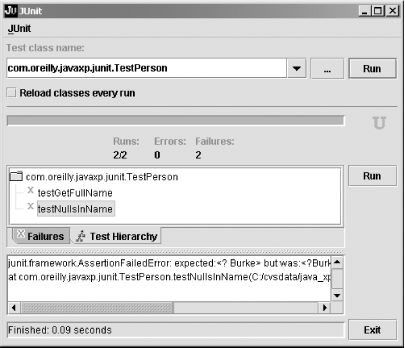
Figure 4-2 shows the Test Hierarchy tab. This tab allows you to see which of the unit tests passed or failed, and allows you to re-run individual tests.
Figure 4-2. Test Hierarchy tab

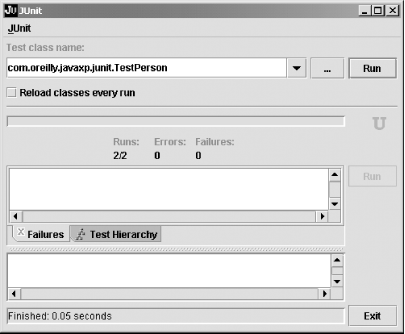
Figure 4-3 shows the output once all bugs are fixed and every test passes. You cannot tell, but the progress bar is now green.
Figure 4-3. All tests pass

4.3.3.3 Reload classes every run
On a final note, the JUnit GUI provides a checkbox allowing you to "Reload classes every run." When checked, the JUnit ClassLoader reads the latest .class files for your tests each time they are run. This allows you to leave the GUI up while you recompile your source code. The new classes are loaded the next time you click the Run button.
4.3.4 See Also
Most Java IDEs are integrated with JUnit. Read your IDE documentation to learn how to run tests directly within the IDE. See Recipe 4.4 to learn how to provide more descriptive error messages. Chapter 3 shows how to run JUnit using Ant.


