8.1 Getting Started
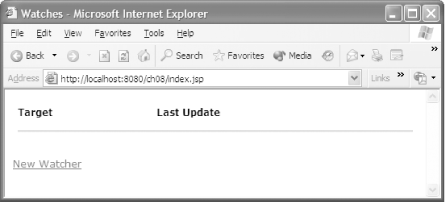
The initial user interface for the aggregator is shown in Figure 8-1. To add a data source to monitor, the user clicks on the New Watcher link.
Figure 8-1. Initial interface

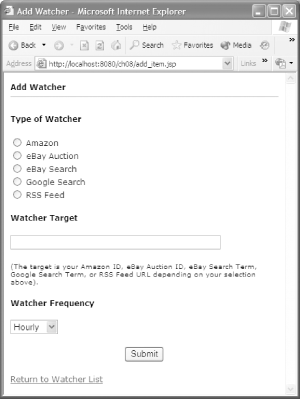
As you can see in Figure 8-2, a form appears that allows a user to define a data source that should be watched by the application (hence the term "watcher"). The user can specify what precise data should be retrieved and how frequently it should be updated.
Figure 8-2. Adding a watcher

One unfortunate user interface element of this application is the use of the watcher target field to get additional data on the specific information. The interpretation of this field varies depending on the type of watcher being created. In a real application, this should be broken up into one or more additional pages with additional validation of the user entered data.
As shown in Example 8-1, some very minimal validation of the user-entered data is performed. This is done in a single code block at the top of the JSP; the rest of the JSP is primarily concerned with the HTML form.
Example 8-1. Add watcher JSP
<%@ page contentType="text/html; charset=iso-8859-1" language="java"

    import="com.cascadetg.ch08.AbstractWatcher"  %>

<%

String error = null;

if(request.getParameter("Submit") != null)

{

    if(request.getParameter("type") == null)

        error = "No Type Defined.";

    if(request.getParameter("target") == null)

    {

        error = "No Target Defined."; }

        else

        {

        if(request.getParameter("target").length( ) < 1)

        {

            error = "No Target Defined.";

        }

    }

    if(error == null)

    {

        AbstractWatcher.addWatch(request.getParameter("type"),

            request.getParameter("target"),

            request.getParameter("frequency"));

        response.sendRedirect("index.jsp");

        return;

    }


}

if(error == null)

    error = "";

%>

<head>

<title>Add Watcher</title>

<meta http-equiv="Content-Type" content="text/html; charset=iso-8859-1" />

<style type="text/css">

<!--

.smaller {font-size: smaller}

-->

</style>

<link href="../ch04/www/default.css" rel="stylesheet" type="text/css" />

<style type="text/css">

<!--

.warning {color: red}

-->

</style>

</head>


<body>

<form name="form1"  method="post" action="">

  <p><strong>Add Watcher<hr />

  <span class="warning"><%= error %></span></strong>

  <p><strong>Type of Watcher</strong></p>

  <p>

  <%

  int types = AbstractWatcher.getTypes(false).length;

  for(int i = 0; i < types; i++) { %>

    <input name="type" type="radio" value="<%= AbstractWatcher.

    getTypes(false)[i] %>" />

  <%= AbstractWatcher.getTypes(true)[i] %><br />

  <% } %>

  <p><strong>Watcher Target</strong></p>

  <p>

    <input name="target" type="text" size="50" />

  </p>

  <p>    <span class="smaller">(The target is your Amazon ID, eBay

Auction ID, eBay Search Term, Google Search Term, or RSS Feed URL depending on your

selection above).</span></p>

  <p><strong>Watcher Frequency</strong></p>

  <p>    <select name="frequency">

      <option value="Hourly" selected="selected">Hourly</option>

      <option value="Daily">Daily</option>

      <option value="Weekly">Weekly</option>

      </select>

  </p>

  <p align="center">

    <input type="submit" name="Submit" value="Submit" />

</p>

  <p align="left"><a href="index.jsp">Return to Watcher List</a> </p>

</form>

</body>

</html>
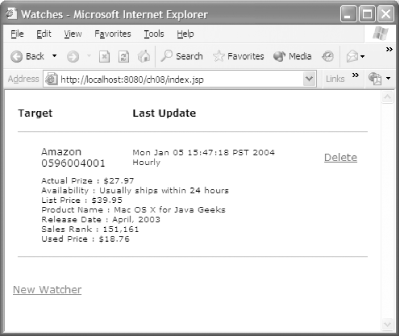
Selecting Amazon and entering an Amazon ID brings us back to the index.jsp page, as shown in Figure 8-3. In addition to the expected information about the selected product, there's now additional data showing the time of the last update, as well as an option to delete the watcher.
Figure 8-3. Added watcher


