5.2 Adding MX Records with the DNS Console
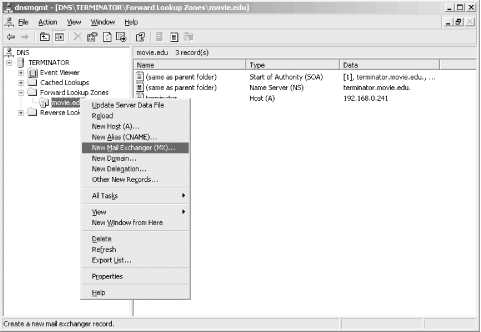
Now that you're familiar with MX records as they appear in zone datafiles, let's cover how to add them with the DNS console. First, right-click on the domain name of the zone to which you'd like to add the MX record. You'll see the drop-down menu shown in Figure 5-1.
Figure 5-1. Adding an MX record to a zone
Choose New Mail Exchanger from the pop-up menu. A small window, shown in Figure 5-2, is displayed.
Figure 5-2. Adding an MX record for terminator.movie.edu
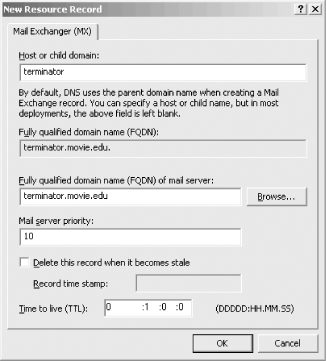
In Figure 5-2, we're adding an MX record for terminator.movie.edu at preference 10, pointing to terminator.movie.edu itself. The record that's added to the zone datafile looks like this:
terminator IN MX 10 terminator.movie.edu.


