Creating Web Deployment Projects
Creating Web Deployment Projects
Many of the problems that arise when deploying an application stem from differences between the development environment and the production environment. The deployed application may need to use a different database backend. Directory permissions may be different between the test and production systems. To help with these problems, the Visual Web Developer team at Microsoft has released an add-in for Visual Studio to manage building web applications for deployment. This Web Deployment Project add-in is a free tool you can download from Microsoft:
-
http://go.microsoft.com/fwlink/?linkid=55111
The web deployment project uses a new tool called aspnet_merge that can take the individual dlls of a precompiled web application and combine them into a single dll. The default setting is to compile and combine the entire application, including code from the App_Code directory as well as the generated code from .aspx pages, and combine them into a single dll for deployment. This not only simplifies the job of deployment but minimizes the overhead time that would otherwise be required to compile specific pages on the fly. However, there will still be a JIT compilation needed at runtime to convert the IL code to native code. The main disadvantage of using aspnet_merge is that you won’t be able to modify a single page and redeploy it individually, unless you use the partial precompilation method explained later.
After installing the add-in, you create the Web Deployment Project in an existing web site or web application by selecting “Add Web Deployment Project” from the Build menu (see Figure 10-4).

Figure 10-4
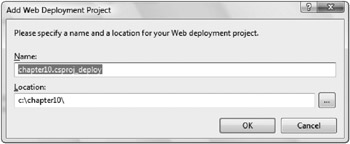
The default behavior is to reuse the existing project name with a suffix that ends in_deploy, but you can change this naming in the dialog shown in Figure 10-5. It’s important to note that although you can change the location of the deployment project, you can’t select the same root folder as the main project.

Figure 10-5
The add-in provides a set of property pages that you can access by right-clicking the deployment project in the Solution Explorer. Before editing the properties, make sure that you’ve selected the right configuration by using the Configuration Manager that can be activated at the top right of the dialog.
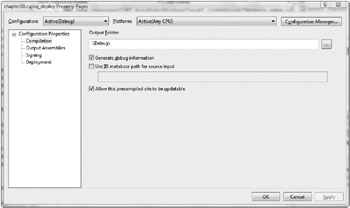
Figure 10-6 shows the compilation options. If you check the “Allow this precompiled site to be updat-able” box, it will cause your .aspx files to be deployed verbatim without being precompiled and merged with the other files. This is only a partial precompile, which allows you to modify an individual page later and deploy only that page. If you uncheck that box, however, your .aspx files will be fully precompiled and replaced with files of the same name containing the text “This is a marker file generated by the precompilation tool, and should not be deleted!”

Figure 10-6
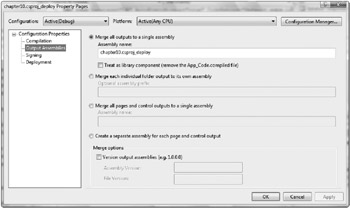
Figure 10-7 shows the options for the assembly outputs. You can opt to have a single assembly, an assembly per directory, or even produce a separate assembly for each page.

Figure 10-7
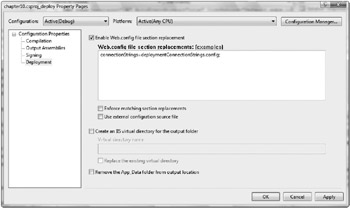
That gives you greater control over compiled outputs, which is nice, but doesn’t solve the problem of needing different sets of configuration data when deploying. You can manage that on the Deployment property page shown in Figure 10-8, where you can specify configuration sections that should be swapped out for updated versions. Check the “Enable Web.config file section replacement” box and provide the section name and the name of a file that contains the updated section. The file must not have any other sections in it. It needs to be a direct replacement for the original section. Here is an example where the section we want to replace is connectionStrings and the file that will provide the new section is deploymentConnectionStrings.config:
connectionStrings=deploymentConnectionStrings.config

Figure 10-8


