Hack 57 Doctoring Photos
![]()
![]()
Techniques and tools for fixing up your photos after they've been taken.
There's more to image preparation than simple crops and rotations. When presentation really matters, you may want to take a few extra minutes to make your auction photos look perfect.
|
The following tools are available in most of the more capable image editors, but their names and usage may vary slightly:
- Clone Tool
-
Use the clone tool to copy one part of an image to another part, useful for removing dust and unwanted reflections.
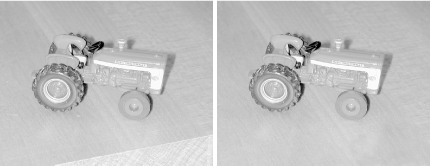
Start by choosing an area to clone. In Photoshop, click while holding the Alt key. In Paint Shop Pro, click while holding Shift. Then, start drawing on a different part of the image. The horizontal and vertical distance will be held constant, so if you move a half-inch to the left, you'll be cloning the area a half-inch to the left of the spot you originally selected. Figure 5-6 shows an image doctored with the clone tool.
Figure 5-6. Use the clone tool to touch up small areas of your images; here, the table edge and a few scratches were removed with cloning

- Skew, Distort, and Perspective Tools
-
Photoshop supports a variety of linear distortion tools, useful for fine-tuning the perspective of your item. Start by selecting a portion of your image (or the entire image), and then go to Edit
Transform
Perspective. Drag any of the eight handles with your mouse to distort the selection, and click any tool in the toolbox to commit (or reject) the change. The Skew and Distort tools work the same way, but the distortions they permit vary slightly.
- Drop Shadows
-
Although somewhat old-school, drop shadows are handy for making small photos stand out, especially thumbnails (see [Hack #60]). Although Photoshop has a feature to automatically add a drop shadow to any layer, here is a more general procedure that will work in any image editor:
Start by floating the layer containing your image. Press Ctrl-A to select all, Ctrl-X to cut, and Ctrl-V to paste the image into a new layer.
Enlarge the canvas of your image slightly, enough to accommodate the shadow; say, 20 pixels on the right side and bottom.
Duplicate the layer by going to Layer
Duplicate Layer, and then move the lower layer down and to the right slightly.
Go to Image
Adjustments
Brightness/Contrast, and turn both the brightness and contrast all the way down. The lower layer will turn completely black.
Finally, perform a Gaussian blur (Filter
Blur
Gaussian Blur) on the lower layer; adjust the radius to achieve the desired effect.
- Auto Levels
-
Most image editors allow you to adjust the individual levels of red, green, and blue, as well as the brightness and contrast of an image. If all you want to do is make the image look more balanced, you can let your image editor do all the work by using the Auto Levels tool (in Photoshop, go to Image
Adjustments
Auto Levels or press Shift-Ctrl-L). It's nothing more than a mathematical operation so it's not always perfect, but most of the time it does a pretty good job.


