Building Basic HTML Pages
Building Basic HTML Pages
The basic unit of web development is the HTML page. This is simply a text document containing special tags to describe the data in the page. Although you might already be familiar with HTML, it makes sense to review these skills because PHP programming is closely tied to HTML.
| TRAP? |
As you are beginning, I strongly urge you to use a plain text editor. You can use Notepad or one of the many free editors available. There are some exceptional free editors available on the CD-ROM that accompanies this book. Word processors usually do not save files in plain text format (which PHP and HTML require) and many of the fancy Web editors (such as FrontPage or Dreamweaver) tend to write clunky code that will really get in your way once you start to add programming functionality to it. |
Creating the HTML "Hello" Page
HTML is mainly text. The Web author adds special markups to a text document to indicate the meaning of various elements. When a user requests a Web page, the text document is pulled from the Web server, and the browser interprets the various tags to determine how the document is displayed on the screen. Figure 1.2 illustrates a very simple Web page.
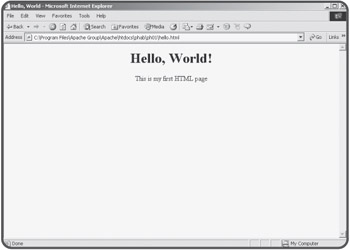
Figure 1.2: A very basic Web page.
If you look at the code for this page, you will see that it's pretty easy to understand, even if you aren't terribly familiar with HTML code.
<html>
<head>
<title>Hello, World</title>
</head>

<body>
<center>
<h1>Hello, World!</h1>
This is my first HTML page
</center>
</body>
</html>
As you can see, many words are encased in angle braces(<>). These words are called tags, and they are meant to be interpreted as instructions for the Web browser. Most tags come in pairs. For example, the entire document begins with <html> and ends with </html> The slash (/) indicates an ending tag.
Each HTML document contains a head area surrounded with a <head></head> pair. The header area contains information about the document in general. It almost always contains a title, which is often displayed in the title bar of the Web browser. However, there are no guarantees. HTML tags describe the meaning of an element, not necessarily how it is to be displayed. It's up to each browser to determine how something will be displayed.
The bulk of an HTML document is contained in the body, indicated with the <body></body> tags.
Within the body of the HTML document, you can use tags to define various characteristics of the page. Usually you can guess at the meanings of most of the tags. For example, the <center></center> pair causes all the text between the tags to be centered (if the browser can support this feature).
| TRAP? |
It's vital to understand that HTML tags are not commands to the browser as much as suggestions. This is because there are so many different types of computers and Web browsers available. It's possible that somebody might look at your Web page on a palm-sized computer or a cell phone. These devices will not be able to display information in the same way as full-size computers. The Web browser will try to follow your instructions, but ultimately, the way the page looks to the end user is not under your direct control. |
The <h1></h1> tags are used to designate that the text contained between the tags is a level-one (highest priority) heading. HTML supports six levels of heading, from <h1> to <h6>. You can't be exactly sure how these headings will appear in a user's browser, but any text in an <h1> pair will be strongly emphasized, and each descending head level causes the text designated by that code to have less and less emphasis.
Basic Tags
There are a number of tags associated with HTML. Most of these tags are used to determine the meaning of a particular chunk of text. Table 1.1 illustrates some of these tags.
|
Tag |
Meaning |
Discussion |
|---|---|---|
|
<b></b> |
Bold |
Won't work on all browsers. |
|
<i></i> |
Italic |
Won't work on all browsers. |
|
<h1></h1> |
Level 1 header |
Strongest headline emphasis. |
|
<h6></h6> |
Level 6 header |
Weakest headline level (levels 2–5 also supported). |
|
<ul> <li></li> </ul> |
Un-numbered list |
Must contain list items (<li></li>). Used for bulleted lists. Add as many list items as you wish. |
|
<ol> <li></li> </ol> |
Ordered list |
Must contain list items (<li></li>). Used for numbered list. Add as many list items as you wish. |
|
<a href = "anotherPage.html"> go to another page</a> |
Anchor (hyperlink) |
Places a link on the page. Text between <a> and </a> will be visible on page as a link. When user clicks on link, browser will go to the specified address. |
|
<img src = "imgName.gif"> |
image |
Adds the specified image to the page. Images should be in GIF, JPG, or PNG formats. |
|
<font color = "red" size = 5> this text is red </font> |
Modify font |
Will not work in all browsers. It's possible to modify font color, size, and face (typeface), although typeface will often not transfer to client machine. |
|
<br> |
Break |
Causes a carriage return in the output. Does not have an ending tag. |
|
<hr> |
Horizontal rule |
Add a horizontal line to the page. Does not have an ending tag. |
Of course, there are many other HTML tags, but those featured in Table 1.1 are the most commonly used. Figure 1.3 illustrates several of the tags featured in Table 1.1.
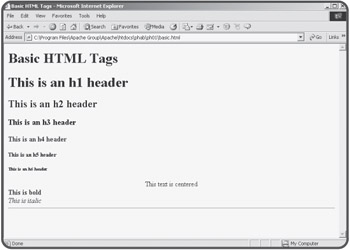
Figure 1.3: An HTML page containing the most common HTML tags.
The source code for the basic.html document illustrates how the page was designed.
<html>
<head>
<title>Basic HTML Tags</title>
</head>
<body>
<h1>Basic HTML Tags</h1>

<h1>This is an h1 header</h1>
<h2>This is an h2 header</h2>
<h3>This is an h3 header</h3>
<h4>This is an h4 header</h4>
<h5>This is an h5 header</h5>
<h6>This is an h6 header</h6>

<center>
This text is centered
</center>

<b>This is bold</b>
<br>
<i>This is italic</i>
<hr>

</body>
</html>
The H1 through H6 headers create headlines of varying size and emphasis. The <b> tag causes text to be bold, and <i> formats text in italics. Finally, the <hr> tag is used to draw a horizontal line on the page.
More HTML Tags
The rest of the tags shown in Table 1.1 are featured in Figure 1.4.
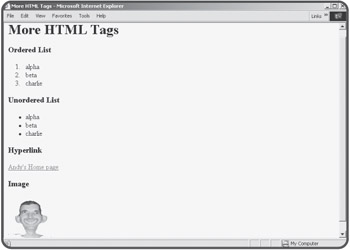
Figure 1.4: Examples of several other basic HTML tags.
The tags in more.html are used to add lists, links, and images to a Web page. The code used to produce this page looks like this:
<html>
<head>
<title>More HTML Tags</title>
</head>
<body>
<h1>More HTML Tags</h1>

<h3>Ordered List</h3>
<ol>
  <li>alpha</li>
  <li>beta</li>
  <li>charlie</li>
</ol>

<h3>Unordered List</h3>
<ul>
  <li>alpha</li>
  <li>beta</li>
  <li>charlie</li>
</ul>

<h3>Hyperlink</h3>

<a href="http://www.cs.iupui.edu/~aharris">Andy's Home page</a>

<h3>Image</h3>
<img src="silly.gif"
     height = 100
     width = 100>

</body>
</html>
HTML supports two types of lists. The <ol></ol> set creates ordered (or numbered) lists. Each element in the list set (specified by an <li></li> pair) is automatically numbered. The <ul></ul> tags are used to produce unnumbered lists. Each <li></li> element is automatically given a bullet.
Hyperlinks are the elements that allow your user to move around on the Web by clicking on specially designated text. The <a></a> tag is used to designate a hyperlink. The <a> tag almost always includes an href attribute, which indicates an address. The user will be redirected to whichever address is indicated in this address when he or she clicks on the link. The text (or other html) between the <a> and </a> tags will be designated as the hyperlink. That text will appear on the page as a link (usually blue and underlined). In the more.html example, I created a link to one of my home pages (http://www.cs.iupui.edu). When the user clicks on the "Andy's Home Page" link in the browser, he or she will be transported to that page.
The other feature illustrated in more.html is the <img> tag. This tag is used to include images into a Web page. Most browsers readily support .gif and .jpg files, and many now can support the newer .png format.
| TRICK? |
If you have an image in some other format, or an image that needs to be modified in some way before using it in your Web page, you can use free software such as irfanView or the Gimp (both included on the CD-ROM that accompanies this book). |
Tables
There are many times you might be working with large amounts of information that could benefit from table-style organization. HTML supports a set of tags that can be used to build tables. These tags are illustrated in Figure 1.5.
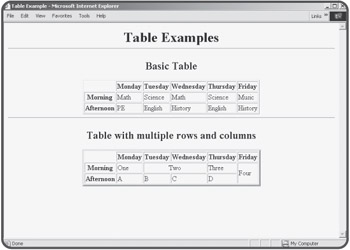
Figure 1.5: Tables can be basic, or cells can occupy multiple rows and columns.
The code for the simpler table looks like this:
<table border = "1">
<tr>
  <th></th>
  <th>Monday</th>
  <th>Tuesday</th>
  <th>Wednesday</th>
  <th>Thursday</th>
  <th>Friday</th>
</tr>

<tr>
  <th>Morning</th>
  <td>Math</td>
  <td>Science</td>
  <td>Math</td>
  <td>Science</td>
  <td>Music</td>
</tr>

<tr>
  <th>Afternoon</th>
  <td>PE</td>
  <td>English</td>
  <td>History</td>
  <td>English</td>
  <td>History</td>
</tr>
</table>
Tables are created with the <table></table> tags. Inside these tags, you create rows using the <tr></tr> (table row) tags. Each table row can contain table heading (<th></th>) or table data (<td></td>) elements.
| TRICK? |
The Web browser ignores spaces and indentation, but it's very smart to use white space in your HTML code to make it easier to read. Notice how I indented all elements inside each table row. This makes it much easier to see that all the information within the <tr></tr> set is part of one group. |
In the <table> tag, you can use the border attribute to indicate how thick the border will be around the table.
| TRAP? |
Note that browsers are not consistent in their default values. If you don't specify the border width, some browsers will show a border, and some will show no border at all. It's best to specify a border width every time. If you don't want a border, set the width to 0. |
Sometimes you will find you need table cells to take up more than one row or column. The code for the second table in table.html shows how to accomplish this.
<table border = "4">

<tr>
  <th></th>
  <th>Monday</th>
  <th>Tuesday</th>
  <th>Wednesday</th>
  <th>Thursday</th>
  <th>Friday</th>

</tr>

<tr>
  <th>Morning</th>
  <td>One</td>
  <td colspan = "2"><center>Two</center></td>
  <td>Three</td>
  <td rowspan = "2">Four</td>
</tr>

<tr>
  <th>Afternoon</th>
  <td>A</td>
  <td>B</td>
  <td>C</td>
  <td>D</td>
</tr>

</table>
Notice that the cell containing the value "Two" has its colspan attribute set to 2. This tells the cell to take up two cell widths. Since this cell is twice as wide as normal, it is only necessary to define five <td> or <th> elements for this row instead of the six elements used for each row of the simpler table.
Look also at the cell containing the value "Four." This cell takes up two rows. I used the rowspan attribute to set up this behavior. Notice that I needed fewer elements in the next row, because one of the columns is taken by this expanded element.


