Section 9.6. Multimedia Applications
|
Once you have your hardware configured under Linux, you'll want to run some multimedia applications. So many are available for Linux that they can't possibly be listed here, so we instead describe some of the general categories of programs that are available and list some popular representative applications. You can look for applications using the references listed at the end of the chapter. Toward the end of the chapter, you will also find more in-depth descriptions of some popular or particularly useful applications. These are the major categories of multimedia applications that are covered:
9.6.1. Sound MixersSound mixers allow one to modify the hardware gain levels and input devices for your sound card. Most sound mixers are similar. If you are running KDE or GNOME you'll generally get the best results using the mixer provided with your desktop, which typically will appear as a speaker icon on your desktop's panel. Command line mixer programs such as aumix can be useful for use in scripts or startup files to set audio gains to desired levels during login, or when you are not running a graphical desktop, such as a remote login. Figure 9-1 shows a screenshot of KMix, the mixer provided by KDE. Figure 9-1. KMix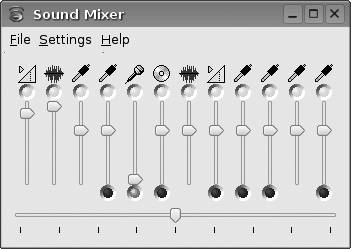
9.6.2. Multimedia PlayersMedia players are the area with the greatest selection of applications and widest range of features and user interfaces. No one application meets everyone's needssome aim to be lightweight and fast, whereas others strive to offer the most features. Even within the KDE desktop, for example, a half dozen different players are offered. If you are running a desktop environment, such as KDE or GNOME, you likely already have at least one media player program. If so, it is recommended that you use this player, at least initially, since it should work correctly with the sound server used by these desktop environments and provide the best integration with the desktop. When choosing a media player application, here are some of the features you can look for:
Here is a rundown of some of the popular media player applications:
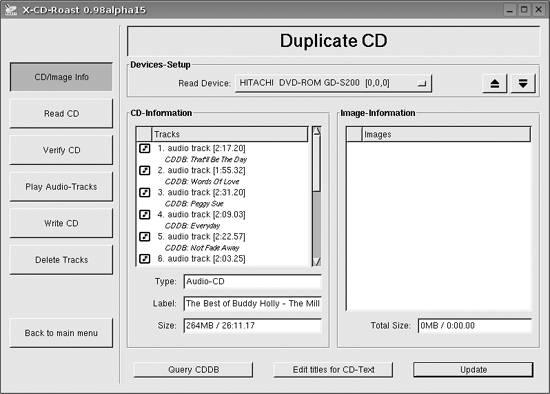
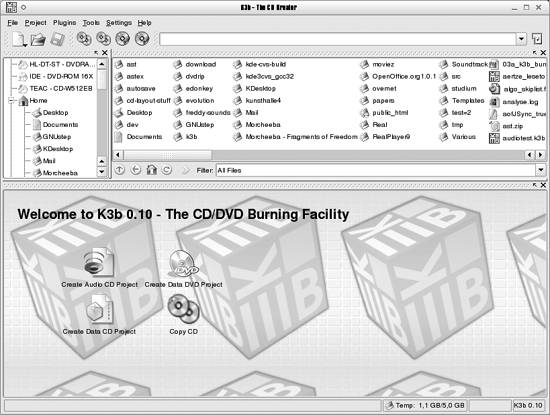
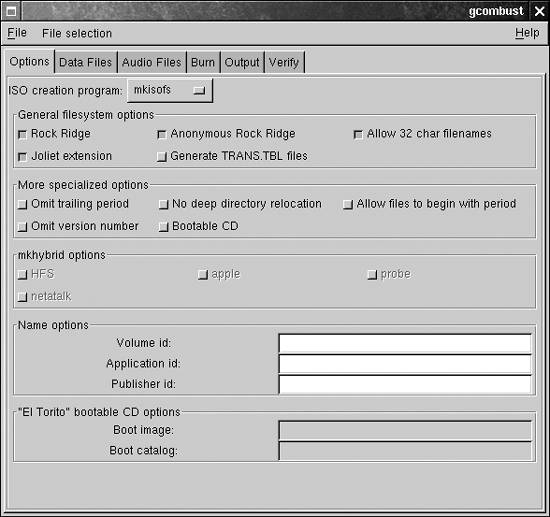
9.6.3. CD and DVD Burning ToolsIf you are running KDE or GNOME, basic CD data and audio burning support is available within the file manager. If you want to go beyond this, or need more help to step you through the process, specialized applications are available. Note that many of the graphical CD burning applications use command-line tools such as cdrecord and cdrdao to perform the actual CD audio track extraction, ISO image creation, and CD recording. For maximum flexibility, some advanced users prefer to use these tools directly.
9.6.4. Speech ToolsSpeech synthesis and recognition have applications for accessibility and specialized applications, such as telephony, where only an audio path is available. Speech synthesis devices fall into two major types. Dedicated hardware synthesizers are available that act as a peripheral to a computer and perform the text-to-speech function. These have the advantage of offloading the work of performing the speech conversion from the computer, and tend to offer good-quality output. Software synthesizers run on the PC itself. These are usually lower cost than hardware solutions but add CPU overhead and are sometimes of poor quality if free software is used.
9.6.5. Image, Sound, and Video Editing and Management ToolsThis section describes some of the popular tools for editing images , video, and sound files, as well as managing image collections:
9.6.6. Imaging ToolsA variety of tools are available for acquiring, manipulating, and managing digital images on your computer. In this chapter, we look at some of them. 9.6.6.1. Image management with KimDaBaMany applications for viewing images exist, and in our experience, they can be grouped into two main categories: those which are good at generating HTML pages from your image sets, and those which are cool for showing fancy slide shows. The number of applications in both categories is counted in hundreds if not thousands, mostly differing in things that would be considered taste or even religion. You can browse the Linux application sites for your favorite application. Here we focus on an application with a slightly different set of design goals. Figure 9-9. Gtkam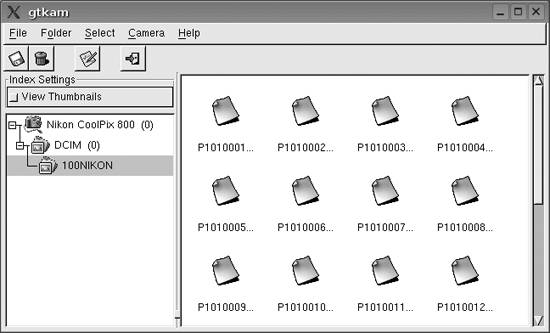 Figure 9-10. Digikam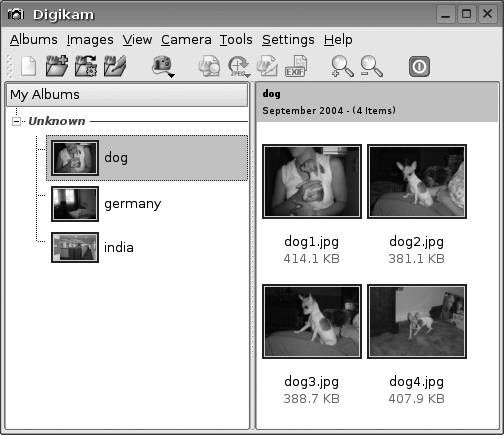 Figure 9-11. Kooka KimDaBa (KDE Image DataBase) is best explained by the following quote from its home page:
The basic idea behind KimDaBa is that you categorize each image with who is in it, where it was taken, and a keyword (which might be anything you later want to use for a search). When looking at your images, you may use these categories to browse through them. Figure 9-12 shows the browser of KimDaBa.[*]
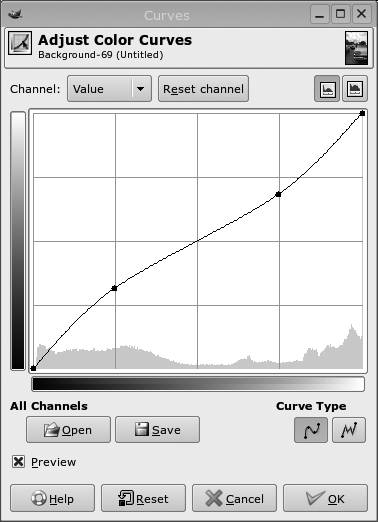
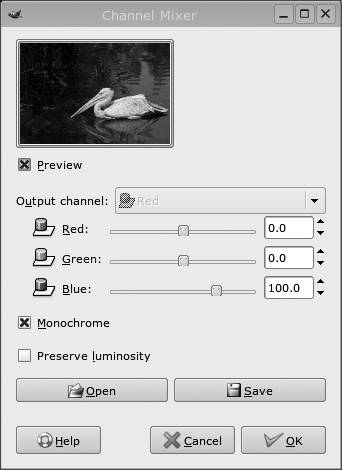
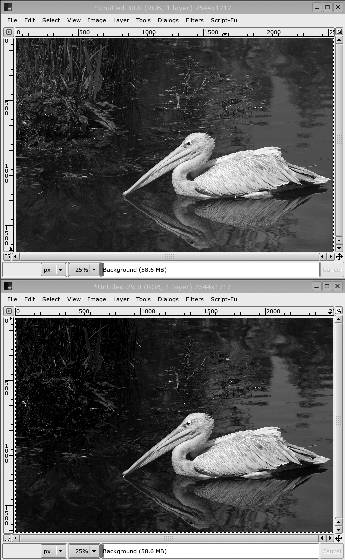
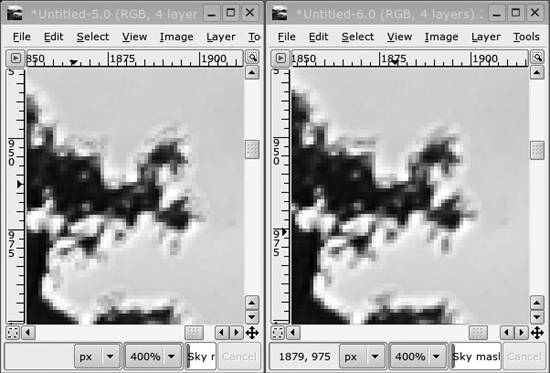
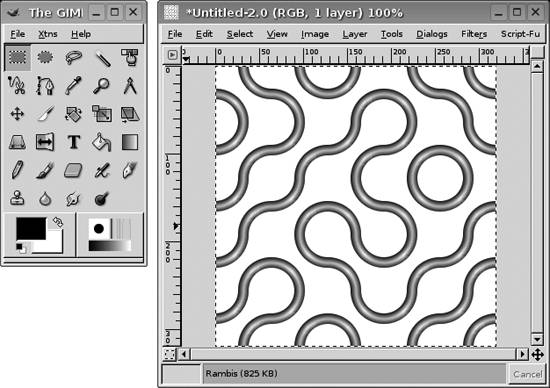
Figure 9-12. Browsing images with KimDaBa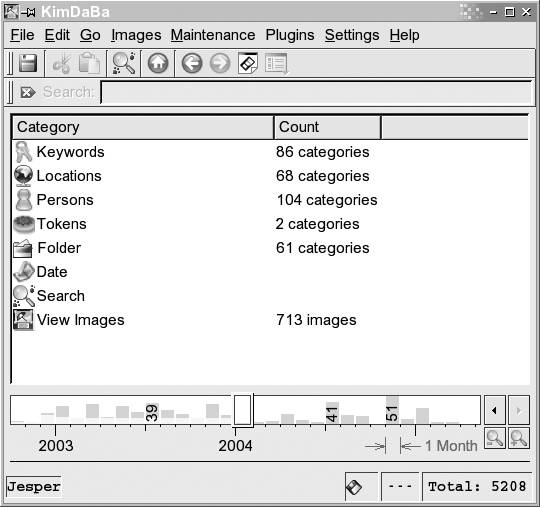 Browsing goes like this: at the top of the list shown in Figure 9-12 you see items for Keywords, Locations, Persons, and so on. To find an image of, say, Jesper, you simply press Persons and, from the list that appears, choose Jesper. Now you are back to the original view with Keywords, Locations, Persons, and so forth. Now, however, you are in the scope of Jesper, meaning that KimDaBa only displays information about images in which Jesper appears. If the number of images is low enough for you to find the image you have in mind, then you may simply choose View Images. Alternatively, repeat the process. If you want to find images with Jesper and Anne Helene in them, then simply choose Persons again, and this time choose Anne Helene. If you instead want images of Jesper in Las Vegas, then choose Locations and, from that view, Las Vegas. There is no such thing as a free lunch. For KimDaBa this means that you need to categorize all your images, which might be a rather big task if you have thousands of images. KimDaBa is, however, up to this task after all, one of its main design criteria is to scale up to tens or even hundreds of thousands of images. There are two ways of categorizing images in KimDaBa, depending on your current focus, but first and foremost let's point out that the categorizing tasks can be done step by step as you have time for them. The first way of categorizing images is by selecting one or more images in the thumbnail view (which you get to when you press View Images), and then press the right mouse button to get to the context menu. From the context menu, either choose Configure Images One at a Time (bound to Ctrl-1) or Configure All Images Simultaneously (bound to Ctrl-2). Configure All Images Simultaneously allows you to set the location of all images from, say, Las Vegas with just a few mouse clicks, whereas Configure Images One at a Time allows you to go through all the images one by one, specifying, say, who is in them. Figure 9-13 shows the dialog used for setting properties for the images. In this dialog you may either select items from the list boxes or start typing the name in questionKimDaBa will offer you alternatives as you type. (In the screenshot, I only typed J, and KimDaBa thus found the first occurrence that matched.) The alternative way of specifying properties is to do it while you view your images (e.g., as a full-screen slide show). In this mode, you simply set a letter token on the image by pressing the letter in question. This usage is intended for fixing annotations later onsay you are looking at your images and realize that you forgot to mark that Jesper is in a given image. Once you have set a number of tokens, you can use these for browsing, just as you use persons, locations, and keywords. What you typically would do is simply to browse to the images with a given token, and then use the first method specified previously to set the person missing in the images. Once you have annotated all your images, you can drive down memory lane in multiple ways. As an appetizer, here is a not-so-uncommon scenario derived from personal use of KimDaBa: you sit with your girlfriend on the living-room sofa, discussing how much fun you had in Mallorca during your vacation in 2000, and agree to grab your laptop to look at the images. You choose Holiday Mallorca 2000 from the keyword category, and start a slide show with all the images. As you go on, you see an image from when you arrived home. On that image is an old friend who you haven't talked to in a long time. In the full-screen viewer, you press the link with his name (all the information you typed in is available during viewing in an info box). Pressing his name makes KimDaBa show the browser, with him in scope. Using the date bar, you now limit the view to only show images of him from 1990 to 2000. This leads you to some images from a party that you attended many years ago, and again the focus changes, and you are looking at images from that party. Often, you end up getting to bed late those evenings when you fetch the laptop. Figure 9-13. Configuring KimDaBa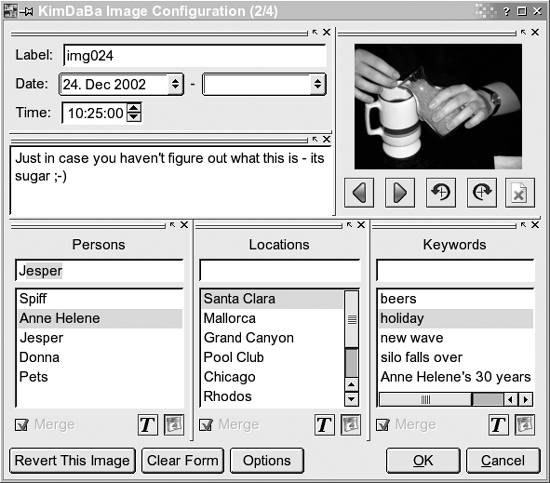 9.6.6.2. Image manipulation with the GIMPIntroduction. The GIMP is the GNU Image Manipulation Program. It is intended for tasks such as photo retouching, image composition, and image authoring. It has been in active development for several years and is a very stable and powerful program. The GIMP's home is http://www.gimp.org, the online manual is available from http://docs.gimp.org, and additional plug-ins to expand GIMP's features can be found at http://registry.gimp.org. It is possible to use GIMP as a simple pixel-based drawing program, but its strength is really image manipulation. In this book we present a small selection of useful tools and techniques. A complete coverage of the GIMP would require a whole book, so read this only as a teaser and for inspiration to explore GIMP. At the time of writing the current version of GIMP was 2.2. Minor details in the feature set and user interface will be different in other versions, but the overall idea of the application is the same. Selection tools. When GIMP is started, it shows the toolbox window, as seen in Figure 9-14. The upper part of the toolbox contains a number of buttons, each of which represents a tool. There is also a menubar with menus for creating new images, loading, saving, editing preferences, and so on. Below the buttons is a section showing the current foreground and background colors, selected pen, and so on. The lower part of the window shows the options for the current tool. To create a new image, choose File The first five tools are selection tools: rectangle, ellipse, freehand, magic wand, by color, and shape-based selection. A selection is an area of the image that almost any tool and filter in GIMP will work onso it is an important concept. The current selection is shown with "marching ants." You can show and hide the marching ants with Ctrl-Z. The first three selection tools are, except for the shape of the selection made, quite similar. While dragging out a rectangular or elliptical selection, it is possible to keep a constant aspect ratio by holding down the Shift key. In the option window for each selection tool, it is possible to choose a selection mode to add to an existing selection, subtract from one, replace the current selection, and intersect with one. All selection tools have a feather parameter that will control how soft the edges of the selection are. See Figure 9-15 for an example. The magic wand allows you to click on a pixel in the image and thereby select a contiguous area around the pixel with similar color. Use the threshold slider to control how similar the colors must be. Selection by color works like the magic wand, but it selects all pixels with similar value contiguous or not. Finally, selection by shapes allows you to place points in the image and try to connect the points with curves that follow edges in the image. When you have selected enough points to contain an area, click in the middle of that area to convert the traced curve to a selection. Figure 9-14. GIMP toolbox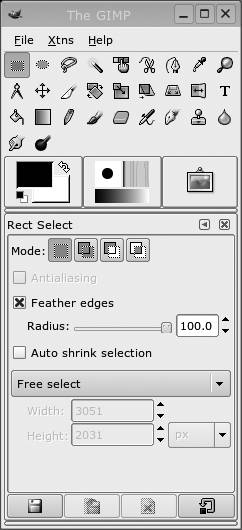 Painting and erasing tools. To paint in an image, the Pencil, Paintbrush, Airbrush and Ink tools can be used. They differ in the way the shapes you draw look: Pencil paints with hard edges, and Paintbrush with soft edges, Airbrush paints semitransparently and Ink thickens the line when you paint slowly and thins the line when you paint quickly. To fill in an area, make a selection and use the paintbucket or gradient fill tool to fill it with color. Selecting the pen style, color, and/or gradient can be done by clicking the controls in the middle of the toolbox window. Some people have trouble drawing a straight line in GIMP, but since you have this clever book in your hands, you will know the secret: select one of the drawing tools, place the cursor where you want the line to start, press and hold Shift, and then move the mouse to where the line should end and click once with the left mouse button. Now either do the same again to draw another line segment or release the Shift key and enjoy your straight line. Figure 9-15. GIMP selections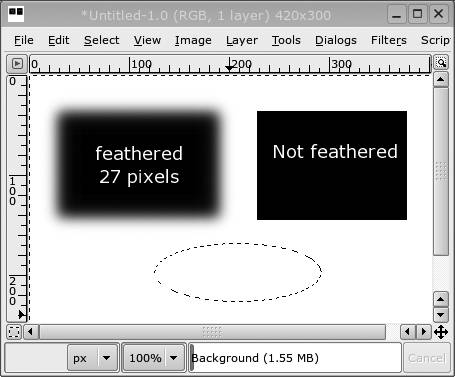 If you make a mistake, use the most often used keyboard shortcut in GIMP: Ctrl-Z to undo. Multiple levels of undo are available. There is also an eraser tool that allows you to selectively erase pixels. Everything you do with the painting tools will be confined to the currently selected area if there is a selection. Photo retouching tools . The tools in this section are mostly for modifying digital photos in subtle (and not so subtle) ways. The Clone tool is very useful to remove blemishes from a photo. It works by first Ctrl-clicking in an image to set the source point, and then painting somewhere in an image. You will now paint with "copies" of the source area. Figure 9-16 shows the upper-right corner of a landscape photo that got a bit of the roof from a house into the frame. The left image is the original, and the right one has the undesired feature removed by using the clone tool with some other part of the clouds as the source area. The last tool in the toolbox is the Dodge and Burn tool. It is used to lighten (dodge) and darken (burn) parts of an image by drawing on it. This tool can be used to finetune areas with shadows or highlights. Color adjustment. During postprocessing of digital photos, it can be very useful to adjust the overall appearance of the light, color, and contrast of a photo. GIMP supports quite a number of tools for this. They are available in the Layer/Colors context menu. Figure 9-16. GIMP clone tool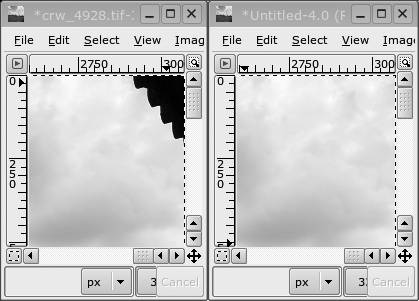 One of the more useful tools is the Levels tool. It allows you to adjust the black and white points of an image. Figure 9-17 shows a photo shot in harsh lighting conditions. It has low contrast and looks hazy. Figure 9-17. Original photo Let's fix that problem using the Levels dialog! Open the dialog for the Levels tool by choosing Levels from the menu. The dialog can be seen in Figure 9-18. Figure 9-18. Levels dialog The diagram seen under "Input Levels" is a histogram of the brightness values in the image. The left end of the histogram represents black, and the right end white. We see that that the lower 40% of the histogram is emptythis means that we are wasting useful dynamic range. Below the histogram are three triangular sliders. The black and the white ones are for setting the darkest and brightest point in the image, and the gray one is for adjusting how values are distributed within the two other ones. We can move the black point up as shown in Figure 9-19 to remove the haziness of the image. The result is shown in Figure 9-20. Contrast enhancement can be done either with the Brightness-Contrast tool or with the Curves tool. The former is quite basic consisting of two sliders, one for brightness and one for contrast; the latter allows much more control. Figure 9-21 shows an original image and two modified versions with different curves applied. The middle image has the contrast-enhancing curve shown in Figure 9-22 applied, and the right image has the contrast-decreasing curve shown in Figure 9-23 applied. The curves describe a mapping from pixel values onto itself. A straight line at a 45-degree slope is the identity mapping; anything else will modify the image. Best results are obtained if you only deviate a little bit from the 45-degree straight line. Figure 9-19. Levels dialog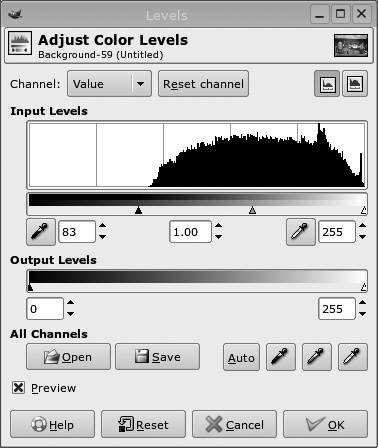 Figure 9-20. Level adjusted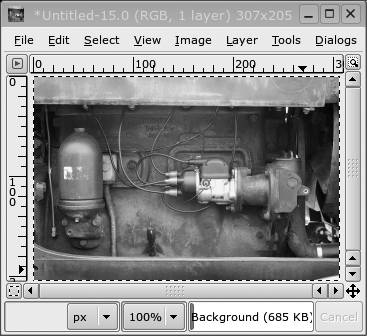 Figure 9-21. Curve adjusted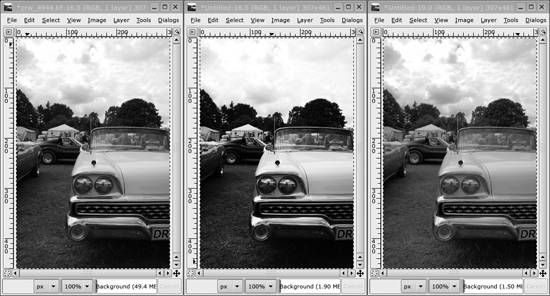 Colors can be changed with several tools, such as the Color Balance and Hue-Saturation tools. The Levels and Curves tools can also be set to operate on individual color channels to achieve various effects. But there is also another tool available: the Channel Mixer. Unlike the other tools this is located in the Filters/Colors/Channel Mixer context menu. The Channel Mixer can be used to create a weighted mix of each color channel (red, green, and blue) for each of the output channels. It is particularly useful for converting color images to monochrome, often giving better results than simply desaturating the image. Figure 9-24 shows the Channel Mixer, and Figure 9-25 shows two monochrome versions of the same color image. The upper one is simply desaturated, and the lower one is based only on the blue channel and seems to emphasize the bird rather than the background. When judging how to convert a color image to monochrome, it can be helpful to examine each color component individually. See the paragraph about channels for more about this. Layers and channels. The most convenient way to access layers and channels is through the combined layers, channels, paths, and undo history window. It can be accessed by right-clicking in the image's windows and selecting the Dialogs Figure 9-22. Contrast-enhancing curve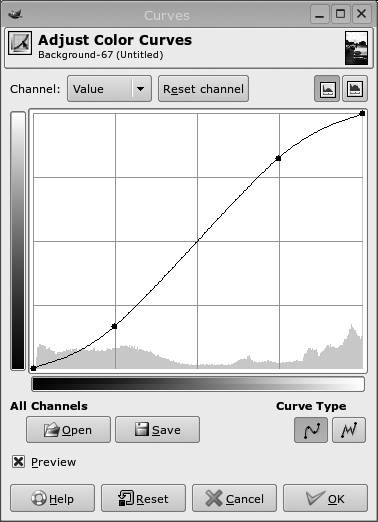
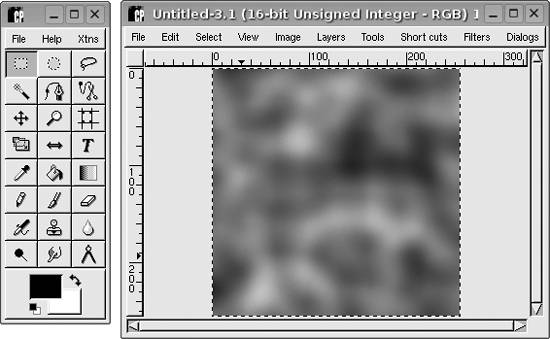
Figure 9-26. Channels dialog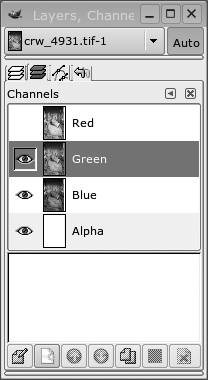 Figure 9-27. Layers dialog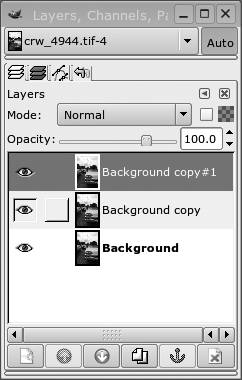 Figure 9-28. Layers and mask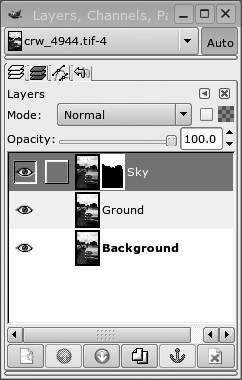 Filters. The final major aspect of GIMP we cover here is its filters. Filters are effects that can be applied to an entire image or a selection. GIMP is shipped with a large number of different filters, and it is possible to plug in new filters to extend the capabilities of GIMP. Filters are located in the right mouse button Filters menu. The Channel Mixer is an example of such a filter. We discuss two useful filters, Gaussian Blur and Unsharp Mask, and apply them to the image from the previous example.
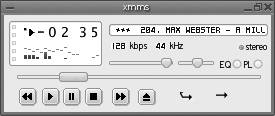
9.6.7. Recording ToolsIf you want to create your own MP3 files, you will need an encoder program. There are also programs that allow you to extract tracks for audio CDs. Although you can perform MP3 encoding with open source tools, certain patent claims have made the legality of doing so questionable. Ogg Vorbis is an alternative file format and encoder that claims to be free of patent issues. To use it, your player program needs to support Ogg Vorbis files because they are not directly compatible with MP3. However, many MP3 players, such as Xmms, support Ogg Vorbis already; in other cases, there are direct equivalents (such as ogg123 for mpg123). For video, Ogg has developed the Ogg Theoris codec, which is free and not encumbered by any patents. This section lists some popular graphical tools for recording and manipulating multimedia. Figure 9-32. Two passes of Unsharp Mask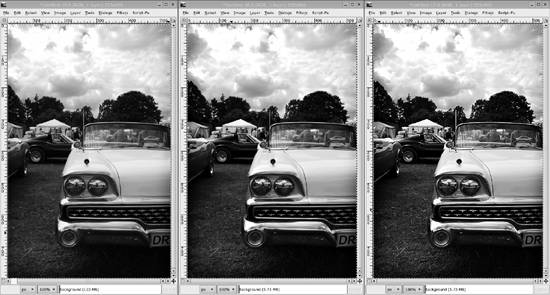
Figure 9-37. MythTV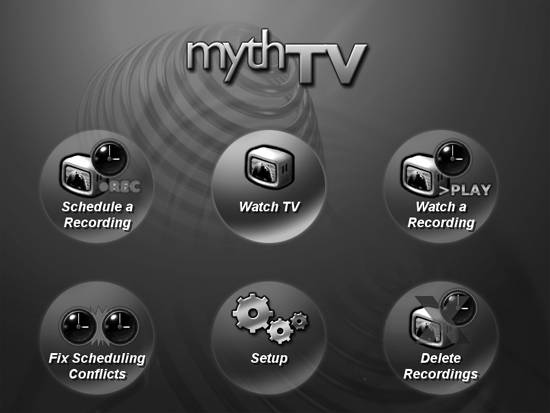 9.6.8. Music Composition ToolsMany applications are available that help music composers. MIDI sequencers allow a composer to edit and play music in MIDI format. Because MIDI is based on note events, tracks, and instruments, it is often a more natural way to work when composing music than directly editing digital sound files. Scoring programs allow composers to work with traditional music notation and produce typeset sheet music. Some support other notation formats such as tablature for guitar and other instruments. Some programs combine both MIDI sequencing and scoring, or can work with various standardized file formats for musical notation.
9.6.9. Internet Telephony and Conferencing ToolsTelephony over the Internet has recently become popular and mainstream. Using VOIP (Voice Over IP) technology, audio is streamed over a LAN or Internet connection. SIP (Session Initiation Protocol) is a standard for setting up multimedia sessions (not just audio). Either a sound card and microphone or dedicated hardware resembling a traditional telephone can be used. Internet telephony has a number of advantages, but the main one is costmany users today have a full-time high-speed Internet connection that can be used to connect to anyone else in the world with compatible software. With a suitable gateway, you can make a call between a VOIP phone and the public telephone network. There are many VOIP applications for Linux. KPhone is one popular KDE-based one. As well as audio, it supports instant messaging and has some support for video. The project's home page is http://www.wirlab.net/kphone. There are also commercial applications that use proprietary protocols or extensions to protocols. One example is Skype, which offers a free client but requires subscription to a service to make calls to regular phones through a gateway. Skype can be found at http://www.skype.com. H.323 is a standard for video conferencing over LANs. It is supported by Microsoft NetMeeting, which is included with Microsoft Windows. H.323-compliant applications are available on Linux, the most notable being GnomeMeeting. The project's home page is http://www.gnomemeeting.org. Figure 9-38. Brahms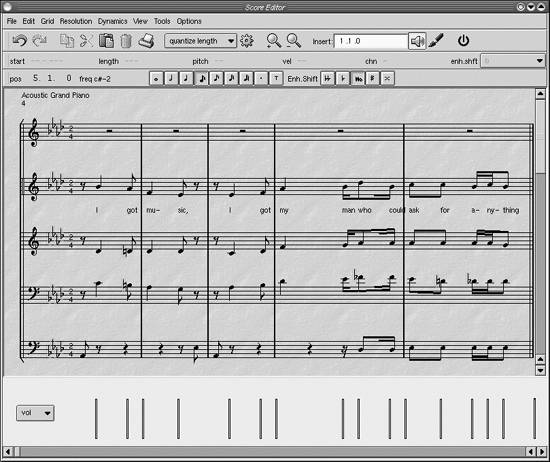 9.6.10. Browser Plug-insBrowser plug-ins allow data types other than HTML to be presented in your web browser. Some of these qualify as multimedia. They can be divided into three categories:
Figure 9-39. Rosegarden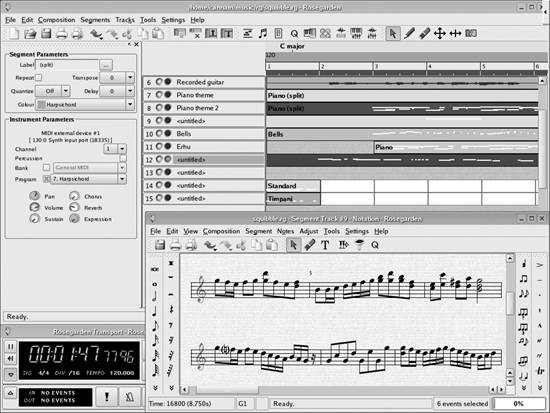 The Netscape plug-in format is supported by Netscape, Mozilla, and some other browsers derived from Mozilla, such as FireFox. Netscape plug-ins are also supported by the KDE project's Konqueror browser. 9.6.11. Putting It All TogetherThis chapter has talked about a lot of different multimedia tools. Although most of these tools are straightforward to use and perform a well-defined function on their own, more powerful tasks can be performed by combining tools. Let's look at a real-life example. I like to collect and restore old vacuum tube radios from the 1930s through 1950s. After I have restored a radio to working condition I like to display it. But when I turn it on, hearing the local sports or talk radio station doesn't seem appropriate. Wouldn't it be fun to hear some old radio shows from the era in which the radio was made coming out of the radio? Lots of old-time radio broadcasts are available as free downloads on the Internet. I can download a number of these to my computer. It is also possible to buy CDs of old radio programs. I might even have an old vinyl record or cassette tape of old radio shows. Using Audacity and connecting a turntable or tape player to my sound card's audio input, I can convert them to sound files. The files can have some simple editing and processing done to clean them up, and they can be converted to MP3 format. If I want to listen to them on my computer, I can use Juk to arrange them in playlists of my favorite programs arranged by type and have hours of continuous music or radio shows. I can save the MP3 files to my portable MP3 player to listen to when I am away from the computer, or burn them to a CD to listen to with a portable CD player. Using a low-power AM transmitter, I can legally broadcast programming throughout my home. An inexpensive AM transmitter is available from a number of sources and connects either to the sound card output of my computer or a CD player, and can broadcast vintage radio programs on the AM band to radios within the house. Now when I turn on that old radio, I can hear Burns and Allen, The Shadow, or some swing music from the 1940s. I might even be able to convince the more gullible visitors to my radio room that old radios can still pick up old radio programs. |

 New. This gives us a blank image to use for experimenting with the tools.