Tricks and Techniques
If you've spent much time surfing the Web, you've probably learned some techniques for dealing with search engines provided by sites such as Google, Yahoo, and even Amazon. Searching a Wi-Fi directory for a hotspot is much the same: There are different tricks and techniques for using each one. In this section, I'll take a look at using my two favorite Wi-Fi directories, HotSpotList and WiFi411.
Using the HotSpotList Directory
Figure 11.1 shows the HotSpotList main window.
Figure 11.1. The HotSpotList search window.
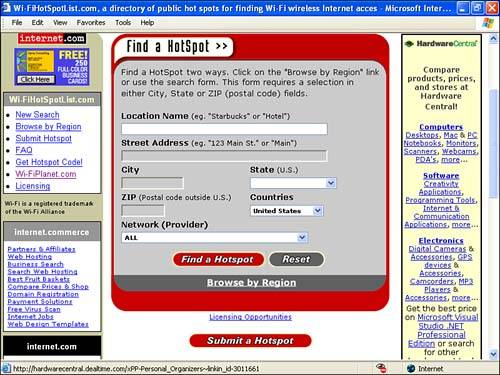
This window is used to conduct searches (you can also browse by location as I'll show you in a second).
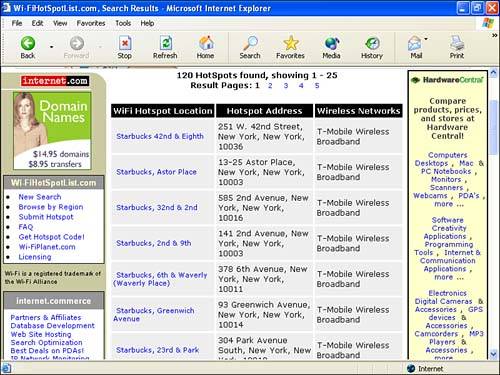
To conduct a search, you need to enter a business name or type, and some geographic information (such as city and state, or a ZIP code). For example, a search for Starbucks in New York provides many pages of results, as you can see in Figure 11.2.
Figure 11.2. The search results window.
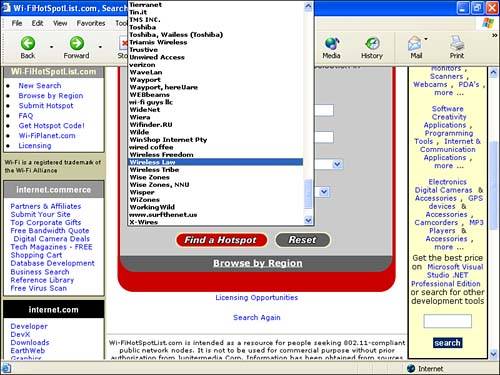
The HotSpotList network provider filter includes all the Wi-Fi networks you may have heard of, such as those listed in Appendix B. It also includes many "boutique" networks that you have probably never heard of. |
A nice feature of this search window is that it allows you to screen by network provider. When you open the search window, it is set to show all network providers, meaning that there is no network provider screening. However, you can select a network provider, such as Boingo Wireless, from the drop-down list, shown in part in Figure 11.3.
Figure 11.3. You can filter the HotSpotList search by network provider.
If you go back to the HotSpotList main search window and click the Browse by Region link, you can then choose a country to browse from the list.
Most of the countries shown in the list in Figure 11.4 are not further subdivided, but if you click on the United States link, you can then click a link for each state.
Figure 11.4. Each city within the state that has at least one hotspot is shown.
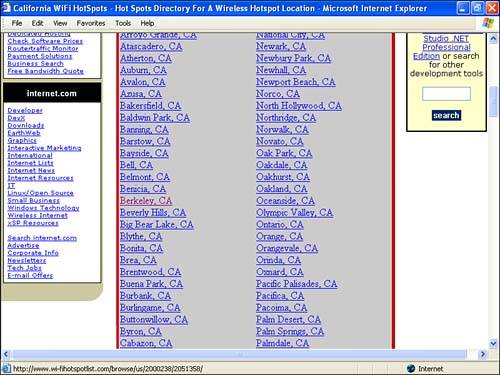
Drilling down the next step, if you click on a state link, you will see the cities within that state with hotspots (see Figure 11.4).
If you click on a link representing a city, you will then see the listings for that city. For example, Figure 11.5 shows the listings for my home town, Berkeley, California.
Figure 11.5. The HotSpotList listings for Berkeley, California.
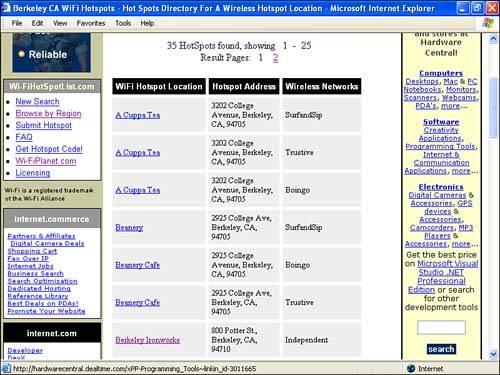
The detailed listing provides the address of the hotspot, the Wi-Fi network provider, and a link to more detailed information about the hotspot. For example, Figure 11.6 shows the listing for Pacific Ironworks, a local climbing gym that offers free Wi-Fi access.
Figure 11.6. Detailed listings provide further information about each hotspot.
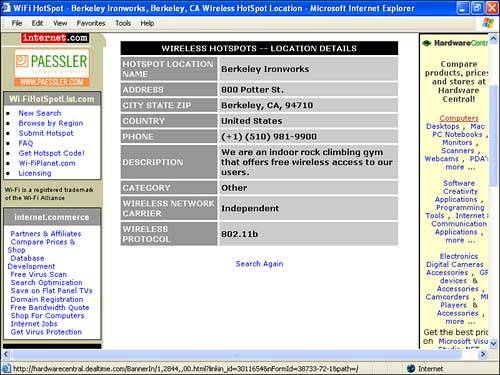
So if you ever plan to visit beautiful, downtown Berkeley, be sure to bring your mobile Wi-Fi device and visit Pacific Ironworks. Even if you don't do any climbing, you can certainly surf the Web!
Using the WiFi411 Directory
The main window of WiFi411, shown in Figure 11.7, doesn't provide a way to drill down by region (as HotSpotList does), but it does add a few useful bells and whistles of its own.
Figure 11.7. The WiFi411 main window.

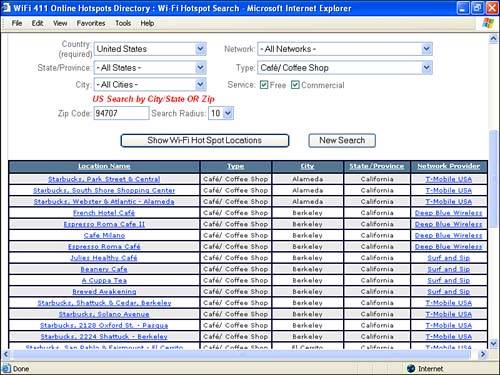
One of the most useful things about WiFi411 is that you can search by type of hotspot. Figure 11.8 shows some of the results of searching for a coffee shop in Berkeley.
Figure 11.8. Search results for a coffee shop in Berkeley.
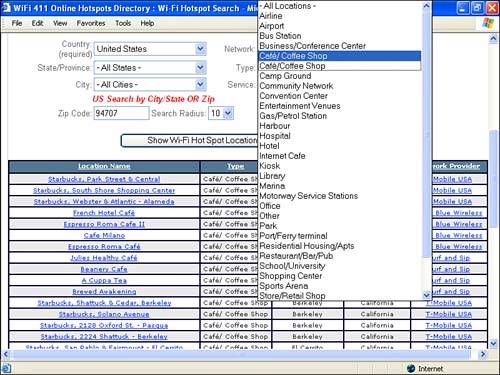
The type of search is determined by selecting a type from the drop-down list shown in Figure 11.9 (you can also choose All types, and not filter based on type).
Figure 11.9. You can search for a particular type of hotspot by searching from the list.
Perhaps the most useful feature of the site is the roaming feature. If you filter your search results using a Wi-Fi network provider, when the results are returned a Roaming check box is displayed (you can see this check box in Figure 11.10).
Figure 11.10. The Roaming check box appears when you select a network provider.

If you check the Roaming box and search again, the new results will show not only your network provider's hotspots but also hotspots that are served by any network with whom your provider has a roaming arrangement. (For more about roaming, see Chapter 12.) Very cool feature!
You may not want to roam; you may just want to stay home. Whatever your call, WiFi411 is one of the best hotspot locators of all!


