Setting Up Axis and Tomcat
Axis (http://xml.apache.org/axis/index.html) is an Apache XML open source project, and is the successor to Apache SOAP, one of the earliest SOAP implementations. Axis is a Java implementation of a SOAP server and client. Axis operates within an application server or servlet engine, and one of the most popular servlet engines is another Apache open source project, Tomcat (http://jakarta.apache.org/tomcat/index.html). Tomcat is the reference implementation of the Java Server Pages (JSP) 1.2 and Servlet 2.3 specifications. Axis can use just about any servlet engine, provided it supports version 2.2 (or greater) of the servlet specification.
Download Axis from http://xml.apache.org/axis/releases.html. The examples in this book use Axis 1.0.
Download Tomcat from http://jakarta.apache.org/builds/jakarta-tomcat-4.0/release/v4.1.12/. The examples in this book use Tomcat 4.1.
Tomcat Installation[5]
[5] This section assumes that you have already installed JDK 1.4, and that JAVA_HOME is pointing to it.
Unzip the Tomcat binary package into a convenient location. We will refer to this location as ${tomcat-base}. Change to the directory ${tomcat-base}\bin, and run the batch file startup.cmd to start Tomcat.
By default, Tomcat runs on port 8080. As Tomcat is starting, you should see information similar to the following:
[View full width]16/11/2002 13:36:29 org.apache.commons.modeler.Registry loadRegistry INFO: Loading registry information 16/11/2002 13:36:30 org.apache.commons.modeler.Registry getRegistry INFO: Creating new Registry instance 16/11/2002 13:36:31 org.apache.commons.modeler.Registry getServer INFO: Creating MBeanServer 16/11/2002 13:36:32 org.apache.coyote.http11.Http11Protocol init INFO: Initializing Coyote HTTP/1.1 on port 8080 Starting service Tomcat-Standalone Apache Tomcat/4.1.10 16/11/2002 13:36:43 org.apache.coyote.http11.Http11Protocol start INFO: Starting Coyote HTTP/1.1 on port 8080 16/11/2002 13:36:43 org.apache.jk.common.ChannelSocket init INFO: JK2: ajp13 listening on tcp port 8009 16/11/2002 13:36:43 org.apache.jk.server.JkMain start INFO: Jk running ID=0 time=10/90 config=C:\jakarta-tomcat-4.1.10\bin\..\conf\jk2.properties
Once Tomcat has started, test that it is working by pointing your browser to http://localhost:8080/. You should see something similar to Figure 8.1.
Figure 8.1. The Tomcat test page
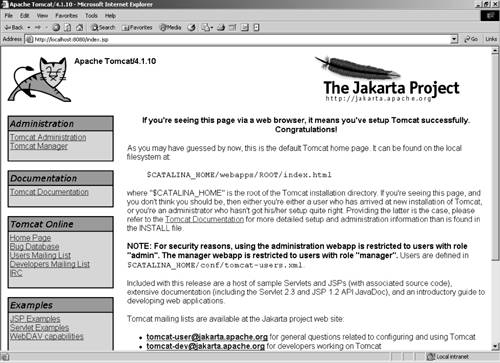
To shut down Tomcat, run the shutdown.cmd batch file.
Axis Installation
Unzip the Axis ZIP file into a convenient location. We will refer to this location as ${axis-base}. In the directory ${axis-base}\webapps, there is a directory called axis. This directory contains the Axis Web application, which can be copied over to the webapps directory of the servlet engine (Tomcat, in this case). So, copy ${axis-base}\webapps\axis to ${tomcat-base}\webapps.
To test the installation, point your browser to http://127.0.0.1:8080/axis/. You should see a page similar to Figure 8.2.
Figure 8.2. The Axis test page
Check whether AXIS is properly configured and that it can find all the components it requires by clicking on the Validate link. You should see a page like that shown in Figure 8.3.
Figure 8.3. The Axis configuration page
Note that the page should say that all the needed components can be found.
Now we are ready to deploy the Web service.
Deploying the ImageService Web Service
In Tomcat, each Web application has a WEB-INF subdirectory, in which class files or JAR files specific to the application are located. This is done so that each Web application can have a set of components (classes or JAR files) independent of other Web applications on the same instance of Tomcat. Axis will need to find our Web service class, so we need to bundle a JAR file and put it in our Web application's lib directory. This is done with the CompileDesktop target in the Ant build file:
<target name="CompileDesktop" depends="Init">
  <!-- Compile the Desktop source code -->
  <javac
    srcdir="${desktopsrc}"
    destdir="${desktopdest}"
    debug="off">
    <classpath>
      <pathelement path="${desktopdest}"/>
      <path refid="axis.path"/>
    </classpath>
  </javac>
  <jar jarfile="${desktoplib}\javaonpdas-desktop.jar"
       basedir="${desktopdest}"
       includes="**\*.class"
  />
  <copy file="${desktoplib}\javaonpdas-desktop.jar" todir="${axis-webapp}" />
  <copy file="${desktoplib}\javaonpdas-desktop.jar" todir="${proxy-webapp}" />
</target>
This target compiles all the source files under the desktop directory, creates the JAR javaonpdas-desktop.jar, and copies it to the Axis webapp directory. Stop Axis and start it again to make sure it has seen the new JAR file.
Now that Axis can see the classes that implement the Web service, we can deploy it.
Deploying the Web Service
In this step we make use of the deployment descriptor we prepared previously. Axis has a deployment client that we will use, which is org.apache.axis. client.AdminClient. The Ant build target DeployImageService performs this task:
[View full width]<target name="DeployImageService" depends="CompileDesktop"> <!-- Run the ImageService web service --> <java classname="org.apache.axis.client.AdminClient" dir="." fork="true" failonerror="true"> <classpath> <pathelement path="${desktopdest}"/> <path refid="axis.path"/> </classpath> <arg line="-l${webserviceadmin} ${desktopsrc}\com\javaonpdas\webservices\
Running this task will tell Axis about the new Web service:
[View full width]C:\JavaOnPDAs>ant DeployImageService Buildfile: build.xml Init: CompileDesktop: DeployImageService: [java] - Processing file .\Desktop\src\com\javaonpdas\ webservices\
If you see any exceptions thrown during this step, it is likely that Axis cannot find a class referenced in the deployment descriptor. If you do see such an exception, check that the JAR file is in the Axis webapp lib directory, and try restarting Axis and redeploying the Web service.
Testing
The first step is to check whether Axis thinks that the Web service has been properly deployed. Point your browser at the main Axis page (http://127.0.0.1:8080/axis/index.html), and click the View link. This will display all the Web services deployed on this server, as shown in Figure 8.4.
Figure 8.4. Web services deployed on Axis
Click on the WSDL link to display a description of the service and how to invoke it. While the WSDL may seem a bit daunting, it describes the operations (i.e., methods) of the Web service that can be invoked (getNames and getImage), the transport to use to invoke them (HTTP), and the location of the service (http://127.0.0.1:8080/axis/services/ImageService).
The next step is to test the Web service from a client. To do so from the desktop, the command line application com.javaonpdas.client.ImageServiceClient calls the Web service and calls both methods, displaying information about what is returned.
Using the Axis client (as we will see later, other SOAP clients have slight variations), the steps to calling a Web service are:
Set up the Call object. This involves telling the Call object the end point URL, the name of the service, and the method to call.
[View full width]Service service = new Service(); Call getNamesCall = (Call)service.createCall(); getNamesCall.setTargetEndpointAddress(endPointURL); getNamesCall.setOperationName( new QName("ImageService", "getNames")); getNamesCall.addParameter("extension", org.apache.axis.encoding.XMLType.XSD_STRING,ParameterMode.IN);
getNamesCall.setReturnType(XMLType.SOAP_ARRAY);
Invoke the call. In this case, the getNames method returns an array of String, so we need to cast the invoke method to String[].
String[] names = (String[])getNamesCall.invoke( new Object[] { ".png" });Process the response.
if (names == null) {
   System.out.println("The array of names is null");
}
else {
   System.out.println("Image names:");
   for (int i=0; i<names.length; i++)
      System.out.println("  " + names[i]);
}
Catch exceptions during these calls. Axis will throw an AxisFault exception if something goes wrong, so we need to make sure we catch it. In this case, we will just send it to System.out.
catch (AxisFault fault) {
   System.err.println("Generated fault: ");
   System.out.println("  Fault Code   = " + fault.getFaultCode());
   System.out.println("  Fault String = " + fault.getFaultString());
}
The Ant build file has a target to run this test client, called RunImageServiceClient. It appears like this:
<target name="RunImageServiceClient" depends="CompileDesktop">
  <java
     classname="com.javaonpdas.client.ImageServiceClient"
     dir="."
     fork="true"
     failonerror="true">
     <classpath>
       <pathelement path="${desktopdest}"/>
       <path refid="axis.path"/>
     </classpath>
     <arg line="${testendpoint}"/>
  </java>
</target>
Run the test client by typing ant RunImageServiceClient on the command line:
C:\JavaOnPDAs>ant RunImageServiceClient
Buildfile: build.xml

Init:

CompileDesktop:

RunImageServiceClient:
     [java] Image names:
     [java]   kookaburra.png
     [java]   kookaburra-bw.png
     [java]   kangaroo-bw.png
     [java]   kangaroo1.png
     [java]   kangaroo2.png
     [java]   kangaroo3.png
     [java] Image returned is kangaroo1.png
     [java]   image date is Mon, 04 Nov 2002 21:08:50
     [java]   image is 1458 bytes long

BUILD SUCCESSFUL
Total time: 7 seconds
Monitoring HTTP Traffic
Axis comes with a very useful debugging tool, called TcpMon. TcpMon allows you to view the request sent from the client and the response received from the server. The way it works is to create a TCP/IP "tunnel" between a dummy port to which the client is pointed, and the real port on which the server is running. For example, we can tell TcpMon to listen on port 5555 and to connect clients to port 8080 (where Tomcat listens), and to display all traffic going between the two ports, such as our Web service requests and responses.
To start TcpMon, the Ant build file has a target called RunTcpMon. It starts on the port ${test-axis-port}, which is set to 5555. The Ant target looks like this:
<target name="RunTcpMon">
  <java
     classname="org.apache.axis.utils.tcpmon"
     dir="."
     fork="true"
     failonerror="true">
     <classpath>
       <path refid="axis.path"/>
     </classpath>
     <arg line="${test-axis-port} localhost ${axis-port}"/>
  </java>
</target>
To start it, type ant RunTcpMon on the command line. When it starts, TcpMon looks like the window shown in Figure 8.5.
Figure 8.5. The TCPMonitor window
To tell the ImageServiceClient that we want to connect to port 5555, make sure that the Ant build file has the following value for the testendpoint property:
<property name="testendpoint"
value="http://localhost:${test-axis-port}/axis/servlet/AxisServlet"/>
When you run the client, you should see TcpMon display the request and response, as shown in Figure 8.6.
Figure 8.6. The TCPMonitor window showing an example session
The ImageServiceClient sends two separate requests to the server. The first is to retrieve the list of image names, and it looks like this:
[View full width]POST /axis/servlet/AxisServlet HTTP/1.0 Content-Type: text/xml; charset=utf-8 Accept: application/soap+xml, application/dime, multipart/related, text/* User-Agent: Axis/beta3 Host: localhost Cache-Control: no-cache Pragma: no-cache SOAPAction: "" Content-Length: 446 <?xml version="1.0" encoding="UTF-8"?> <soapenv:Envelope xmlns:soapenv="http://schemas.xmlsoap.org/soap/envelope/" xmlns:
And the response looks like this:
[View full width]HTTP/1.1 200 OK Content-Type: text/xml; charset=utf-8 Date: Sat, 07 Dec 2002 12:21:33 GMT Server: Apache Coyote/1.0 Connection: close <?xml version="1.0" encoding="UTF-8"?> <soapenv:Envelope xmlns:soapenv="http://schemas.xmlsoap.org/soap/envelope/" xmlns:
Undeploying the Web Service
To undeploy the Web service, we again use the Axis administration client. The Ant build file defines a target to undeploy the image service, called UndeployImageService. The target is defined as follows:
[View full width]<target name="UndeployImageService"> <!-- Undeploy the ImageService web service --> <java classname="org.apache.axis.client.AdminClient" dir="." fork="true" failonerror="true"> <classpath> <pathelement path="${desktopdest}"/> <path refid="axis.path"/> </classpath> <arg line="-l${webserviceadmin} ${desktopsrc}\com\javaonpdas\webservices\
Typing the command ant UndeployImageService should get the following response:
C:\JavaOnPDAs>ant UndeployImageService
Buildfile: build.xml

UndeployImageService:
     [java] - Processing file .\Desktop\src\com\javaonpdas\webservices\undeploy-
ImageService-AXIS.wsdd
     [java] - <Admin>Done processing</Admin>

BUILD SUCCESSFUL
Total time: 14 seconds
To verify that Axis has indeed removed the service, point your browser back to the main Axis page at http://127.0.0.1:8080/axis/index.html and click on the View link. The ImageService should not be listed as a service that Axis knows about. Note that the undeploy command merely removes the Web service definition from Axis?it does not remove the JAR file we put in the webapp lib directory.


