28.2 Building the System
With all the components in hand, it's time to start building the system. If you've built systems before, you may be able to complete a simple system in a couple of hours, and even a complex system should take only an evening to build. If this is your first system, plan to assemble, configure, and test it over a weekend. Choose a well-lighted work area (the kitchen table is traditional) and lay out all of your components. We use old towels to protect the surface of the table. Observe anti-static precautions throughout.
|
28.2.1 Step 1: Prepare the Case
If you are recycling an old case, first remove all components and clean the case thoroughly, using a soft brush and vacuum cleaner to remove dust and a cleaner such as Fantastic or Formula 409 to remove grime. We sometimes take really filthy cases outside and literally hose them down (after first removing the power supply). If you do that, use a hair dryer to make sure the case is dry before you begin installing components. If you're not in a hurry, it's better still to let it sit a week or two and dry naturally. If the power supply has been in use for some time, it will likely have accumulated a lot of dust inside it. Do your best to remove dust using a brush and compressed air (the air hose at the gas station works well), but do not remove the cover from the power supply. Whether the case is new or old, check it thoroughly for sharp edges and burrs and file down any you find. That saves a lot of bloodshed later. Once the case is clean, dry, and defanged, proceed as follows:
Verify that all components are present, including the power cord and the package of small mounting hardware and other incidentals. If the case uses drive rails, there should be sufficient rails to mount a drive in each bay.
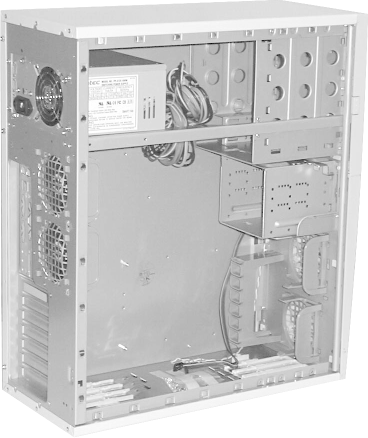
Remove the cover(s) and set them aside, as shown in Figure 28-1. If it is not obvious how to do so, see the manufacturer's instructions. You want the case wide open while you work on it. If the front bezel is removable, you may or may not need to remove it to mount drives. Most removable front bezels simply snap on and off bottom-first, but some are secured with screws. Some cases have a removable motherboard tray. If yours does, remove it also.
Figure 28-1. The Antec SX840 mid-tower case with side panel removed (note the two standard 80mm fans at rear and positions for two optional 80mm fans at front)
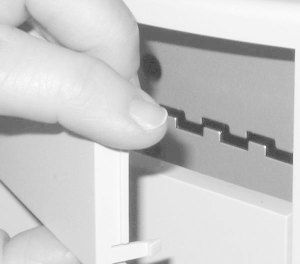
Remove all drive bezels from the front of the case to give you easy access later when you're installing drives. Depending on case design, you may have to remove the front case bezel before you can remove drive bezels. Most cases use plastic drive bay bezels, shown in Figure 28-2, which snap into place using a small hook on each side to secure them to the chassis. To remove these bezels, use a small flat-blade screwdriver to bow them slightly until the hooks are clear and then pull them out. Some cases use metal drive bay bezels, which are secured with a screw on each side.
Figure 28-2. Removing a drive bay bezel with the main front bezel still in place (an anti-RFI plate is visible behind the bezel)
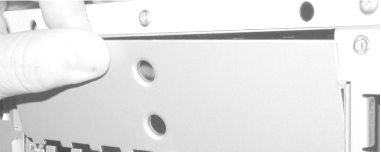
Most cases have metal plates at the front of each drive bay, immediately behind the bezel, to shield against RFI. On some cases, these plates are discrete pieces, mounted with screws or spring-clip retainers. On inexpensive cases, the plates are often stamped as a part of the chassis and may have to be twisted out, as shown in Figure 28-3, sometimes using pliers or a screwdriver. Doing that may leave a sharp barb. File it down now or it will cut you later. Make sure to vacuum up metal filings so that they can't short something out later. Cases often arrive with the plates already removed from one floppy drive bay and one externally accessible 5.25-inch drive bay (for a CD or DVD drive). You need not remove the metal plates from positions where you will not be mounting externally accessible drives. To make the system easier to work on, we sometimes remove all anti-RFI plates, risking the wrath of the FCC.
Figure 28-3. Removing an anti-RFI plate with the main front bezel removed
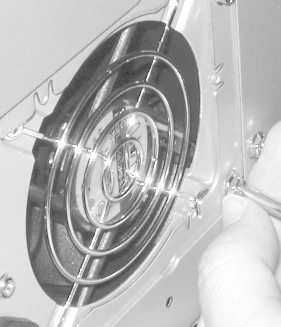
If you order a case and power supply together, the case usually arrives with the power supply installed. If so, verify that all screws securing the power supply to the case are tight and that the voltage selector (if present) is set to the proper input voltage. If you order a power supply separately, install it by aligning any locking tabs and slots, sliding the power supply into position, and securing the screws. Manufacturers often use cable ties to secure the wires coming from the power supply in a neat bundle. If yours did, carefully nip the cable ties with your diagonal cutters to free the wires. Better power supplies come with spare cable ties that you can use later to dress the wires. Electrical tape or the yellow plastic ties supplied with garbage bags work just as well. (See Figure 28-4 and Figure 28-5.)
Figure 28-4. Sliding the power supply into position, making sure to align locking slots and tabs
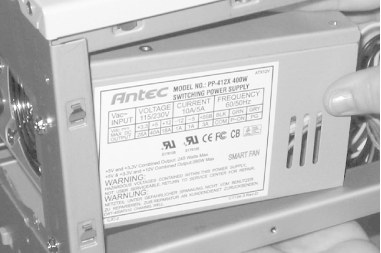
Figure 28-5. Inserting the screws (typically four) to secure the power supply

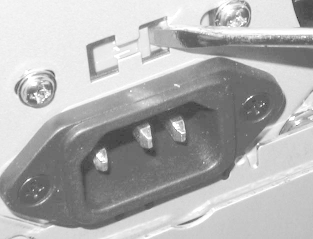
Many power supplies are adjustable for 110/115 volts or 220/230 volts. Make sure to set the power supply for the correct input voltage. If the voltage selection switch is set to 220/230V and your mains power is 110/115, the system won't boot but no damage occurs. But if the voltage selection switch is set to 110/115 and your mains power is 220/230, you will destroy your motherboard, processor, memory, and drives the moment you apply power to the system. Some power supplies automatically sense input voltage and adjust themselves accordingly. If there is no voltage selector switch on your power supply, check the manual rather than assuming that it is auto-sensing. (See Figure 28-6.)
Figure 28-6. If the power supply has a voltage selector switch, make sure to set it correctly
If it has not already been done, install the power switch and connect the main power cables.
Traditional AT power supplies for desktop cases have a built-in power switch (the "big red paddle switch"), and require no configuration.
Power supplies designed for AT mini-tower cases have four main power leads (usually blue, white, brown, and black) with spade lug connectors that attach to the power switch on the front of the case. If they are not already connected, connect them, being very careful to orient them properly. Note that these wires carry mains voltage; connecting them incorrectly may short the power supply and destroy it. Use electrical tape to insulate each of the four connections.

Always disconnect the main power cord from the wall receptacle and/or the power supply before you work on the power switch.
In ATX cases, the power switch has only one light-gauge two-wire cable coming from it. You will connect this cable to the power switch header pins on the ATX motherboard during a later assembly step.
If the case has an LED to indicate CPU speed, change the jumpers on the back of the LED assembly to cause it to display the proper CPU speed. This step is entirely optional because the LED display is informational only, and has no effect on system operation. For years we had a Pentium III/550 system that displayed the CPU speed as 6 MHz, the default for that case, because we lost the instructions that told us how to change the display.
Install supplemental case fan(s), if necessary. Not all cases can accept supplemental fans, and not all systems require them. Minimally configured systems with basic processors ordinarily do not require supplemental fans. Heavily loaded systems?those with multiple hard drives, fast (or dual) processors, most or all expansion slots occupied, and so on?should have supplemental fans installed. Fans are available in several sizes, including 60, 70, 80, 90, and 120 mm. Some cases have multiple fan mounting positions which require different fan sizes.
Ensuring Proper Airflow
If you install supplemental fans, make certain they blow in the proper direction?aiding the main power supply fan rather than fighting it. We have seen processors destroyed by overheating in tightly sealed systems with supplemental fans blowing in the wrong direction.
Standard AT power supplies and some ATX power supplies blow out from the power supply, exhausting air from within the case. For these systems, install supplemental fans to push air into the case.
Some ATX power supplies suck air into the power supply, pressurizing the case. For these systems, install supplemental fans to draw air out of the case.
Most supplemental fans can be installed to push air in either direction, either by simply reversing the fan assembly or by throwing a small switch on the fan itself. Some cases are supplied with supplemental fan(s) installed. Do not assume that these fans are necessarily configured correctly. We have seen more than one such case with power supply and supplemental fans both configured to push air into the case, or both configured to draw air out of it. In a typical case, which has many openings for airflow, this may not be a problem. But in a well-sealed case, where the only airflow is through the fans, having the fans working against each other can result in rapid overheating.
Install the feet on the case. Feet are usually plastic devices an inch or so in diameter and a quarter-inch thick. They may be secured to the case bottom with a bolt and nut, with small plastic spreaders that are inserted from inside the case, or simply by peel-and-stick adhesive. In all cases, the feet are designed to prevent scarring of the surface that the case rests upon. Some cases have vents in the bottom of the case, and must have the feet installed for proper cooling.
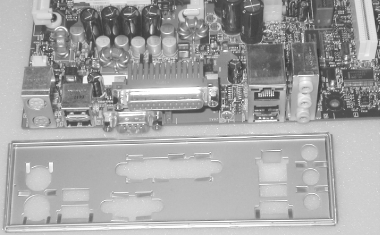
Most ATX cases are supplied with a standard I/O template already in place, which may or may not be suitable for your motherboard. Remove the motherboard from its antistatic bag and compare the I/O panel on the back of the motherboard with the installed template, as shown in Figure 28-7. If the template that comes with the case is appropriate for the motherboard, proceed to the next step.
Figure 28-7. A motherboard I/O panel and matching I/O template
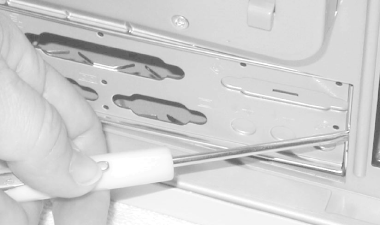
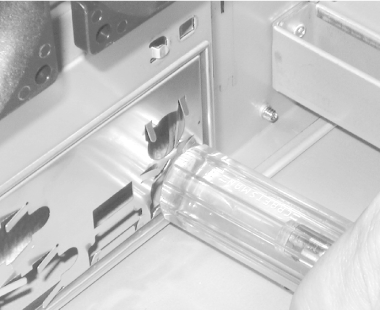
The Antec SX840 case comes with a standard I/O template installed, but the holes are in the wrong locations for the motherboard. That means we need to remove the I/O template that came with the case and install the I/O template that was supplied with the motherboard. To remove a template, press gently from the outside of the case until the template snaps out. Some templates seat very snugly, so you may need to use a small screwdriver to pry one edge loose before you can snap the template out, as shown in Figure 28-8. Be careful not to bend the template as you remove it. They are made of thin metal that bends easily, and you may want to keep the standard template in case you ever want to install a different motherboard in this case.
Figure 28-8. If necessary, use a small flat-blade screwdriver to pop the template
Install the new I/O template supplied with the motherboard from inside the case, and press gently toward the outside of the case until the template snaps into place, as shown in Figure 28-9. I/O templates can be difficult to install because they are made of easily bent metal and yet may require substantial pressure to seat. We generally get one edge aligned properly and then press gently until the template seats. If you are sure the template is aligned but cannot get it to seat, use the handle of a screwdriver on alternate corners until you feel the template snap into place, as shown in Figure 28-10. If you do not have the correct I/O template, contact the motherboard or case manufacturer to obtain one. Running the system without an I/O template installed risks disrupting airflow.
Figure 28-9. Inserting the I/O template from inside the case and pressing gently until it snaps into place
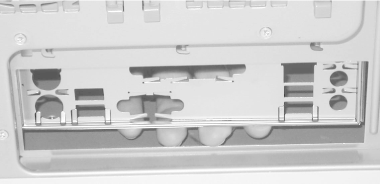
Figure 28-10. Using the handle of a screwdriver to gently press a template that refuses to seat
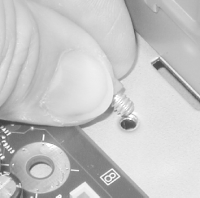
Lay the motherboard flat in the case to determine which positions in the motherboard tray require stand-offs. Screw brass stand-offs into those positions, as shown in Figure 28-11, and verify that each motherboard mounting hole has a corresponding stand-off installed. Also verify that no extra standoffs are installed, which might short the motherboard. Some cases use all mounting holes; others use a combination of holes and slots. If yours uses slots, lay aside the proper number of white nylon stand-offs, which you will later snap into the bottom of the motherboard for each slotted position. Don't do that now, however, because it prevents the motherboard from lying flat while you install the CPU and RAM. If you need to remove a nylon stand-off from the motherboard, use your needlenose pliers to squeeze the prongs on the front side of the motherboard gently while pulling from the back side of the motherboard.
Figure 28-11. Installing a brass stand-off spacer for each motherboard mounting hole
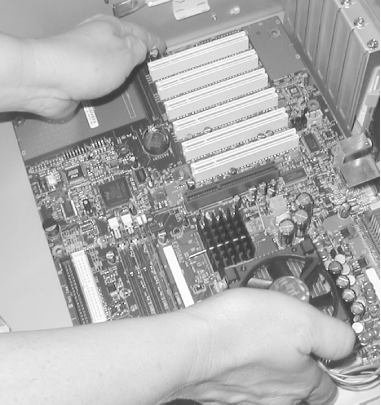
After you have installed a brass stand-off spacer for each motherboard mounting hole, slide the motherboard into position and verify that all mounting holes line up with the stand-off spacers, as shown in Figure 28-12. Don't install any screws yet, though. We still need to install the processor and memory, and that's much easier to do with the motherboard outside the case.
Figure 28-12. Comparing motherboard mounting holes against chassis stand-off positions to make sure everything lines up
28.2.2 Step 2: Configure the Motherboard
Motherboards differ greatly in how much configuration they require and exactly how it is done. Most recent motherboards use only one or two jumpers, or are configured through software during BIOS Setup. Older motherboards often have dozens of jumpers to set such things as CPU voltage, FSB speed, and CPU multiplier. Refer to your motherboard manual to determine the proper settings for your processor and memory, and make any required changes before proceeding. The Intel motherboard we're using has only one setup jumper, which we leave as is for the moment.
28.2.3 Step 3: Install the Processor
Before you begin processor installation, place the motherboard flat on a firm surface, padding it with the antistatic foam or bag supplied with it. Installing the CPU (and memory) may require substantial force, so it's important to ensure that the motherboard is fully supported to avoid cracking it.
|
To install the processor, ground yourself to dissipate any static charge, and then take the following steps:
Remove the processor from its packaging, and examine it closely to make sure that no pins are bent. A new processor should never have bent pins. If one or more pins are bent, that's certain proof that you were sold a used or repackaged processor. Do not attempt to straighten bent pins. Return the processor and insist on a replacement processor in original factory shrink- wrap.
The processor fits a Zero Insertion Force (ZIF) socket on the motherboard. To prepare the socket to receive the processor, lift the small lever on one side of the socket to the vertical position.
Examine the socket to determine which corner is Pin 1. Pin 1 may be indicated by a small diagonal cutout on the socket, by a dot or arrow, by a number 1 printed on the socket or motherboard itself, or by other similar means. Once you have located Pin 1 on the socket, locate Pin 1 on the processor, which is also marked clearly.
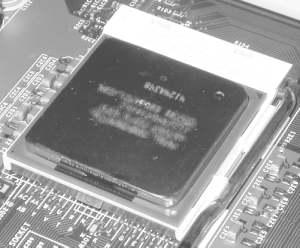
Carefully align the processor with the socket, making sure that Pin 1 on the processor corresponds to Pin 1 on the socket, and then drop the processor into place, as shown in Figure 28-13. We say "drop" rather than "press" because the processor should seat fully in the socket with little or no resistance (that's why it's called "Zero Insertion Force"). If you encounter resistance, either the pins are misaligned or the ZIF lever is not fully vertical. Don't force the processor into the socket because those tiny pins are very easy to bend, which effectively destroys the processor. When the processor is seated properly, its bottom should be flush against the top of the socket.
Figure 28-13. With the ZIF arm fully raised, carefully aligning the processor, making sure Pin 1 on the CPU corresponds to Pin 1 on the socket, and dropping the processor into place
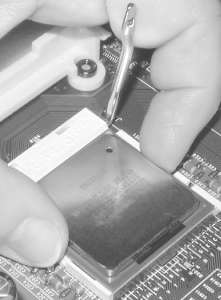
With the processor fully seated, pivot the ZIF lever down until it is parallel to the motherboard to lock the processor into place, as shown in Figure 28-14. You may encounter resistance while closing the lever, which is normal. Continue pressing the level down until it snaps into place. Don't press too hard, though. If the lever seems not to want to seat, you may have the processor misaligned.
Figure 28-14. With the processor fully seated, lowering the ZIF socket arm until it snaps into place parallel to the motherboard and is secured by the plastic latch
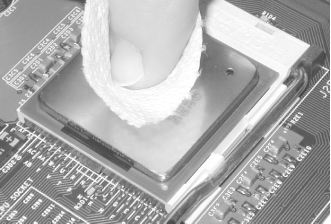
Before installing the heatsink/fan unit, use a paper towel to polish the top of the processor to a mirror-like surface to remove fingerprints and other residue, as shown in Figure 28-15. Intimate contact between the processor and heatsink is critical to ensure proper cooling. Even a fingerprint can interfere with heat transfer.
Figure 28-15. Polishing the processor carefully before applying thermal compound
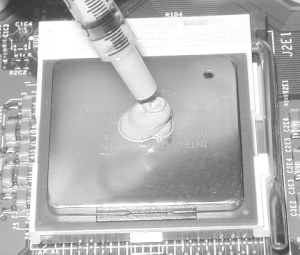
Most retail-boxed Intel Pentium 4 processors include a heatsink/fan unit and a premeasured amount of thermal compound in a syringe (some substitute a thermal pad on the heatsink base for the syringe of thermal compound). After you have polished the top of the processor, use the supplied syringe to deposit the full amount of supplied thermal compound in a small pile at the center of the processor, as shown in Figure 28-16. Although it appears that using all of the supplied thermal compound will make a mess, you need to apply all of it to ensure proper cooling.
Figure 28-16. Applying the supplied thermal compound as a small pile at the center of the processor
Make sure the base of the heatsink (the part that comes in contact with the processor) is clean and polished. Lower the heatsink/fan unit gently into position, as shown in Figure 28-17. Keep the heatsink as level as possible as you lower it into contact with the processor. The goal is to press the heatsink gently into place, thereby spreading the thermal compound evenly over the surface of the processor to ensure good heat transfer. If you tilt the heatsink as you're moving it into place, most of the thermal compound may be shifted to one side of the processor. When the heatsink/fan unit is properly in place, it should be sitting level within the heatsink retention mechanism on the motherboard.
Figure 28-17. After applying thermal compound, aligning the heatsink squarely on top of the processor
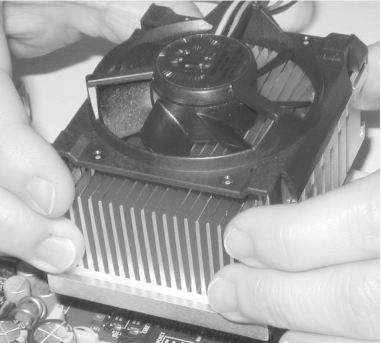
The heatsink/fan unit includes two spring-steel retaining brackets that clamp the heatsink into tight contact with the processor. Align each bracket so that the central hole fits over the corresponding tab on the heatsink/fan retention mechanism, and then use both thumbs to press the two ends of the retaining bracket until they snap into place against the heatsink retention mechanism, as shown in Figure 28-18. It may require substantial force to seat the bracket, so don't be afraid to press hard. With some brackets, it's easier to seat one side first while it's not under tension and then press down the opposite side until it snaps into place. Make certain that both ends of both brackets are secured, as shown in Figure 28-19. You don't want the heatsink/fan to come loose, particularly if the motherboard is mounted vertically.
Figure 28-18. Snapping both heatsink support brackets over the matching connectors on the heatsink retention mechanism
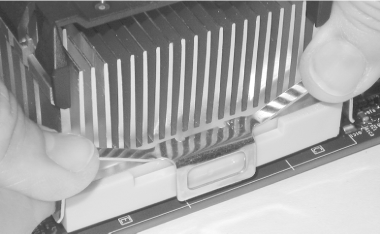
Figure 28-19. When the retaining brackets are installed properly, the hole on each end snaps into the corresponding tab on the heatsink retention mechanism
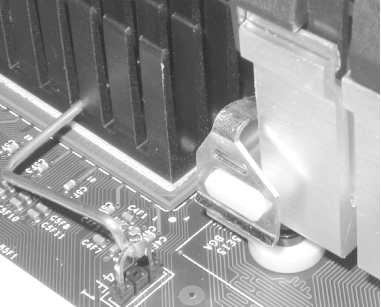
The Pentium 4 CPU fan connects to a motherboard power header, as shown in Figure 28-20. Most motherboards include two or more such power headers, but those headers are not fully interchangeable. All of them supply the same voltage on the same pins, and any can be used to power any fan, but the CPU fan header is designed to report the speed of the CPU fan to the motherboard, where that information can be used by a hardware monitoring utility. Connect the CPU fan header to the specific motherboard power header intended for it. Other motherboard power headers can also report fan speeds to the motherboard, and are intended to power supplemental chassis fans .
Figure 28-20. Connecting the heatsink fan power lead to the motherboard CPU fan header
28.2.4 Step 4: Install the Memory
Memory slots are always numbered, usually beginning with "0", but sometimes with "1". Always populate the memory slots from lowest to highest. That is, slot 0 should be occupied before you install a module in slot 1; both slots 0 and 1 should be occupied before you install a module in slot 2, and so on. This section illustrates installing PC133 SDR-SDRAM DIMMs in a D845WNL motherboard. Other modern memory modules?DDR-SDRAM DIMMs and Rambus RIMMs?are very similar physically and install the same way. For information about installing older-style memory, see Chapter 5.
To install the memory module, first pivot the plastic retaining arms on the DIMM socket away from the socket toward the motherboard. Align the keying notch(es) in the DIMM module with the corresponding keys in the memory slot, and the module itself with the slots in the side supports. These keying notches assure that you cannot install the proper module backward (because the keying notches are offset) and that you cannot install the wrong type of module (because SDR-SDRAM, DDR-SDRAM, and RDRAM all use different keying notch positions).
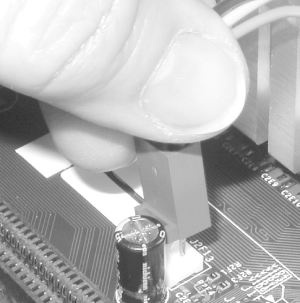
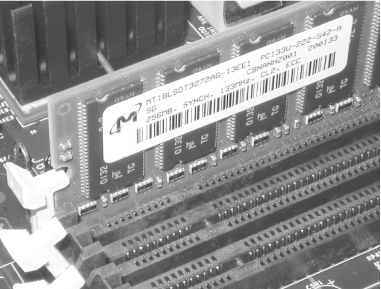
Once you have the module aligned with the slot, place one thumb on each end of the module and press straight down until the module seats in the slot, as shown in Figure 28-21. As the module seats, the retaining arms should be forced to the vertical position, as shown in Figure 28-22. If that doesn't happen, it usually means that the module isn't fully seated or that the retaining mechanism is defective. If you're sure the module is fully seated and the arms are still spread, move them inward yourself to lock the module in place.
Figure 28-21. Aligning the memory module and pressing down with both thumbs to seat it
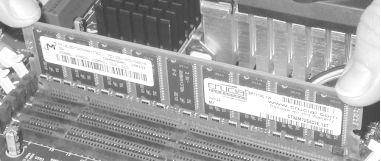
Figure 28-22. When the memory module is seated properly, the plastic retaining arm on each end automatically pivots into place, locking the module into the slot
If you have additional memory modules, install them in the same fashion. After you finish configuring the motherboard and installing processor and memory, lay the motherboard aside for the time being. Use the antistatic bag or foam packaging that came with the motherboard to prevent damage.
28.2.5 Step 5: Prepare Drives for Installation
Several steps may be required before installing some drives, including setting configuration jumpers, installing mounting hardware, and installing supplemental cooling. Some of those steps are difficult or impossible to perform after the drive is installed in the system, so plan ahead. If you are installing several drives, make a written plan of how each drive needs to be configured to ensure that there are no conflicts. As you configure each drive, check what you're doing against the list and mark off each drive as you finish it.
|
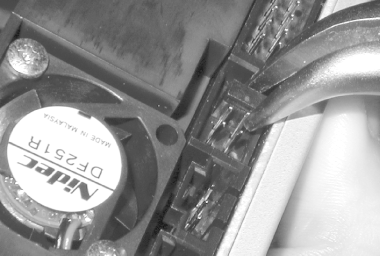
In turn, remove each drive from its packaging and set jumpers as necessary to configure it, as shown in Figure 28-23. Leave unused jumper blocks connected to only one pin, which has the same effect as removing the jumper block entirely, but leaves that block conveniently available for future use.
Figure 28-23. Using needlenose pliers to set the drive select jumper on the rear panel of the Plextor PlexWriter to Master
- Standard (parallel) IDE/ATAPI drives
-
For each drive, set the jumper to designate the drive as Master, Slave, Only, or Cable Select, as appropriate. Some ATAPI drives, particularly tape drives, have jumpers to set other options, such as read-while-write or hardware compression. Set these jumpers as recommended by the documentation. A basic system uses one hard disk set as Primary Master and one CD-ROM, CD-RW, DVD-ROM, or writable DVD drive as Secondary Master. If your system has more IDE/ATAPI devices, see Chapter 14 for more information.
- SATA drives
-
SATA drives require no master/slave jumpering. Each SATA drive connects to a dedicated SATA interface connector on the motherboard or an adapter card. In some circumstances, you may want your SATA drives to emulate a parallel master/slave arrangement. If so, see the manuals for the drives and SATA interface to determine how to configure the devices in emulation mode.
- SCSI drives
-
Some SCSI drives require setting jumpers or DIP switches to specify a unique SCSI ID for that drive and whether it is terminated. By convention, the SCSI host adapter is assigned SCSI ID 7. ID 0 is reserved for the boot hard disk, and ID 1 for a secondary hard disk. IDs 2 through 6 are available for use by other devices such as tape and optical drives. Make sure that the last physical device on each SCSI bus (and only the last device) is terminated. For most drives, you enable termination by setting a jumper or DIP switch, but some drives use a small resistor pack instead. Many SCSI drives have numerous other settings?e.g., parity, termination power, and delayed motor start. Set jumpers for these options as recommended by the documentation. If the host adapter and drives are SCAM-compliant (SCSI Configured AutoMagically), SCAM sets ID and termination automatically, but it does no harm to set parameters manually even on a SCAM-compliant system.
- Floppy disk drives
-
Standard floppy disk drives require no configuration.
Decide where to mount each drive, considering the following issues:
- Convenient access
-
Place the externally accessible drives you use most often where it is easy to reach them. For example, for a tower unit that sits on the floor, place the CD/DVD drive in an upper drive bay.
- Drive spacing
-
If you have more drive bays than drives, use that extra space to separate the drives, which improves cooling and makes it easier to connect cables or change jumpers.
- Heat production
-
Some drives, such as CD/DVD writers and high-speed hard drives, generate a lot of heat?hard drives constantly and CD/DVD burners intermittently. Heat rises, so install heat-producing drives above other drives whenever possible. This system has only an IDE hard drive and a CD writer, so drive placement is not critical.
- Cable routing
-
We've learned this one the hard way more than once. Make sure your cables will reach the positions where you install the drives. This is usually not an issue with desktop or mini/mid-tower cases, but with a full-tower case it's easy to install two drives that must share the same cable so far apart that the cable won't reach. It's also less a problem with SCSI or SATA cables than with standard ATA cables, which are limited to 18 inches. Take care even with SCSI, however. You may find that your SCSI cable is more than long enough, but the drive connectors are too close together to span two drives installed far apart.
- Physical stability
-
If possible, avoid installing many heavy drives high in the case. The concern is not so much to prevent the case from tipping because most cases are very stable. But tower systems with many heavy hard drives (and the power supply) all installed near the top of the case are very awkward to manipulate because all of the weight is at one end.
If the drive is a 3.5-inch form factor and will be installed in a 5.25-inch bay, install the drive in a chassis adapter.
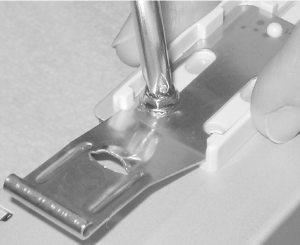
Attach any required mounting hardware, such as drive rails, to the drive. Note that some cases have multiple locations where drives can be installed that use different mounting methods, so it's important to decide where each drive will be mounted before you attach the mounting hardware to it. In some cases, drives are mounted directly to the chassis by driving screws through holes in the chassis and into the drive. Other cases, including the Antec SX840, use mounting rails, as shown in Figure 28-24. You will usually find that the drive can be secured by four or more screws on each side. We normally use only two on each side?one front and one back?unless the system will be moved frequently or is subject to vibration. In that case, we use four screws on each side and secure them with a dab of nail polish to prevent them from vibrating loose. That's not necessary for this system, so we mount the rails with two screws per side. If your case uses plastic drive rails, make sure that at least one screw connects the drive itself to the metal grounding strap on the rail.
Figure 28-24. Securing the drive rails to the drive, making sure that the drive is electrically grounded to the chassis
For high-performance disk drives (some 7,200 RPM and all 10,000 and 15,000 RPM drives), install supplementary drive cooling to prevent overheating. Small supplementary fans (so-called "drive coolers") are adequate for most 7,200 RPM drives. For 10,000 and 15,000 RPM drives, we recommend using a full bay cooling unit such as the PC Power & Cooling Bay-Cool, which integrates a 3.5- to 5.25-inch chassis adapter with two fans and a filtered inlet. The Seagate Barracuda ATA IV drive is a very cool-running drive, and requires no supplementary cooling.
If possible, connect the data cable to the drive while the drive is still outside the case, as shown in Figure 28-25. If you install the drive in the chassis first, it's much harder to make sure the cable is aligned properly. If more than one drive will connect to a cable, it's generally best to connect the cable to the "difficult" drive before you install it and make the connections to the more readily accessible drives after they're installed in the chassis. This system has only two drives, each of which has its own cable, so we can install both cables before installing the drives. When you install the cable, make sure the colored stripe on the cable corresponds to Pin 1 on the drive connector. Line the cable up, making sure that it is not offset by a row or column of pins, and then press it firmly into place. We'll connect the power cable later.
|
Figure 28-25. Connecting the data cable to the drive before installing the drive in the chassis (this drive, a Plextor PlexWriter, uses a standard ATA cable)
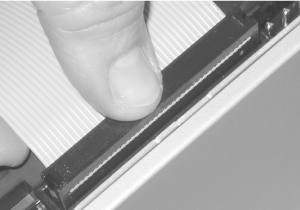
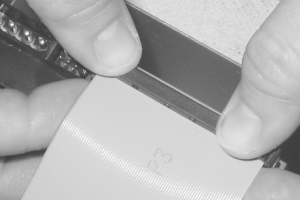
Figure 28-26. Connecting the data cable to the Seagate Barracuda ATA V hard drive (this drive uses an Ultra ATA cable, which is easily discernible from a standard ATA cable by the finer wires)
28.2.6 Step 6: Install the Floppy Disk Drive
Modern floppy disk drives (FDDs) have no user-configurable settings. All FDDs are set in hardware as B:. Whether the drive appears to the system as A: or B: depends upon which cable position you attach the FDD to and how the BIOS is configured. Install the FDD, noting the following:
If the case has externally accessible 3.5-inch drive bay(s), use one of them for the floppy disk drive, saving the 5.25-inch bays for other purposes. If for some reason you must install the FDD in a 5.25-inch bay, you'll need to purchase an adapter for $5 or so.
A standard FDD cable has three connector positions, one on each end and one in the middle. Between the middle and one end connector, a portion of the cable is twisted. The two connectors separated by the twisted portion are used to connect drives. The other end connector attaches to the motherboard FDD interface. Attaching the FDD to the connector on the far side of the twist makes that FDD A:. Connecting it to the middle connector (before the twist) makes it B:. Some cables have five connectors, with two connectors (one header-pin and one edge-card) at each drive position. These dual connectors can be used interchangeably, depending on which fits the drive. The edge-card connector was used by 5.25-inch FDDs, which are obsolete, but many adapters that allow a 3.5-inch FDD to be installed in a 5.25-inch drive bay use the edge-card connector.
Most recent BIOSs support only one FDD, and have a BIOS setting that allows drives A: and B: to be swapped. This is important if the FDD cable supplied with your motherboard has only two connectors and no twist, as do some we have seen. In that situation, you can use the supplied cable to connect the drive, but make sure to use BIOS Setup to swap A: and B: so that the installed drive appears as A:.
Once you have determined where to install the drive and which connector you will use, slide the drive into the bay. Some drives and cases require that the FDD be installed from the front of the case, and others from the back. FDDs are inexpensive devices, and manufacturers don't spend much money on amenities such as shrouded connectors, so it's often easier to connect the data and power cables to the drive before you slide it into the bay.
Although power cables are keyed, it can be difficult to line up the connection after the drive is installed. If the power cable is too short to allow connecting it to the drive while the drive is outside the case, you will have to connect it after the drive is installed. Depending on where the drive is mounted, it may be difficult to see the connector with the drive in place. If that's true for your system, connect the power cable to the drive temporarily to determine how it should be oriented?e.g., "red wire toward the data cable."
28.2.7 Step 7: Install Other Drives
How you mount hard disk drives, tape drives, and optical drives varies from case to case, and may depend on the drive itself and whether the drive is to be mounted in an externally accessible bay. Some cases use multiple mounting methods, as follows:
- Direct attachment
-
With typical mini- and mid-tower cases, slide the drive into the bay and secure it with screws to the bay itself. Depending on the particular case and drive, you may need to slide the drive into place from the front or from the back. Use the screws provided with the drive to secure the drive. If no screws were provided with the drive, make sure that the screws you use not only have the proper thread, but also are of the proper length. A too-long screw can project inside the drive enclosure and damage a circuit board or other component. Four screws?front and back on each side?are adequate, although there may be room to install as many as eight. Although it is not recommended practice, we have sometimes secured a drive with only two screws on the same side when the case design made it difficult to drive screws into the other side. We have never had any problems result from doing this, but if you do it, do so at your own risk.
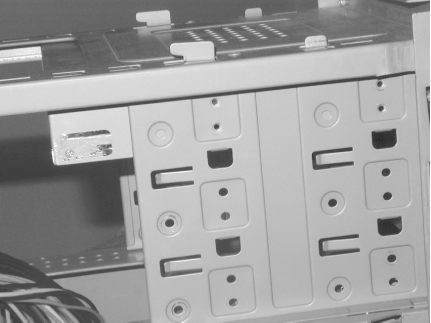
Figure 28-27 shows a typical mini-tower arrangement. The drive in the top bay of this Antec KS288 case has all four screw holes aligned with the corresponding chassis holes, which automatically aligns the drive front to back to be flush with the front bezel. Cases built with sloppier tolerances use slots rather than holes to make up for the loose tolerances, although some well-built cases also use slots.
Figure 28-27. A typical mini-tower arrangement, where drives secure directly to the chassis

Ever wonder why stools have three legs? It's because three points define a plane, and a three-legged stool is therefore always stable, regardless of the unevenness of the surface it rests on. Our tech reviewer, Francisco García Maceda, called this to our attention. Francisco notes that when working with inexpensive cases he often uses only three screws to secure a drive because that minimizes the danger of the drive being torqued if the case flexes. He (and we) have seen this happen in cheap cases, and it can lead to anything from intermittent read and write problems to premature drive failure. So if you are installing a drive in a cheap case, consider using only three screws to do so. Better yet, replace the case.
- Removable drive cages
-
Some cases use removable drive cages in which you install drives and then mount the cage with installed drives as a single unit. Drive cages are in all other respects similar to the arrangement described earlier. Figure 28-28 shows the removable drive cage being installed in the Antec SX840 case, with the hard drive already secured to the cage. This particular drive cage installs from the front and is secured by thumbscrews. Other removable drive cages install internally and are secured by standard screws or by a clamping arrangement.
Figure 28-28. Installing a removable drive cage with the hard drive in place
- Drive rails
-
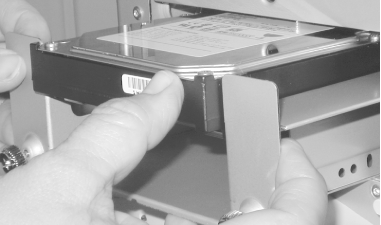
Traditional desktop cases and some tower cases use drive rails, which are secured to the drives and fit slotted channels within the case. Rails are always mounted directly to the drive using screws. The rails may be secured to the case by a screw through the front of the rail into the front of the chassis, by a separate clip that screws into the front of the chassis to prevent the rail from sliding forward, or simply by snapping into place. Figure 28-29 shows the PlexWriter with attached rails being slid into place in the Antec SX840 case. These rails snap into place, which both secures the drive and aligns it properly front to back so that it is flush with the main front bezel once it is reinstalled.
Figure 28-29. The traditional arrangement, in which rails mounted to the drive slide into matching slots in the chassis, and are secured by a front screw or clips
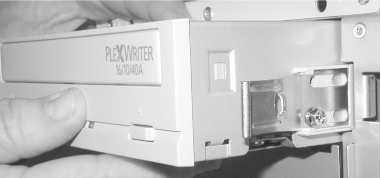
Whichever mounting method(s) your case uses, verify that all externally accessible drives project the correct distance to ensure that they are flush with the front chassis bezel when it is installed. Some cases have alignment holes or snap-in drive rails that make this job trivial. Others require trial and error. In that situation, we usually mount one drive, temporarily mount the front chassis bezel to ensure proper alignment, and then install all other drives flush with the first drive we installed.
You may have to depart from your planned arrangement of drives if you encounter vertical alignment problems. Some externally accessible drives have front bezels that are just slightly too big or have a vertical offset that's slightly incorrect, preventing you from installing another externally accessible drive in the bay immediately above or below the problem drive. You can sometimes gently force such a drive to seat, but it's usually better to rearrange the drives to avoid such tight fits.
Before you install each drive, consider data cabling. If the drive is the only drive that will connect to a data cable, it's easier to attach the cable to the drive first and then feed the cable through the bay and into the chassis. If multiple drives will connect to the same data cable, choose the drive for which rear access will be most difficult after the drive is installed and connect the cable to that drive before you install the drive.
After you install and secure each drive, connect the data cable (if you have not done so previously) and then the power cable.
28.2.8 Step 8: Install the Motherboard
Slide the motherboard into position, verifying that each motherboard mounting hole aligns with its brass stand-off, that each nylon stand-off slides properly into the corresponding slot on the motherboard tray, and that the I/O connectors on the rear of the motherboard align properly with the I/O template (or the access holes in the chassis).
While maintaining continuous gentle pressure toward the rear of the chassis to keep the motherboard aligned with the mounting holes, insert one of the mounting screws, but don't tighten it fully. Continue inserting mounting screws loosely until all mounting holes are occupied. Finally, tighten each mounting screw gently, as shown in Figure 28-30. Finger-tight is adequate. We've seen people crack motherboards by applying too much torque to the mounting screws.
Figure 28-30. Tightening the motherboard mounting screws sufficiently to ensure good contact, but not so much as to risk cracking the motherboard
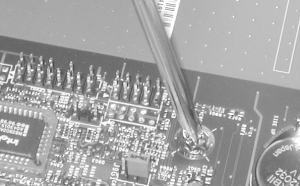
Make sure to install a motherboard mounting screw at every position. In addition to securing the motherboard physically, these screws also ground the motherboard to the chassis. Their positions are carefully calculated by motherboard designers with grounding in mind. Leaving one or more screw positions vacant can cause improper grounding, which may cause instability or high RFI emissions.
If you have not already done so, connect the CPU fan to the appropriate motherboard power header or to a spare drive power cable.
Connect the main power lead from the power supply to the motherboard. For ATX systems, the main power connector is a single 20-pin keyed connector, shown in Figure 28-31. The Main ATX Power Connector is keyed, which prevents misconnecting the main power lead.
Figure 28-31. The main ATX power connector jack (the light object in the center)
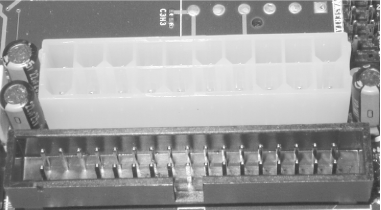
Note to the upper right of the main ATX power connector the six solder points for the Auxiliary ATX Power Connector, shown in Figure 28-32. Although the Antec power supply provides this connector, this particular motherboard does not require it, so we leave it unused. If your motherboard has a connection point for the Auxiliary ATX Power Connector, make sure to connect it as well as the Main ATX Power Connector.
Figure 28-32. The Auxiliary ATX Power Connector plug
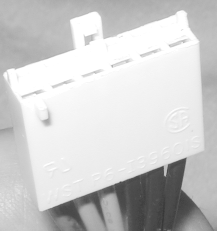
The motherboard we used requires the ATX12V Supplementary Power Connector, shown in Figure 28-33. This "P4 connector" supplies the additional 12V current required by Pentium 4 motherboards. It is keyed to prevent incorrect installation, and simply snaps into place, as shown in Figure 28-34. All Pentium 4 motherboards require this connector, and an increasing number of other motherboard have begun using it as well as the industry shifts to using 12V VRMs.
Figure 28-33. The ATX12V Supplementary Power Connector plug
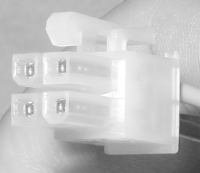
Figure 28-34. If you forget to insert the ATX12V Supplementary Power Connector, your Pentium 4 motherboard will not boot.
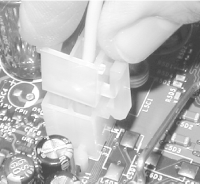

The Antec power supply we're using for this project has a P4 connector. Older power supplies usually do not, even though they may otherwise be capable of powering a Pentium 4 system. If you're installing a Pentium 4 motherboard and the existing power supply is not P4-compliant, you may be able to save the cost of replacing the power supply by buying an adapter cable. These cost $5 or so, and are sold by PC Power & Cooling and most computer stores. They connect to a drive power cable on one end and have the connector shown in Figure 28-33 on the other. Pentium 4 motherboards don't care where they get the extra 12V current, as long as they do get it. Do note, though, that not all ATX power supplies are capable of supplying sufficient amperage on the 12V rail. Even those that are may not regulate the 12V rail closely enough.
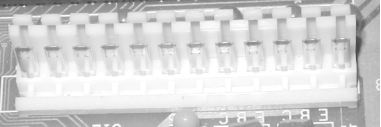
If you're working on an older system, be careful. AT systems use two main power cables, each with a 6-pin keyed connector (often labeled P8 and P9), which connect to one 12-pin connector strip on the motherboard, shown in Figure 28-35. It's possible to swap positions of these cables, which can destroy a motherboard, so be careful which you connect where. For nearly all AT power supplies, when both connectors are installed properly the black wires on each will be toward the center, but we have encountered AT power supplies with nonstandard wire colors. Verify connector orientation with the documentation for your power supply and motherboard instead of making assumptions. Note that some power supplies have both AT and ATX power connectors, as do some motherboards.
Figure 28-35. An AT power connector (the light object in the center)
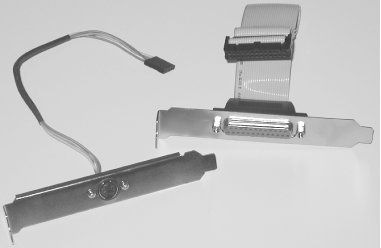
ATX motherboards organize all I/O connectors in a block that matches the I/O template on the rear. AT motherboards use a permanently mounted keyboard connector that aligns with the keyboard hole in AT cases, but other I/O ports?serial, parallel, USB, and so on?exist only as groups of header pins on the motherboard. Those I/O ports are made accessible on the rear panel of the case by installing port extenders, shown in Figure 28-36, which are cables with a header-pin connector on one end and the appropriate I/O connector on the other. Some port extenders are normally supplied with the motherboard, but many AT motherboards do not include port extenders for all ports. For example, the extenders for Serial 2 and USB are often optional items. These port extenders are relatively standard items. If you're missing any, you can buy them for a few dollars at any well-stocked computer store.
To install a port extender, align the header-pin connector with the appropriate set of header pins on the motherboard, making sure that Pin 1 corresponds to the red stripe on the cable, and press down until the connector seats. Most port extenders have the external connector mounted on an expansion slot bracket. The case may have more expansion slot cutouts than the motherboard has expansion slots. If yours does, mounting the port extender in an expansion slot cutout costs nothing. If your system has the same number of expansion slots and cutouts, mounting the port extender in an expansion slot cutout wastes that expansion slot. Most AT cases contain several precut holes for DB9, DB25, and other connectors. On better cases, the covers for these holes are secured by screws. On inexpensive cases, the covers are die-cut and need to be twisted out with needlenose pliers. Remove the covers for the ports you need to extend. Remove the port extender connector from the slot bracket and mount it directly to a matching cutout in the rear panel of the chassis.
Figure 28-36. Typical port extenders for an AT motherboard (on the left is a PS/2 mouse connector, on the right is a DB25 serial port connector)
28.2.9 Step 9: Connect Cables to the Motherboard
All systems require connecting various cables to the motherboard. These include:
Cables that connect floppy, hard, and optical drives to embedded motherboard interfaces
Cables for miscellaneous functions, such as connecting audio out on the rear panel of a CD-ROM drive to the audio header on the motherboard, or connecting a CPU fan to a power header on the motherboard
Cables that connect front panel switches (power, reset, keylock, etc.) and indicators (drive activity, power on, speaker, etc.)
Supplementary case fans, which may connect to the motherboard or to power supply connectors
It's usually easier to connect these cables before you start installing expansion cards. Proceed as follows:
Connect the drive data cables from the back of each drive to the appropriate connector on the motherboard, making sure to align Pin 1 properly on both the drive and controller. Typical systems have at least two such cables: one 34-wire ribbon cable connecting the FDD to the FDD controller interface on the motherboard; and an IDE cable connecting the hard drive and CD- or DVD-ROM drive to the primary IDE interface connector on the motherboard. If the system has more than two IDE devices, or if you put the hard drive and optical drive on separate channels, you will also need to connect a second IDE cable from the additional device(s) to the secondary IDE interface connector on the motherboard. If the system has SCSI devices installed and the motherboard has an embedded SCSI host adapter,


