Using a DataAdapter Object to Populate a Dataset
The DataAdapter class is the primary interface to the data set and the data provider. This class enables you to fill datasets, manage and maintain the data, and send updates back to the data store.
DataAdapter objects can be initialized with several different sets of data. The state of the data adapter after it’s created will depend on which constructor is used. The first DataAdapter constructor doesn’t accept any parameters, as shown in the following code. The data adapter is created, and all of its properties must be set individually.
SqlDataAdapter da = new SqlDataAdapter();
The second DataAdapter constructor accepts a Command object as a parameter, as shown in the following code. This Command object will be assigned to the SelectCommand property.
SqlDataAdapter da = new SqlDataAdapter(cmd);
The third DataAdapter constructor, shown in the following code, will accept a parameter that contains the command text of the object’s SelectCommand property. This command text will be used to create the Command object that will be assigned to the SelectCommand property. In addition, this constructor will accept a SqlConnection object, which will be used to connect to the database.
SqlDataAdapter da = new SqlDataAdapter(sSQLSelect, conn);
The fourth constructor, shown in the following code, accepts a parameter that contains the command text of the object’s SelectCommand property. This command text will be used to create the Command object that will be assigned to the SelectCommand property. The constructor also accepts a connection string that defines the connection to the data source.
SqlDataAdapter da = new SqlDataAdapter(sSQLSelect, sConnString);
The DataAdapter class uses a set of Command objects to manage the data. A Command object can be assigned to each of the properties related to the four major data operations, as follows:
-
SelectCommand
-
InsertCommand
-
UpdateCommand
-
DeleteCommand
The SelectCommand property is used to hold the Command object that will be used when data is selected from the data store, as shown here:
SqlCommand cmd = new SqlCommand("SELECT * FROM authors");
SqlDataAdapter da = new SqlDataAdapter();
da.SelectCommand = cmd;
The InsertCommand, UpdateCommand, and DeleteCommand properties hold Command objects that will be used when the Update method of the DataAdapter class is called, as shown in the following code. The Update method is discussed in detail later in this chapter, in the section “Updating Data.” Any changes to the local dataset will be sent to the data store, using the set of commands that are associated with the DataAdapter object.
SqlCommand cmd = new SqlCommand("spInsertNewAuthor");
cmd.CommandType = CommandType.StoredProcedure;

cmd.Parameters.Add(new SqlParameter("@au_lname", SqlDbType.VarChar,
                                    40, "au_lname");
cmd.Parameters.Add(new SqlParameter("@au_fname", SqlDbType.VarChar,
                                    20, "au_fname");
SqlDataAdapter da = new SqlDataAdapter();
da.InsertCommand = cmd;
You can fill a dataset with data based on the Command object in the SelectCommand property by calling the Fill method, which is inherited from the DbDataAdapter class. The data to be filled will depend on the parameters you provide for this method. The most common parameters are shown here:
-
Fill(DataSet) Fills the dataset from the data store and names the resulting table in the dataset Table. If the SelectCommand property returns multiple result sets, subsequent tables will be named Table1, Table2, and so on. The following code shows how to create a DataAdapter object and fill rows in the dataset to match those in the data store:
SqlDataAdapter da = new SqlDataAdapter();
//Configure DataAdapter with commands and so on.


DataSet ds = new DataSet();
da.Fill(ds);
DataSet ds = new DataSet();
da.Fill(ds); -
Fill(DataTable) Fills the data table from the data store, as shown here:
SqlDataAdapter da = new SqlDataAdapter();
//Configure DataAdapter with commands and so on.


DataTable tbl = new DataTable("authors");
da.Fill(tbl); -
Fill(dataSet, srcTable) Fills the named table in the dataset from the data store, as shown here:
SqlDataAdapter da = new SqlDataAdapter();
//Configure DataAdapter with commands and so on.


DataSet ds = new DataSet();
DataTable tbl = new DataTable("authors");
ds.Tables.Add(tbl);
da.Fill(ds, "authors"); -
Fill(dataSet, startRecord, maxRecords, srcTable) Fills the named data table in the dataset, starting with the specified record and including the maximum number of records to retrieve, as shown here:
SqlDataAdapter da = new SqlDataAdapter();
//Configure DataAdapter with commands and so on.


DataSet ds = new DataSet();
DataTable tbl = new DataTable("authors");
ds.Tables.Add(tbl);
da.Fill(ds, 21, 10, "authors");
As mentioned, the dataset maintains data locally, disconnected from the data store. The data can be changed locally, with records being updated, added, or deleted. This won’t result in the changes being made to the database, however. To save each of these changes, you’ll need to call the DataAdapter object’s Update method. This method will use the commands in the InsertCommand, UpdateCommand, and DeleteCommand properties to make the necessary changes in the database.
Like the Fill method described earlier, the Update method is overloaded and will function differently depending on which parameters you supply. The most common overloaded versions are shown below.
-
Update(DataRow[]) Updates the data rows in the array of DataRow objects as provided, as shown here:
SqlDataAdapter da = new SqlDataAdapter();
//Configure DataAdapter with commands and so on.


DataSet ds = new DataSet();
da.Fill(ds);
//Do stuff.
DataRow[] dr = ds.Tables[0].Select(null, null,
    DataViewRowState.Added);
da.Update(dr); -
Update(DataSet) Updates the dataset, as shown here:
SqlDataAdapter da = new SqlDataAdapter();
//Configure DataAdapter with commands and so on.


DataSet ds = new DataSet();
da.Fill(ds);
//Do stuff.
da.Update(ds); -
Update(DataTable) Updates the data table, as shown here:
SqlDataAdapter da = new SqlDataAdapter();
//Configure DataAdapter with commands and so on.


DataTable tbl = new DataTable("authors");
Da.Fill(tbl);
//Do stuff.
da.Update(tbl); -
Update(DataSet, srcTable) Updates the identified table in the dataset, as shown here:
SqlDataAdapter da = new SqlDataAdapter();
//Configure DataAdapter with commands and so on.


DataSet ds = new DataSet();
DataTable tbl = new DataTable("authors");
ds.Tables.Add(tbl);
da.Update(ds, "authors");
Table mapping enables you to use column names in a DataTable object different from those in a data source. When the dataset is created and populated using the DataAdapter object, you can map the data tables in the dataset back to the original source tables in the database using the DataTableMappings collection, which is stored in the TableMappings property of the DataAdapter object. In most cases, you’ll use the Add method of the collection to add a mapping to the dataset, providing the name of the source table in the database and the name of the data table in the dataset, as shown here:
SqlDataAdapter da = new SqlDataAdapter();
//Configure DataAdapter with commands and so on.


da.TableMappings.Add("authors", "LocalAuthors");
You can drag the SqlDataAdapter or OleDbDataAdapter object from the Data tab of the Toolbox window to a Web Form or a Windows Form in the Microsoft Visual Studio .NET integrated development environment (IDE) to launch the Data Adapter Configuration Wizard, shown in Figure 18-2. This wizard allows you to automatically configure the DataAdapter object so that it can be used by your application. Behind the scenes, the code for your application that initializes the DataAdapter object and the data connection is developed.
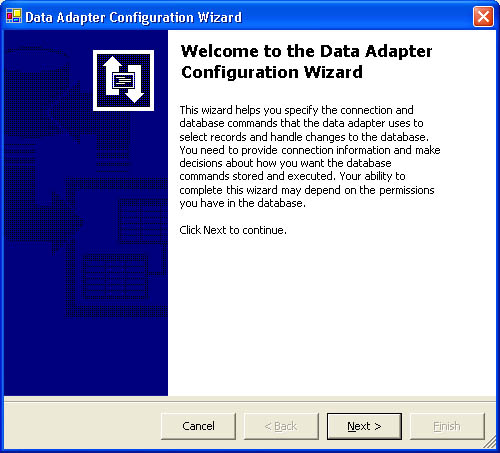 Figure 18-2.
This wizard enables you to specify the data connection that the data adapter will use to access the database, as shown in Figure 18-3. The drop-down list displays any data connections that you’ve already created on this computer.
 Figure 18-3.
If the desired data connection isn’t listed, you can create a new connection by clicking the New Connection button to display the Connection tab of the Data Link Properties dialog box. You can use this dialog box to configure the properties of the data connection.
On the next page of the wizard, shown in Figure 18-4, you specify whether the data adapter will use SQL statements or stored procedures to access the data.
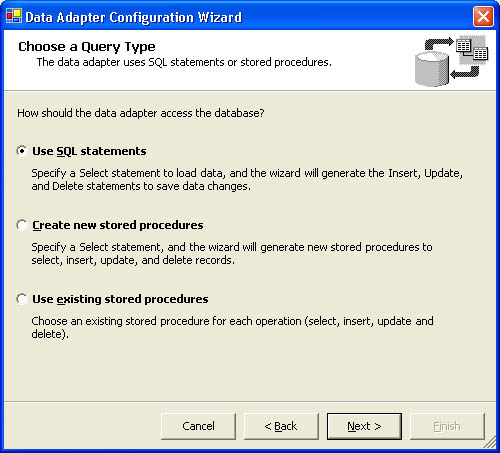 Figure 18-4.
You have the following options:
-
Use SQL Statements Lets you create an ad hoc SQL SELECT statement. The wizard can then generate the INSERT, UPDATE, and DELETE commands.
-
Create New Stored Procedures Lets you create new stored procedures for each of the SELECT, INSERT, UPDATE, and DELETE commands.
-
Use Existing Stored Procedures Lets you select already existing stored procedures for the SELECT, INSERT, UPDATE, and DELETE commands.
If you choose to use SQL statements, the next page of the wizard will prompt you to write a SQL SELECT statement to retrieve the data you want from the database, as shown in Figure 18-5.
 Figure 18-5.
Based on the SELECT statement you create, the wizard will automatically generate the INSERT, UPDATE, and DELETE statements the data adapter will use.
If you decide to create the stored procedures, you’ll begin by defining the SQL SELECT statement that will retrieve the data on a page similar to the one shown in Figure 18-5. Based on this statement, the wizard can build the new stored procedures, using the names you specify, as shown in Figure 18-6. The stored procedures will be created within the database, and the code to access those stored procedures will also be generated within your application.
 Figure 18-6.
If you choose to use existing stored procedures, you can select the stored procedures that will be used for the SELECT, INSERT, UPDATE, and DELETE commands, as shown in Figure 18-7.
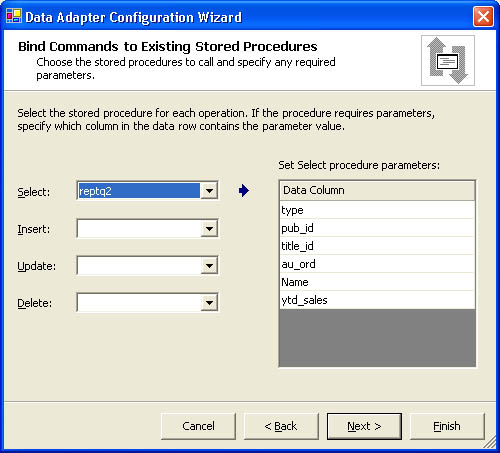 Figure 18-7.
Finally the wizard will generate the appropriate code and stored procedures, if applicable. To confirm that the settings you’ve configured should be applied, click the Finish button, shown in Figure 18-8.
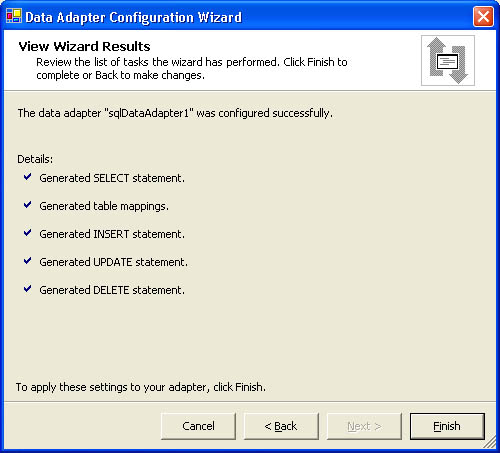 Figure 18-8.


