Consuming a Web Service
After a Web service has been created, you can access and make use of it. You can consume the Web service using one of three protocols that the service is configured to respond to, as follows:
-
HTTP GET
-
HTTP POST
-
SOAP
This section examines accessing a Web service method using these protocols.
The HTTP GET protocol is the simplest of the protocols. To consume the page, you simply make a call to the Web service name and pass the required parameters to the service as parameters in the query string, as shown here:
http://localhost/WebService1/Service1.asmx/Add?x=5&y=2
This call will return an XML document that includes the results of the service. The schema that’s returned will depend on the particular method that’s called.
The Web service supplies a contract that identifies how each protocol will be used to access the service. The contract for the HTTP GET method is shown here:
HTTP GET
The following is a sample HTTP GET request and response.
The placeholders shown need to be replaced with actual values.

GET /webservice1/service1.asmx/Add?x=string&y=string HTTP/1.1
Host: localhost

HTTP/1.1 200 OK
Content-Type: text/xml; charset=utf-8
Content-Length: length

<?xml version="1.0" encoding="utf-8"?>
<long xmlns="http://www.mysite.com/">long</long>
The HTTP POST protocol is similar to the HTTP GET protocol—with both protocols, you call the Web service page and post the parameters to the page as required. The following HTML code creates a Web page that allows you to access the Add Web service method described earlier in this chapter, in the section “Creating Web Methods”:
<HTML>
<BODY>
<FORM ACTION="/WebService1/Service1.asmx/Add" METHOD=POST>
<INPUT NAME="x">
<BR>
<INPUT NAME="y">
<P>
<INPUT TYPE=SUBMIT>
</FORM>
</BODY>
</HTML>
The Web service method will write the results back to the page as an XML document, as shown here:
<?xml version="1.0" encoding="utf-8" ?>
<long xmlns="http://www.mysite.com/">5</long>
The Web service supplies a contract that identifies how each protocol will be used to access the service. The contract for the HTTP POST method is shown here:
HTTP POST
The following is a sample HTTP POST request and response.
The placeholders shown need to be replaced with actual values.

POST /webservice1/service1.asmx/Add HTTP/1.1
Host: localhost
Content-Type: application/x-www-form-urlencoded
Content-Length: length

x=string&y=string
HTTP/1.1 200 OK
Content-Type: text/xml; charset=utf-8
Content-Length: length

<?xml version="1.0" encoding="utf-8"?>
<long xmlns="http://www.mysite.com/">long</long>
More than likely, you’ll most often access the Web service using SOAP. SOAP allows you to directly call components and execute methods. The Web service will return the data as an XML document, with the results passed back through the SOAP return function.
The Web service supplies a contract that identifies how each protocol will be used to access the service. The contract for the SOAP method is shown here:
SOAP
The following is a sample SOAP request and response.
The placeholders shown need to be replaced with actual values.

POST /webservice1/service1.asmx HTTP/1.1
Host: localhost
Content-Type: text/xml; charset=utf-8
Content-Length: length
SOAPAction: "http://www.mysite.com/Add"

<?xml version="1.0" encoding="utf-8"?>
<soap:Envelope xmlns:xsi="http://www.w3.org/2001/XMLSchema-instance"
xmlns:xsd="http://www.w3.org/2001/XMLSchema"
xmlns:soap="http://schemas.xmlsoap.org/soap/envelope/">
  <soap:Body>
    <Add xmlns="http://www.mysite.com/">
      <x>int</x>
      <y>int</y>
    </Add>
  </soap:Body>
</soap:Envelope>
HTTP/1.1 200 OK
Content-Type: text/xml; charset=utf-8
Content-Length: length

<?xml version="1.0" encoding="utf-8"?>
<soap:Envelope xmlns:xsi="http://www.w3.org/2001/XMLSchema-instance"
xmlns:xsd="http://www.w3.org/2001/XMLSchema"
xmlns:soap="http://schemas.xmlsoap.org/soap/envelope/">
  <soap:Body>
    <AddResponse xmlns="http://www.mysite.com/">
      <AddResult>long</AddResult>
    </AddResponse>
  </soap:Body>
</soap:Envelope>
To make use of a Web service in an application, you start by creating a reference to the Web service. To do so, choose Add Web Reference from the Project menu to open the Add Web Reference dialog box, in which you can search for the Web service, as shown in Figure 21-8. To search your local server, click the Web References On Local Web Server link. To search the UDDI services at Microsoft, click the appropriate links. Or you can type the URL of the Web service’s discovery file in the Address bar.
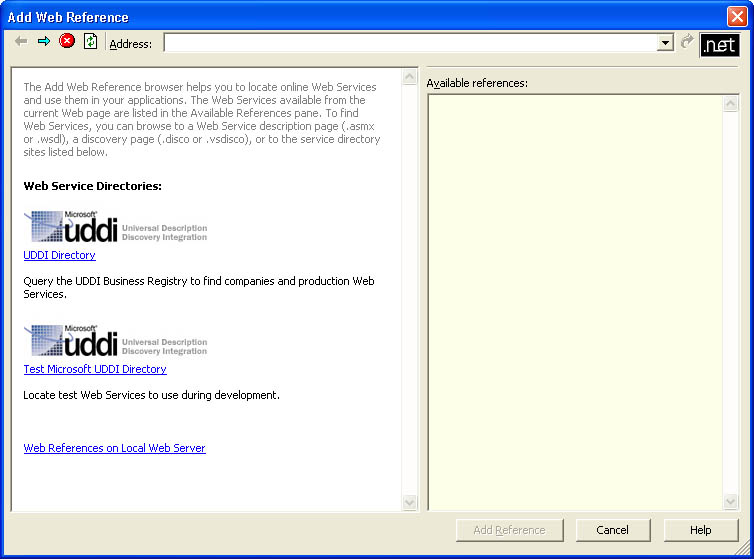 Figure 21-8.
If you click the Web References On Local Web Server link, the IDE will start a dynamic discovery of the Web services on your local machine, based on the http://localhost/default.vsdisco page. A list of the existing Web services on your system will be displayed in the right pane of the Add Web Reference dialog box, as shown in Figure 21-9.
If you click one of the Web service links, you’ll see detailed information about the Web service and you’ll be able to view the Web service contract and documentation, as shown in Figure 21-10. If this is the Web service you want to reference and use in your application, you can add the reference to your project by clicking the Add Reference button.
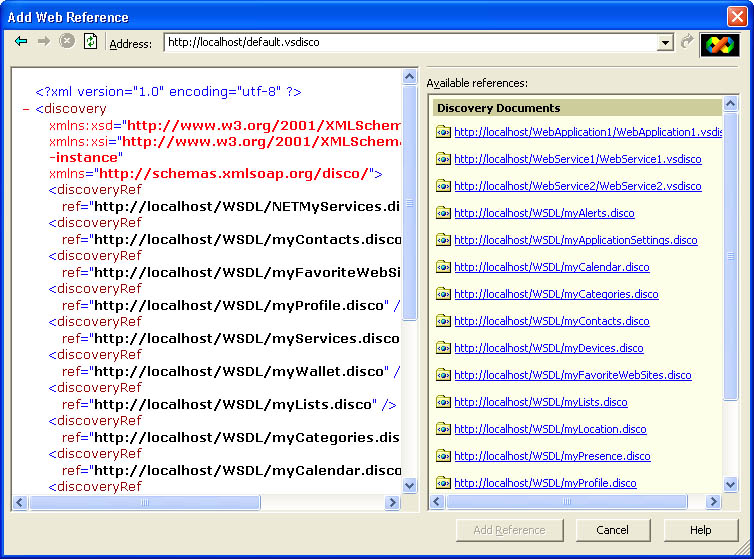 Figure 21-9.
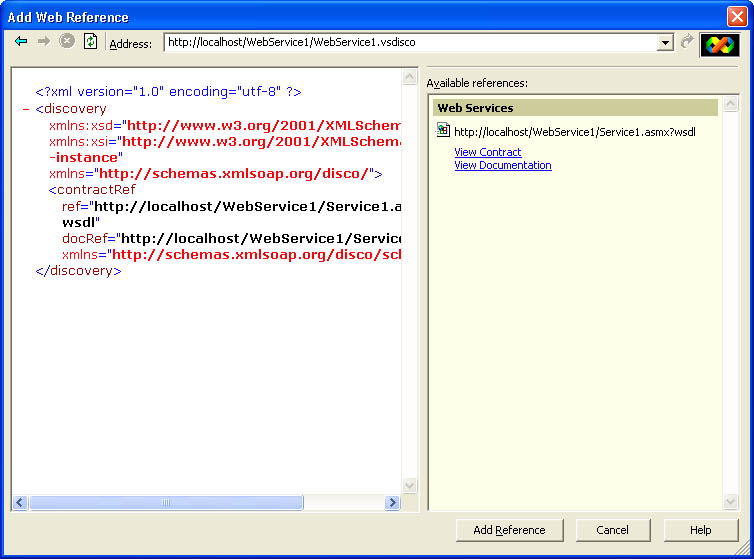 Figure 21-10.
If you want to make calls to an application other than one that you have on the local server, you’ll need to generate a proxy class for the Web service. This proxy is used to identify the Web service and its methods. You can also specify the means by which you’ll connect to and communicate with the service. Fortunately, you can generate this proxy class automatically, using the Wsdl.exe tool included in the .NET Framework SDK, which is a part of Visual Studio .NET. To build the proxy, simply run the following command:
wsdl http://localhost/webservice1/service1.asmx?wsdl
Of course, you’ll want to replace the URL shown here with the particular URL for the Web service you’ll be accessing on the remote host. This command will create a proxy class file with the name of the Web service and with the extension .cs (indicating that it’s a C# file).
To specify other details about the proxy, you can use optional command-line parameters, including the following:
-
/language:<language> Language of the proxy class. Use cs, vb, or js for C#, Visual Basic, or JScript. C# is the default.
-
/protocol:<protocol> Protocol to use in accessing the service. Use SOAP, HTTP-GET, or HTTP-POST. SOAP is the default.
-
/username:<username> User name to use when accessing the service to get WSDL information.
-
/password:<password> Password to use when accessing the service to get WSDL information.
-
/domain:<domain> Domain to use when accessing the service to get WSDL information.
-
/namespace:<namespace> Namespace of the generated proxy class. The global namespace is the default.
-
/out:<outputfile> Output file name for the proxy class. The name of the Web service is used as the default.
Based on the optional parameters, you could generate a Web service proxy class that communicates with a service using the HTTP POST protocol and authenticates itself using the username bob and the password opensesame by using the following command line:
wsdl /protocol:HTTP-POST /username:bob /password:opensesame
    http://localhost/webservice2/service1.asmx?wsdl
After the proxy class has been created, you can add it to your project and call it just like any other class in the project. Within the proxy class is the code required to access the Web service, call the desired methods with the needed parameters, and retrieve the necessary results.


