Setting Up Authentication
Now that I have discussed passwords and how the various forms of authentication work, I will discuss how to set up authentication.
Creating Users
Before you can begin to authenticate people, you need to know how to create users. In SmartDashboard/Policy Editor, click on this icon in the objects tree: ![]() . From here, you may create users, templates, and groups by right-clicking on the appropriate name and selecting New. You may also select Users from the Manage menu. In this case, a dialog box similar to Figure 8.12 appears. Note that all of the same functions can be performed via either interface.
. From here, you may create users, templates, and groups by right-clicking on the appropriate name and selecting New. You may also select Users from the Manage menu. In this case, a dialog box similar to Figure 8.12 appears. Note that all of the same functions can be performed via either interface.
Figure 8.12. Users and Administrators, main screen

Use the buttons on the Users and Administrators main screen for the following purposes.
New: Create a new user, group, or template.
Remove: Remove the user, group, or template selected.
Edit: Edit the user, group, or template selected.
Close: Close the window.
Install: Install the user database on managed firewalls. This must be done any time the user database has been modified.
When you click New, the pop-up menu shown in Figure 8.13 appears. This menu contains several options.
User by Template: All users are initially created through a template. Default is the one created by Check Point on installation.
Administrator: This option creates an administrative user who can log into the Check Point SmartConsole GUI applications. These users cannot be used to log to authenticate at the firewall.
Administrators Group: This item creates a group of administrative users.
External User Profile: This tells FireWall-1 to forward requests by unknown users to a specific authentication server and give all of those users a common profile. This functionality supercedes the generic* functionality[1] that existed in NG FP2 and earlier. It also improves on it because you can define more than one external user profile, whereas previously you could define only one generic* user.
[1] In NG FP2 and earlier, you could create a user with the name generic*. This provided functionality similar to the External User Profile option.
Group: This option allows you to create a new group within FireWall-1.
LDAP group: To reference a branch of an LDAP Directory for use in FireWall-1, use this option. This is discussed in the Integrating LDAP subsection of this chapter.
Template: This option is used to create a template user.
Figure 8.13. Users and Administrators, New menu

For template users or external user profiles, most of the screens shown in Figures 8.16 through 8.23 are identical for both situations. The only difference is that template users or external user profiles cannot have passwords established.
For this example, select User by Template and then Default. You are then presented with the dialog shown in Figure 8.14. If you created an external user profile by domain (instead of choosing Match All Users), you will see a dialog like Figure 8.15.
Figure 8.14. User Properties, General tab
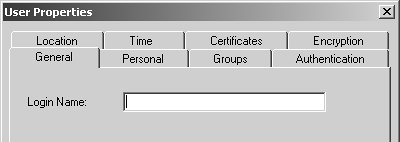
Figure 8.15. External User Profile Properties
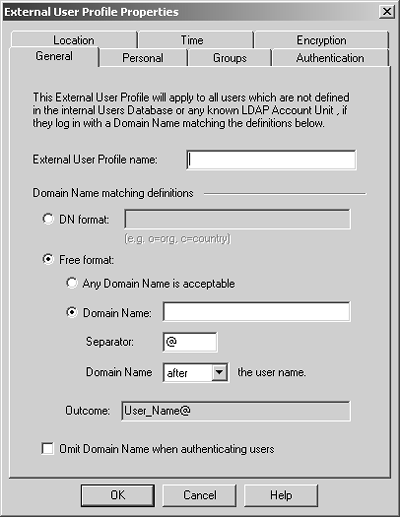
The field in Figure 8.14 allows you to enter the username for the user in question. This name is what the user will authenticate to the firewall as. In Figure 8.15, you have more options.
External User Profile Name: This field provides a way to refer to the external user group.
DN Format: If you are using LDAP, this option allows you to specify the branch that is valid for this user group.
Any Domain Name is acceptable: If you select this option, the domain name specified by the user when he or she authenticates will be accepted, even if it is not valid. If you don't want the user to have to specify a domain, when creating the external user group, select Match All Users as described previously.
Domain Name: Here you specify the domain name that matches this external user group. You can also specify the separator and where the domain appears (before or after the username).
Omit Domain Name when authenticating users: Select this option to indicate that when sending the authentication request to the external authentication server, the domain name should be omitted from that request.
After configuring the user properties, select the Personal tab, which is shown in Figure 8.16.
Figure 8.16. User Properties, Personal tab
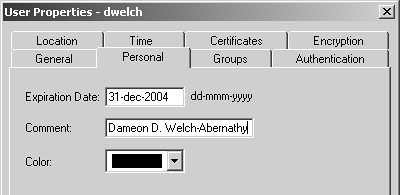
The following fields appear on this dialog.
Expiration Date: After this date, the user cannot authenticate through the firewall.
Comment: Enter any information you want as a comment. It is strongly suggested that you enter the user's full name in this field.
Color: Choose a color for this object.
Next is the Groups tab (see Figure 8.17), where you list the groups the user is a member of.
Figure 8.17. User Properties, Groups tab
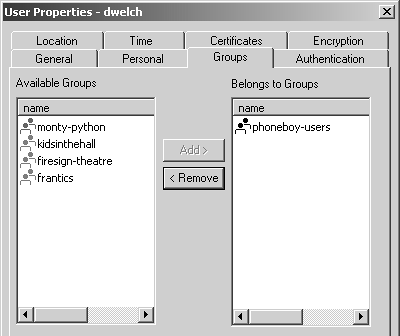
NOTE!
All users belong to the default group All Users, which is never shown on the Groups tab. |
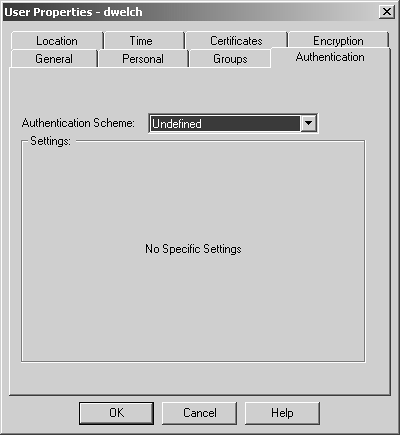
Now let's look at the Authentication tab (see Figure 8.18). A user must have a form of authentication defined. Recall that the authentication types were described earlier in this chapter, although specific settings for some of these types are discussed in this section.
Figure 8.18. User Properties, Authentication tab
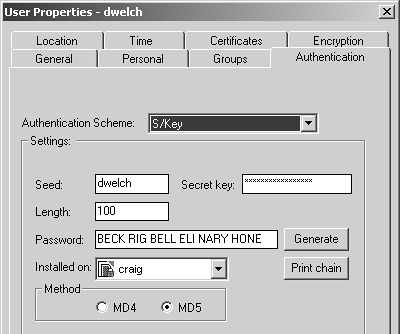
I'll start with S/Key (see Figure 8.19). This tab contains the following items.
Seed: This field usually contains the username, but it can be anything. The value is used as part of calculating the S/Key chain.
Secret key: This field contains the password the user enters into an S/Key generator to generate the response to the S/Key challenge. It must be at least ten characters long.
Length: This field contains the number of passwords in the chain. This value also indicates the number of times the user can authenticate before his or her S/Key chain needs to be regenerated?actually, one less than this number because the first password in the chain is displayed in the GUI, so you can match the user with the printed S/Key chain (see Print chain at the end of this list). As a result, the first password in the chain is not used.
Password: Leave this field blank. It will be filled in once you click the Generate button. (When I captured Figure 8.19, I had already clicked that button.)
Installed on: With S/Key, the user can exist on only a single FireWall-1 gateway. This is to ensure that each password is used just once. The easy way to do this is to allow you to install the user on only a single gateway. In other words, you can't use this on a gateway cluster.
Method: You can choose to use either MD4 or MD5 to generate the proper S/Key response. MD5 is considered a stronger hash, but not all S/Key generators support it.
Generate: Once you have filled in the Installed on, Seed, and Length fields, click the Generate button. A password then appears in the Password field. If none of the fields are filled in (except for Installed on, which must be filled in), FireWall-1 will make up a secret key and generate a chain of 100 passwords. FireWall-1 does not tell you what the key is, so you need to click the Print chain button (below). If a user loses the printout, there is no way to recover the chain, and a new chain must be generated.
Print chain: Once you have filled in all the fields, click the Print chain button to print out the entire chain of passwords. This printout allows a user to use S/Key authentication in situations where having an S/Key generator is not desirable. Make sure your end user does not lose this piece of paper!
Figure 8.19. User Properties, Authentication tab, S/Key
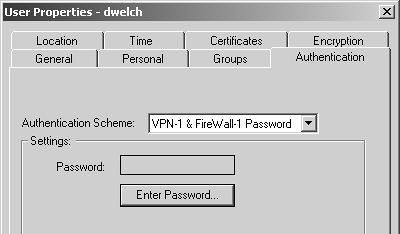
If you decide to use FireWall-1 Password as your authentication type, see Figure 8.20. Enter your password in the Password field. Your password is stored locally and encrypted with a mechanism similar to the one used to store UNIX passwords in /etc/passwd.
Figure 8.20. User Properties, Authentication tab, FireWall-1 Password
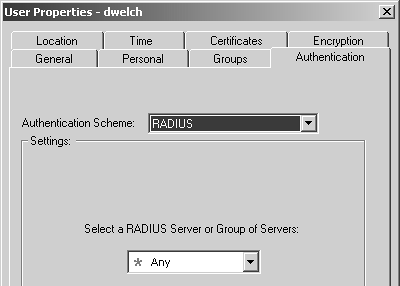
If you decide to use RADIUS as your authentication type, see Figure 8.21. This screen presents you with any server objects of type RADIUS or any groups that might contain them. By default, all RADIUS servers are queried.
Figure 8.21. User Properties, Authentication tab, RADIUS
For TACACS, you will receive a dialog similar to the one shown in Figure 8.22. Only server objects of type TACACS are shown on this screen.
Figure 8.22. User Properties, Authentication tab, TACACS

If you decide to use SecurID as your authentication type, you will see no specific settings in the GUI. This is because you must configure an sdconf.rec file on each firewall gateway. See the Integrating External Authentication Servers section later in this chapter for details.
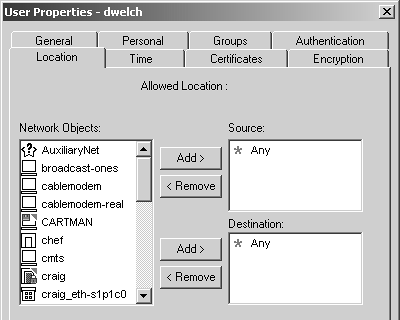
Let's quickly look at the remaining tabs. On the Location tab (see Figure 8.23), you can specify which sources and destinations are permitted for a particular user. Note that the rulebase can specifically override this designation on a per-rule basis, as I will describe in more detail in the Setting Up User Authentication section.
Figure 8.23. User Properties, Location tab
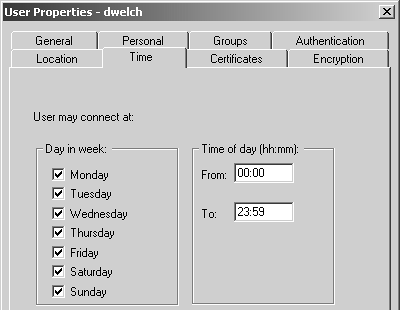
The Time tab defines when a user is allowed to authenticate (see Figure 8.24). The user must still be permitted by the rulebase.
Figure 8.24. User Properties, Time tab
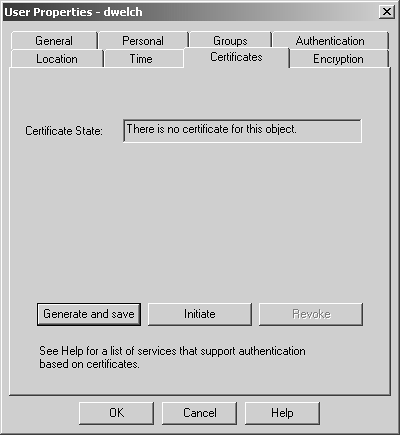
The Certificates tab (see Figure 8.25) allows you to generate a certificate for the user based on the Internal Certificate Authority (ICA). Certificates can be used only for authentication with SecureClient and authentication via HTTPS. The buttons on the Certificates tab offer three options.
Generate and save: This simply generates a certificate, prompting for a password to protect the certificate and a location to save it.
Initiate: This is specific for SecureClient use. A certificate is generated and stored on the management station. A registration key tied to that specific user is also issued. With the IP address or fully qualified domain name (FQDN) of the management console and the registration key, a user can obtain the certificate via SecureClient.
Revoke: This option revokes any outstanding certificates for this user.
Figure 8.25. User Properties, Certificates tab
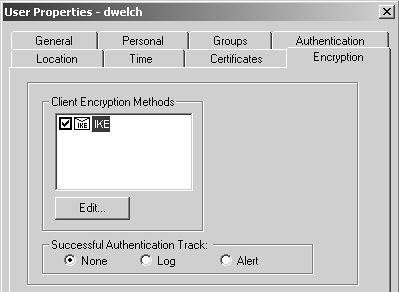
The Encryption tab (see Figure 8.26) is not used at this point, but I've included the screenshot here for completeness. This tab is discussed in Chapter 12.
Figure 8.26. User Properties, Encryption tab
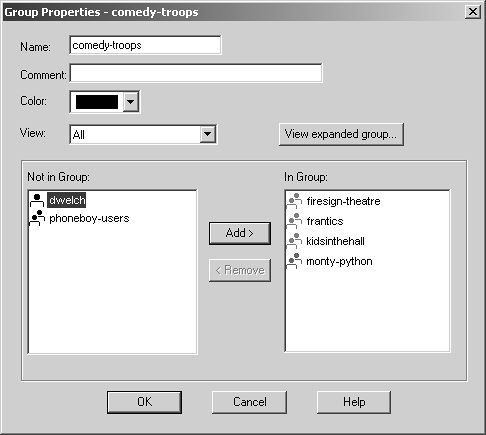
Creating Groups
Creating a new group is necessary if you want to permit some of your users to do certain things, but not others. FireWall-1 does not allow you to define rules in terms of individual users, but you can define rules for groups. The dialog looks similar to the one shown in Figure 8.27.
Figure 8.27. Group Properties
Setting Supported Authentication Schemes
You must configure the workstation object representing your firewall so that the authentication schemes you intend to use are enabled on your firewall object. Edit the object, and go to the Authentication frame (see Figure 8.28).
Figure 8.28. Gateway Properties, Authentication frame
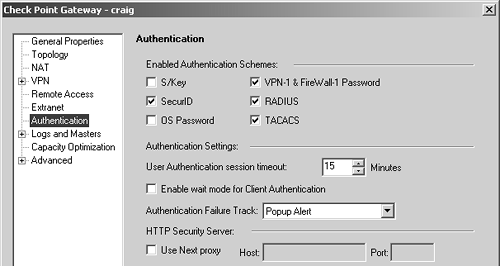
By default, OS Password and FireWall-1 Password are disabled. In NG FP3, S/Key is disabled by default as well. If you want to use these authentication schemes, you need to select them here. The options for using HTTP Next Proxy and setting a User Authentication session timeout are discussed in the Setting Up User Authentication section. The option to enable wait mode is discussed later in the Setting Up Client Authentication section.
Global Properties Related to Authentication
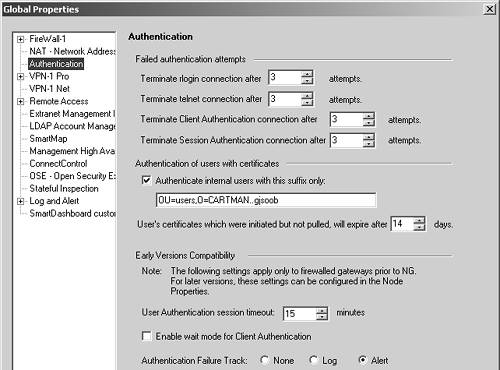
Figure 8.29 shows the Authentication frame in the Global Properties section. Several options relate to all the authentication schemes.
Terminate rlogin/telnet/Client Authentication/Session Authentication connections after: If a user connects via one of the specified methods and the user fails to provide the correct credentials the specified number of times, the session will be terminated.
Authenticate internal users with this suffix only: This option is relevant for certificate-based authentication when using the ICA. By default, this value matches the current value for your ICA.
User's certificates which were initiated but not pulled will expire after: When a certificate is generated for a user but the user does not "pull" the certificate into SecureClient, the certificate will expire after the specified number of days.
User Authentication session timeout: This is relevant only for FireWall-1 4.1 and earlier gateways, where this option was specified as one of the global properties instead of on a per-firewall basis. This is discussed in the Setting Up User Authentication section.
Authentication Failure Track: This is relevant only for FireWall-1 4.1 and earlier gateways, where this option was specified as one of the global properties instead of on a per-firewall basis. The Authentication Failure Track provides three options that determine what happens when a user fails to authenticate successfully. The selected alert will be generated upon failure.
Figure 8.29. Global Properties, Authentication frame