Secure Internal Communication
Anyone who has managed installations of distributed FireWall-1 4.1 or earlier knows what the fw putkey command is. Anyone who has managed a particularly complex FireWall-1 environment has done fw putkey numerous times, particularly when adding a new firewall?not just for the firewall you're adding but also for all the other firewalls in your installation because the authentication between the firewalls and the management station broke. I can't tell you how many customers I've had to help with putkey-related problems over the years. Even customers who knew what they were doing would get tripped up by the putkey process.
Aside from the technical issues of getting and keeping putkey-type authentication working, it was unclear exactly how secure it was.
In FireWall-1 NG, Check Point decided to do away with the fw putkey command and created Secure Internal Communication. SIC uses Secure Sockets Layer (SSL) to encrypt all data. The management station becomes an Internal Certificate Authority (ICA) and issues all managed modules a certificate. These certificates are used to validate the identity of a node.
You may recall that during the initial installation of a firewall module, you are asked to provide a one-time password (OTP). You are not asked to configure any other information pertaining to the management station. The management module will establish an anonymous SSL session with the module and exchange OTPs. If they match, the management station will generate a signed certificate for the module, which will authenticate future communications between the management module and the firewall module. Because certificates are used for authentication, there are no longer issues related to authentication getting out of sync.
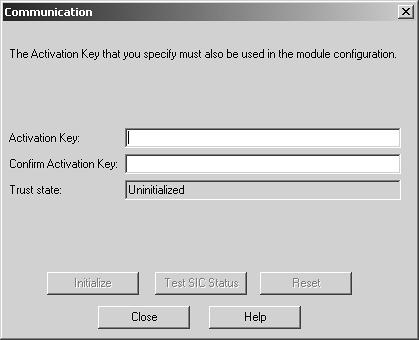
When managing FireWall-1 4.1 modules from an NG management module, authentication between modules will occur using fw putkey. On the NG management module, authentication is configured the same way as if the firewall module were running NG?in SmartDashboard. In the General frame of any locally managed Check Point object, there is a button called Communication under the heading Secure Internal Communication. To the right of this button, you will see a field. If it contains something similar to "CN=grover,O=snuffleupagus..ou812q," a certificate is defined for that host. If this is blank (and it will be for a newly defined object) or if you know that you need to reestablish SIC with a particular host, click the Communication button to establish the OTP. Figure 7.2 shows the screen that appears after you click the button.
Figure 7.2. Establishing a one-time password between modules

Figure 7.2 shows how the Communication screen looks for a module that has never had SIC established with it before or has had its SIC status reset. Type in the OTP in the Activation Key and Confirm Activation Key fields. Assuming this is a FireWall-1 NG module, clicking the Initialize button causes the management module to attempt to establish an encrypted session with the firewall, exchange OTPs, and generate certificates. Assuming the remote module is configured with the same OTP and FireWall-1 is up, running, and accessible, the value in the Trust state field should change to "Trust established." If there was a problem connecting to the module or the OTP was not set, you will instead see "Initialized but trust not established." In this case, the next time the module fetches policy, SIC should be established. On the management module, you can also click Initialize once the module is online and available.


