How Users Authenticate
Now that I have discussed passwords, I can talk about the various ways FireWall-1 asks users for passwords. Demonstrations of each method are provided in the following subsections.
Explaining User Authentication
User Authentication allows you to provide authentication for five different services: Telnet, rlogin, HTTP, HTTPS, and FTP. FireWall-1 provides user-level authentication via the appropriate Security Server processes. These processes are invoked when FireWall-1 needs to authenticate a connection. The Security Server authenticates the session, then passes it on to the remote server.
For example, if you wanted to Telnet to 172.29.0.44 and you want FireWall-1 to require authentication, the following exchange would occur:
$ telnet 172.29.0.44
Trying 172.29.0.44...
Connected to 172.29.0.44.
Escape character is '^]'.
Check Point FireWall-1 authenticated Telnet server running on mrhat
User: dwelch
FireWall-1 password: abc123
User dwelch authenticated by FireWall-1 authentication
Connected to 172.29.0.44
Red Hat Linux release 6.0 (Hedwig)
Kernel 2.2.12-20 on an i486
login:
The following list explains the steps taken in the previous code.
FireWall-1 intercepts the communication between the client and the server.
FireWall-1 prompts for a username and password.
If the user successfully authenticates with FireWall-1, the connection is then passed on to the destination host. The remote host then prompts for a username and password, which will likely be different from the one given to the firewall.
Because rlogin works in almost exactly the same way, a specific rlogin example is not needed. HTTP and HTTPS use the standard authentication screen you would see in your Web browser when accessing a password-protected Web site (see Figure 8.3).
Figure 8.3. Sample HTTP authentication
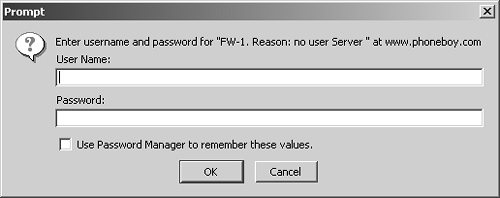
You must enter your username and password. If a specific challenge is needed before you can enter your password (e.g., for S/Key), just enter your username and click OK. You are then presented with the challenge as the "reason" shown in the dialog box.
FTP is a bit more complicated. Even though you can FTP directly to a specific host and FireWall-1 will intercept it, you must still tell the FTP Security Server where to go:
$ ftp 172.29.0.44
Connected to 172.29.0.44.
220 aftpd: Check Point FireWall-1 Secure FTP server running on mrhat
Name (172.29.0.44:dwelch):
At this point, you must enter a username in the following format: Site User@FireWall-1 User@Remote Host. If the FireWall-1 user and the FTP site user are the same, you can enter the username in this format: User@Remote Host.
Here is an example of an FTP authentication:
Name (172.29.0.44:dwelch): anonymous@dwelch@172.29.0.44
331 aftpd: FireWall-1 password: you can use password@FW-1-password
Password:
The password is in the following format: FTP Site Password@FireWall-1 Password.
Anonymous login to an e-mail server usually asks for an e-mail address; dwelch@phoneboy.com is the e-mail address used in the following example. Note that if either the username or password contains an @ symbol, you need to enter the @ twice.
Password: dwelch@@phoneboy.com@abc123
230-aftpd: User dwelch authenticated by FireWall-1 authentication
230-aftpd: Connected to 172.29.0.44. Logging in...
230-aftpd: 220 stinkpot Microsoft FTP Service (Version 3.0).
230-aftpd: 331 Anonymous access allowed, send identity (e-mail
name) as password.
230 aftpd: 230 Anonymous user logged in.
Remote system type is Windows_NT.
ftp>
A different interface is available by making a change via dbedit or the GUIdbedit tool. See FAQ 4.2 in Chapter 4 for instructions on how to do this. In dbedit, you would enter the following commands:
dbedit> modify properties firewall_properties new_ftp_interface true
dbedit> update properties firewall_properties
In this case, the FTP to 172.29.0.44 is a bit easier to access via the command line:
$ ftp 172.29.0.44
Connected to 172.29.0.44.
220 aftpd: Check Point FireWall-1 Secure FTP server running on mrhat
Name (172.29.0.44:dwelch):
At this point, you must enter a username in the following format: FireWall-1 User@Remote Host, which is used in the example below:
Name (172.29.0.44:dwelch): dwelch@172.29.0.44
331 aftpd: FireWall-1 password: you can use FW-1-password
Next, simply enter the FireWall-1 Password:
Password: abc123
230-aftpd: User dwelch authenticated by FireWall-1 authentication
230-aftpd: Connected to 172.29.0.44. Logging in...
230-aftpd: 220 stinkpot Microsoft FTP Service (Version 3.0).
ftp>
You should then be connected to the remote FTP server. You must log in by using the user command as follows:
ftp> user anonymous
331 Anonymous access allowed, send identity (e-mail name) as password.
Password: dwelch@phoneboy.com
230 Anonymous user logged in.
ftp>
Explaining Session Authentication
Session Authentication can be used for any service. Authentication relies on the presence of an agent on the client, which prompts users for authentication as they make the connection request. When necessary, the firewall contacts the agent, which either transparently provides authentication to the firewall or prompts the user for authentication if it cannot provide authentication. Check Point includes agents for all supported platforms (Windows, Solaris, AIX, and HP).
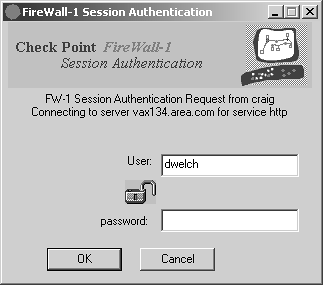
Figure 8.4 illustrates an example of what happens when a user tries to use Session Authentication on a Windows platform. In Figure 8.4, the user tries to access vax134.area.com via HTTP. Once the username is entered, FireWall-1 prompts the user for a password, as shown in Figure 8.5.
Figure 8.4. Session Authentication user prompt
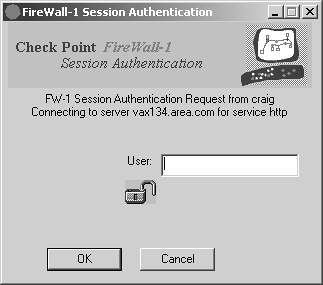
Figure 8.5. Session Authentication password prompt
Explaining Client Authentication
Client Authentication can be used to authenticate any service. The user must authenticate with the firewall before using the service. The service is then provided to the user a specific number of times and/or for a specific period of time. A user can authenticate in four ways, depending on how Client Authentication is configured:
A Telnet connection to the firewall on port 259
An HTTP connection to the firewall on port 900
An HTTPS connection to the firewall on port 950
User or Session Authentication
For the latter case, the authentication looks no different from the example shown earlier in the Explaining User Authentication subsection. However, you have two other choices to make with respect to Client Authentication:
Standard Sign-On
Specific Sign-On
Standard Sign-On lets users simply authenticate once and do whatever the authentication allows. Specific Sign-On requires users to specify each destination and service they want to use when they authenticate. Users are allowed to access only those services and destinations they specify, even if the rule allows for more. For simplicity's sake, most administrators are satisfied with simply allowing users to use Standard Sign-On because it requires less end-user training.
Manual authentication via Telnet using Standard Sign-On looks like this:
$ telnet 10.0.0.1 259
Trying 10.0.0.1...
Connected to 10.0.0.1
Escape character is '^]'.
Check Point FireWall-1 Client Authentication Server running on craig
User: dwelch
password: abc123
User dwelch authenticated by FireWall-1 authentication

Choose:

(1) Standard Sign-on
(2) Sign-off
(3) Specific Sign-on

Enter your choice: 1

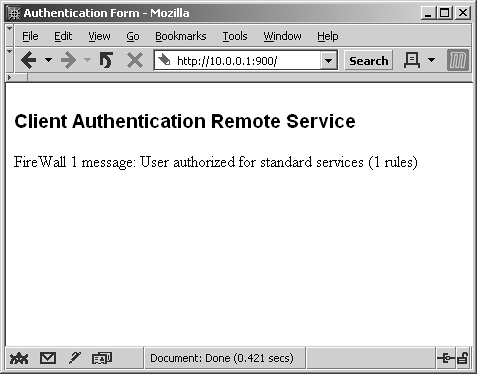
User authorized for standard services (1 rules)


Connection to host lost.
$
As mentioned, with Specific Sign-On, users must specify each service and destination they want to access. The following example attempts to set up HTTP and FTP access to www.phoneboy.com. Only HTTP will be permitted; FTP will not.
$ telnet 10.0.0.1 259
Trying 10.0.0.1...
Connected to 10.0.0.1
Escape character is '^]'.
Check Point FireWall-1 Client Authentication Server running on craig
User: dwelch
password: abc123
User dwelch authenticated by FireWall-1 authentication

Choose:

(1) Standard Sign-on
(2) Sign-off
(3) Specific Sign-on

Enter your choice: 3

Service (^D to Quit): http
Host: www.phoneboy.com
Client Authorized for service

Service (^D to Quit): ftp
Host: www.phoneboy.com
User not allowed for service ftp on host

Service (^D to Quit):

Connection to host lost.

$
HTTP authentication to port 900 on the firewall is shown in Figure 8.6. Note that a username has already been entered into the form. When you click Submit, the screen shown in Figure 8.7 appears.
Figure 8.6. Manual Client Authentication over HTTP, username entry
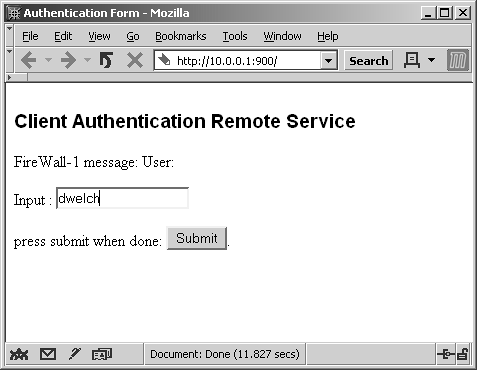
Figure 8.7. Manual Client Authentication over HTTP, password entry
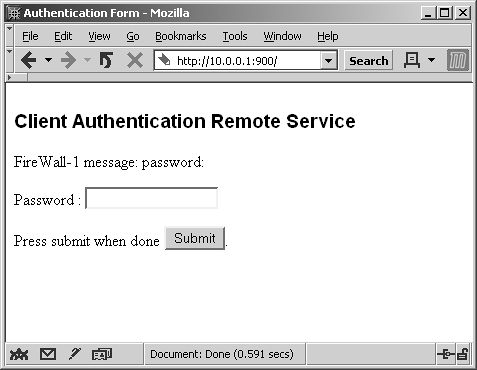
Type in your password, and click the Submit button. You are then presented with the screen shown in Figure 8.8. Select Standard Sign-On and click Submit to complete the authentication, as shown in Figure 8.9.
Figure 8.8. Manual Client Authentication over HTTP, method selection
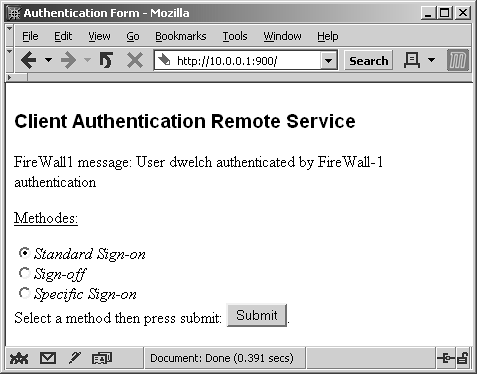
Figure 8.9. Manual Client Authentication over HTTP, Standard Sign-On authorization
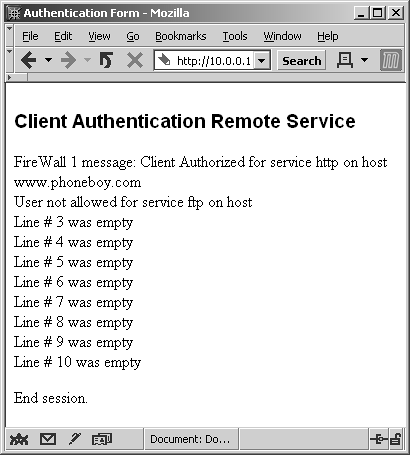
When you select Specific Sign-On, a screen appears allowing you to enter the services and hosts you want to access. Figure 8.10 shows entries for using both FTP and HTTP to www.phoneboy.com. The response to this authentication request is shown in Figure 8.11.
Figure 8.10. Manual Client Authentication over HTTP, Specific Sign-On details
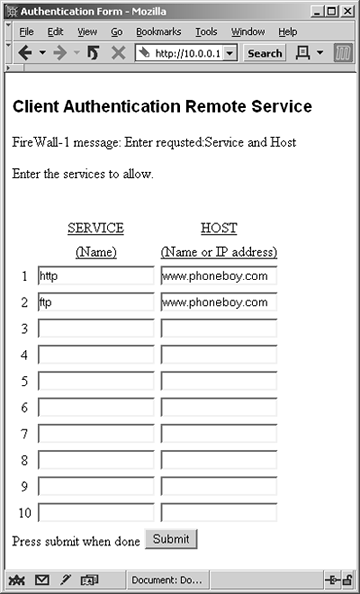
Figure 8.11. Manual Client Authentication over HTTP, Specific Sign-On completed
Which Authentication Type Should You Use?
Usually, the application you need to authenticate and the operating system of the client in question dictate the type of authentication you need to perform. Table 8.1 provides you with a guide to the various authentication schemes.
Client and Session Authentication have a limitation: Only a single user can come from an IP address you want to authenticate from. Typical UNIX systems and NAT gateways present situations where more than one person can potentially come from a single IP address. In the case of Client Authentication, a user who authenticates from such an IP address could potentially be letting in more users than just him- or herself. Client Authentication can be dangerous in this situation. With Session Authentication, the problem is that it is not clear whom to prompt for Session Authentication on a multiuser system. Because the Session Authentication agent typically caches the login and password information, you have a situation where either the user is constantly entering in (or having to cancel) authentication requests for connections he is not making or more than just the authorized user is allowed to perform a service. In these cases, the only appropriate authentication mechanism is User Authentication because each individual session is authenticated in-band, which means you are limited to what you can reasonably authenticate.
Use This Method | Under These Circumstances |
|---|---|
User Authentication |
|
Client Authentication |
|
Session Authentication |
|


