Hack 20 Use Complex Shapes as Masks
![]()
![]()
Masking is one of those features that seems to have few applications, but experienced Flashers know that whenever a clever Flash graphical trick appears, masking is usually at play. As explained in the introduction to Chapter 1, masks can be added either during authoring time or at runtime.
Flash MX was the first version to support the ability to create a scripted mask, which is a mask applied dynamically at runtime with the MovieClip.setMask( ) method. Naturally, developers must be aware of how using scripted masks affects runtime performance.
During the Flash MX beta, Macromedia released a version of the application that allowed any shape, however complex, to act as the mask but later had to withdraw this feature because of performance issues. One of the biggest dissidents over the "you can't use complex masks" limitation was Erik Natzke (http://www.natzke.com). Erik creates loads of head-turning (as well as page-turning) tricks that initially dumbfound everyone [Hack #25] . It comes as no surprise that Erik uses a lot of masking in his work.
This hack shows you how to get back the functionality of complex masks without compromising performance. It is loosely based on discussions between Macromedia engineers and beta testers during the Flash MX beta period.
Using Complex Masks
A Flash mask must be a solid shape. If Flash sees a complex shape such as a doughnut used as a mask, it will simplify the shape. You can see the problem by setting up this simple FLA.
In a new movie, change the name of the first layer to background, and add two layers above it called maskLayer and actions, as shown in Figure 3-24.
Figure 3-24. Setting up layers in a masking movie

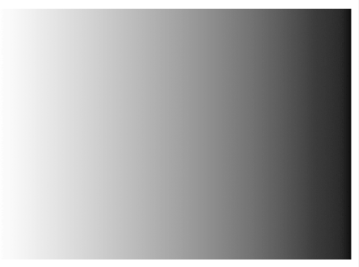
On the background layer, create a filled rectangle that covers the Stage. Give this rectangle a linear gradient fill, as shown in Figure 3-25. Press F8 to convert it to a movie clip symbol. Give it the symbol name back in the Symbol Properties dialog box. Give it an instance name of backClip in the Properties panel. Lock the layer.
Figure 3-25. A gradient

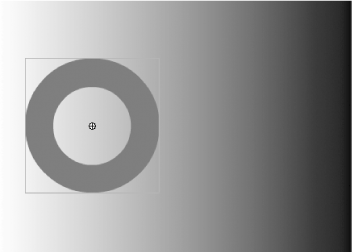
In the maskLayer layer, create a doughnut shape, as shown in Figure 3-26. Press F8 to convert it to a movie clip symbol. Name the symbol mask, and give the clip an instance name of maskClip.
Figure 3-26. A doughnut shape atop the gradient

Finally, attach the following script to frame 1 of the actions layer:
function dragDrop(mc:MovieClip){

  mc.onPress = function( ) {

    this.startDrag(true);

    this.onMouseMove = function( ) {

      updateAfterEvent( );

    };

  };

  mc.onMouseUp = function ( ) {

    delete this.onMouseMove;

    this.stopDrag( );

  };

}

dragDrop(maskClip)

backClip.setMask(maskClip);
As an aside, smoothly dragging and dropping a clip is such a common task that you might also consider making it a class. Here's an example of a class that performs smooth dragging:
// This ActionScript 2.0 code must go in an external SmoothDrag.as file

class SmoothDrag {

  public function SmoothDrag(targetClip:MovieClip) {

    dragDrop(targetClip);

  }

  private function dragDrop(mc:MovieClip):Void {

    mc.onPress = function( ) {

      mc.startDrag(true);

      mc.onMouseMove = function( ) {

        updateAfterEvent( );

      };

    };

    mc.onMouseUp = function( ) {

      delete mc.onMouseMove;

      mc.stopDrag( );

    };

  }

}
The availability of such a class would reduce our code to only a couple of lines:
var myClipDragger:SmoothDrag = new SmoothDrag(maskClip);

backClip.setMask(maskClip);
We will, however, continue with the original, non-class-based version.
Function dragDrop( ) allows you to click and drag maskClip; it drops the clip when you release the mouse button. By making maskClip the masking clip for backClip, we should see only that portion of backClip that is underneath maskClip.
However, we actually see all portions of backClip that are inside the perimeter of maskClip. Flash treats our complex doughnut mask as a simple circular mask, as shown in Figure 3-27.
Figure 3-27. A doughnut is treated as a circular mask

Flash masks are limited by the need to have a continuous perimeter. By making a small gap in the doughnut, we can make our doughnut have one perimeter. The trouble is that cutting a gap will make our "O"-shaped doughnut look more like a "C." We need to make the gap so small that Flash ignores it when drawing the shape but large enough for Flash to treat the entire shape as if it possesses a single perimeter. The trick is to make the gap a hairline.
Select the maskClip instance and double-click it to edit it in place. Using the Line tool, draw a hairline across the doughnut wall, as shown in Figure 3-28.
Figure 3-28. Adding a hairline fracture to our priceless doughnut mask

Select the entire hairline. Use
Modify

Figure 3-29. A gap of less than 1 pixel

This small gap means that, although Flash thinks we have now created
a "C" with a single continuous
perimeter, the vector renderer draws this shape as on
"O" with no gap at all. Test the
movie using Control
You will see one of two things. If you are lucky, you will see a doughnut-shaped mask without any gap, as seen in Figure 3-31. If you are not so lucky, you may see the hairline gap in the doughnut, shown on the left side of Figure 3-30 and greatly magnified on the right side of Figure 3-30.
Figure 3-30. Doughnut mask showing hairline gap (left) and close up of hairline (right)

If you encounter the problem depicted in Figure 3-30, use the Subselection tool to make the gap a little smaller. Using Snap to Pixel sometimes helps; move the edge of the gap that is furthest away from a pixel snap line up to the snap. You should see a perfect doughnut mask, as shown in Figure 3-31. Zooming in might show the gap, but the renderer ignores the gap during redraws at normal magnification.
Figure 3-31. The desired doughnut mask

In [Hack #21], we'll see some interesting effects that can be achieved with the seemingly innocuous mask feature.


