Section 6.3. Template Customization
Customizations to the blog template can take many forms. Some change the blog's overall design and layout; others are primarily focused on adding new content to the page, such as a blogroll. We'll focus on the latter type of customization in this chapter, because discussions about design can literally fill books, and the customization basics are the same for both categories of change.
First, as a precaution, always make a backup of your blog template before you modify it in any way ? even simple modifications. You can do this by selecting the text and copying it into a text file. Additionally, if your changes are fairly significant, you'll want to make a second copy after the modifications and before saving them. Problems can occur when transmitting text across the Internet and if you don't have a local copy of the changes, you could lose them and then have to reedit the template.
6.3.1 Adding a Blogroll
Adding a blogroll isn't a customization to the template as much as it is an addition. You're not changing the underlying format of the template ? just adding a bit of text to one side.
To demonstrate adding a blogroll, we'll modify the Essential Blogger blog, created in Chapter 3. After opening the Template view page, find the occurrence of the <$BlogArchiveFileName$> template tag within the template. You'll add the blogroll just above the archives and contained within the same div block (class name of "links") to take advantage of the CSS styles applied to the block.
The blogroll is nothing more than standard HTML copied or typed into the template, as shown in Example 6-1. This particular blogroll contains the locations of the blogs of the authors of this book.
Example 6-1. Adding a blogroll to the blog
<div class="posts">

<$BlogDescription$><br>

<br>

<div class="links">

        <h5>Blogroll:</h5>

        <a href="http://radio.weblogs.com/0103807/">J. Scott Johnson</a><br>

        <a href="http://boingboing.net">Cory Doctorow</a><br>

        <a href="http://www.movabletype.org">Ben and Mena Trott</a><br>

        <a href="http://www.oreillynet.com/~rael/">Rael Dornfest</a><br>

        <a href="http://weblog.burningbird.net/">Shelley Powers</a><br>

        <br>

<b>Archives</b><br>

<script type="text/javascript" src="<$BlogArchiveFileName$>"></script>

<br><br>

</div>
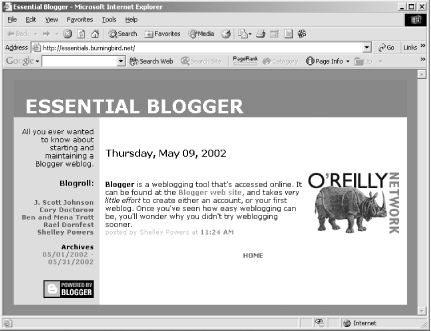
Figure 6-9. Blog page with new blogroll

The new blogroll HTML is indented in the example. After modifying the template, save the changes and publish the main blog page. The page should look similar to that shown in Figure 6-9.
When you're satisfied with the change, republish all the archives to pick up the template change.
This example just has plain HTML added to the template. The example in the next section manipulates works with the Blogger template tags to add titles to the blog posts.
6.3.2 Adding a Blogger Pro Title
One difference between Blogger Pro and standard Blogger is a Title field right above the text edit box in the Edit view page. This field allows you to add titles to your post, a popular practice among bloggers and an important modification if you're interesting in using RSS and other aggregation technologies. In addition, titles give your readers something to refer to when they talk about your posts ? another thing you want to encourage.
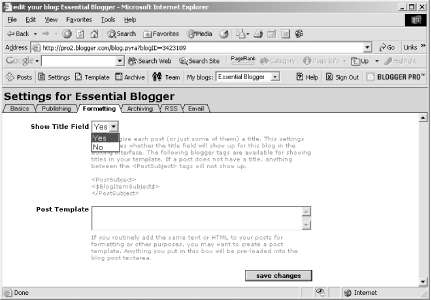
To turn the Title field on and off, access the Settings view. Click on the Formatting tab and, when the page opens, scroll down until you see the field labeled Show Title Field. Change this to Yes if you want to use the field, as shown in Figure 6-10.
Figure 6-10. Enabling support for post titles

After returning to the Edit view, edit the existing post and add the following title:
What this weblog is all about
Publish the page and open it for viewing. The new title won't show on the page, even though you've added it, because the template you're using doesn't implement the title tag. To add the title into the display, you'll need to add the <$BlogItemSubject$> template tag within its containing <PostSubject> elements for the title to show with each post. Example 6-2 shows the blog's Blogger template area after the new title tag has been added (the change is highlighted).
Example 6-2. Blog's template after adding in posting title template tag
<Blogger>
<BlogDateHeader>
<div class="date"><$BlogDateHeaderDate$></div>
</BlogDateHeader>
<div class="posts">
<a name="<$BlogItemNumber$>"> </a><br>
<PostSubject>
<h5><$BlogItemSubject$></h5>
</PostSubject>
<$BlogItemBody$><br>
<span class="byline">posted by <$BlogItemAuthor$> at
<a href="<$BlogItemArchiveFileName$>#<$BlogItemNumber$>">
<$BlogItemDateTime$></a></span>
</div>
<br>
</Blogger>
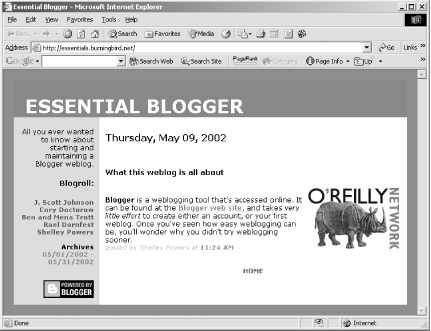
After saving the template change, republish the posting and view the results, as shown in Figure 6-11. If the change is satisfactory, republish all the archives to pick up the template modifications. Adding a title for new postings won't impact your previous postings ? if no title exists, none's printed.
Figure 6-11. Blog page with titled post

Though the template modifications just demonstrated ? adding a blogroll and a blog title ? were fairly minor, hopefully they demonstrate that working with the Blogger template can be a straightforward process.


