DVD Authoring?Initial Phase
Now it's time for some hands-on work.
Task: Take a Tour of DVDit!
Before building a menu I want you to venture around the DVDit! interface. Follow these steps:
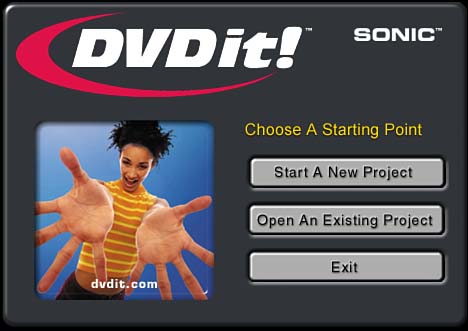
Open Sonic DVDit! LE. After the small splash screen disappears, select Start a New Project from the opening menu shown in Figure 21.6.
Figure 21.6. The DVDit! opening menu.
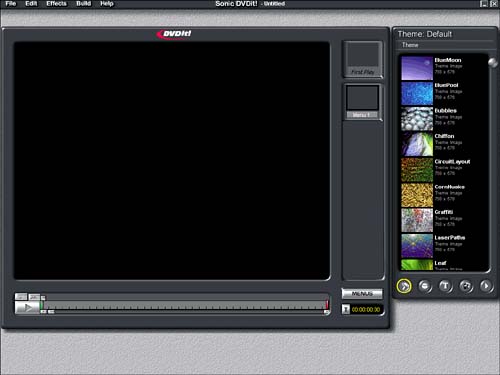
The opening menu changes appearance and offers up two drop-down lists. Choose NTSC or PAL?depending on your country's TV standard?and MPEG-2 (DVD Compliant). Click Finish. That opens the DVDit! interface shown in Figure 21.7. In a few moments you'll use its TV screen to create menus.
Figure 21.7. The DVDit! interface streamlines the production process.
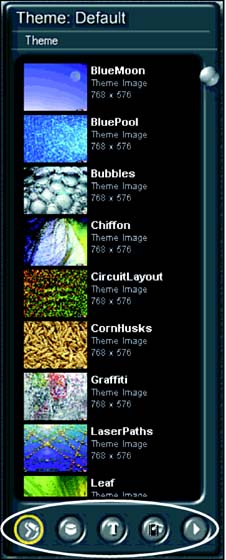
For now check out the Theme window, shown in Figure 21.8. Here you will find all the elements to create your DVD project. DVDit! comes with a nice variety of graphics to ease you into DVD authoring. Note the five buttons I've highlighted in Figure 21.8. Click each in turn to open its respective palette:
Background? You may use any of the images in this palette as menu backdrops.
Buttons? Use the buttons in this palette to create links from menus to media or other menus.
Text? Use this palette to access any font installed on your system and to apply text to any menu.
Media? Any video clips, audio cuts, and images you've stored in the Sonic Solutions media folder show up in this palette, including MPEG files created using the Adobe MPEG Encoder with the Sonic Solutions file folder option checked.

To test your media, right-click a file icon and select Play. If you selected a video clip, it should play in the TV screen portion of the DVDit! interface. To stop playing, right-click again and select Stop. Still images display for five seconds.
Plays? Clicking this button opens a pushbutton remote control?like interface, shown in Figure 21.9, that you'll use to test drive your DVD project before burning a DVD or CD. Click the x in the upper-right corner to close this interface.
Figure 21.9. Use this remote control?like interface to test the functionality of your DVD project before burning a DVD or CD.
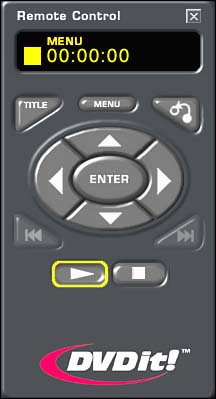
Figure 21.8. The DVDit! Theme window displays background images, buttons, text, and media (audio/video/stills).
Task: Combine DVDit!'s Graphics into One File Folder
Sonic provides two sets of backgrounds and buttons?Default and Corporate?with this LE version of DVDit! There really is no reason to keep these groups of items in separate folders. Follow these steps to combine them all into one personalized location:
Open "My Computer" or the Windows Explorer to navigate to the Sonic Solutions Themes directory?C:\Program Files\Sonic Solutions\DVDit! LE\Themes?and create a new folder in the Themes folder. As I've illustrated in Figure 21.10, call it something like My Graphics.
Figure 21.10. Create a new file folder to store all your graphics and media for use in DVDit!
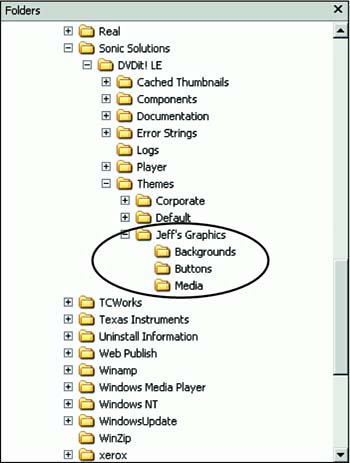
Open the Themes/Default file folder and copy/paste its three folders into your newly created folder.
Go to the Themes/Corporate/Backgrounds folder and copy/paste its one file?Corporate_Backgrounds.SonicTheme?to your Backgrounds file folder.
Do the same with the Themes/Corporate/Buttons folder and copy/paste its one file?Corporate_Buttons.SonicTheme?to your Buttons file folder.
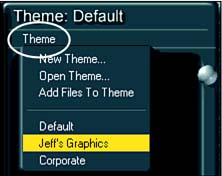
Test to make sure that everything fell into place by opening DVDit!, clicking the small-print "Theme" in the Theme window, and selecting your newly created file folder. I've highlighted that in Figure 21.11.
Figure 21.11. Click the small-print "Theme" to open your newly created Theme folder.
You should end up with 30 backgrounds and 40 buttons?all readily accessible. No need to open a new theme to search for a graphic.
Make sure you do not change the DVDit! "Themes" file folders naming convention: Backgrounds, Buttons, and Media. These names "cue" DVDit! to handle files from those folders in specific ways. |


