Reporting System Management
In a sense, all the previous information in this chapter deals with the management of the Reporting Services system. A great many of the choices you will need to make to manage and maintain the system depends on the layout you chose early in the layout process. If you chose a single server that connects to your production data, you have a simpler task ahead of you than if you have multiple servers set up in a Web farm. In this section, I show you the components you need to manage, no matter where they are. First, I explain the tools you need to use to manage each part. After you are familiar with the environment each tool offers, we will put that to good use in each of the sections that follow. Reporting Services Configuration ToolYou will use several tools in managing your systems, including the SQL Server Management Studio, the Windows Control Panel, and others. The primary tool you will use to set up and configure Reporting Services servers is the Reporting Services Configuration tool that I showed you in the first part of the chapter. I return to that tool here to talk about the components within the system. Starting and Stopping Reporting ServicesYou have got a few options for starting and stopping Reporting Services on your server. The first is to use the Services Control Panel applet in the Windows Server operating system, as shown in Figure 9-22. Figure 9-22.[View full size image] 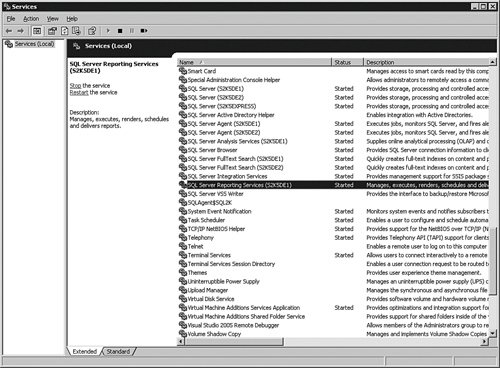
This method is useful if you are already in the Services applet or if you want to stop the service on a remote computer. Another method to stop and start the service is to use the SQL Server Configuration Manager, shown in Figure 9-23. Figure 9-23.[View full size image] 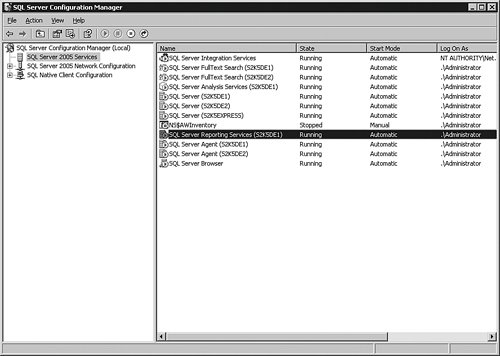
This is a good way to control the services from an entire SQL Server perspective, or if you are in the tool to stop more than just Reporting Services. If you are working with the server strictly from a Reporting Services aspect or you want to change other configuration parameters, the best place to view, stop, and start Reporting Services is using the Reporting Services Configuration Management tool. You should see a screen similar to Figure 9-24, and the first icon in the list shows the server's status and allows you to control its state. Figure 9-24.[View full size image] 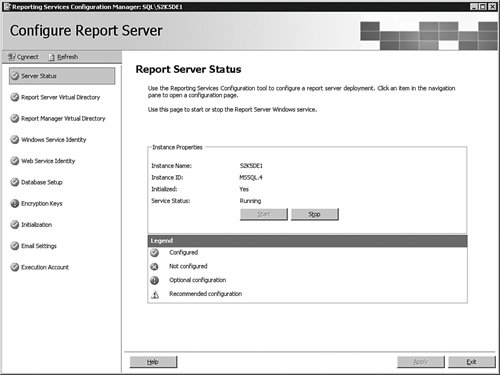
If you want to work with a different Reporting Services server, just click the Connect icon and supply the server's name and your credentials. Virtual DirectoriesA virtual directory is a term from Microsoft's Web server, IIS. It serves as a pointer that the system uses to present a physical directory as a Web location. For instance, the site http://MyServer/MyDirectory can be "pointed" using a virtual directory to a location on the server's hard drive called c:\www\public. Anything you put in the physical directory shows up on the Web site. The second icon in Reporting Services Configuration Management sets the Web site virtual directory that you can use for the Web-based management of the system. On this test system, I have the default directory set up; if you are setting up the system for the first time without using the original installation wizard, however, you can specify the site in Figure 9-25. If you want to use a SSL for more security, this is also the place to set that. If you want to make that choice your IIS, you need to have the SSL setup complete before you can access the system using the HHTPS protocol. Figure 9-25.[View full size image] 
The second virtual directory shown in Figure 9-26 sets the site that the system will use to present the reports to the users. Figure 9-26.[View full size image] 
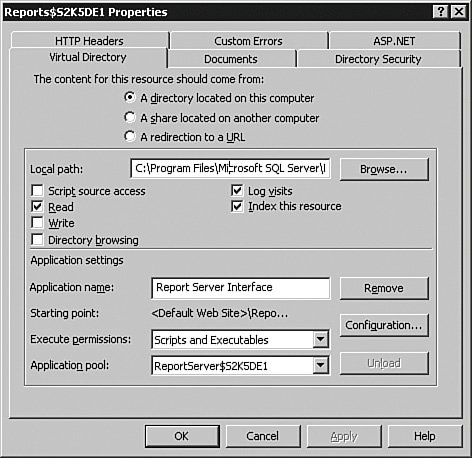
The information here looks similar to the previous screen, but notice that it does not have a selection for SSL. On my test system, I have also opened the Internet Information Services Microsoft Management Console (IIS MMC) from the Windows Start menu and expanded the Reporting Services virtual directory there. You can see that in Figure 9-27. Figure 9-27.[View full size image] 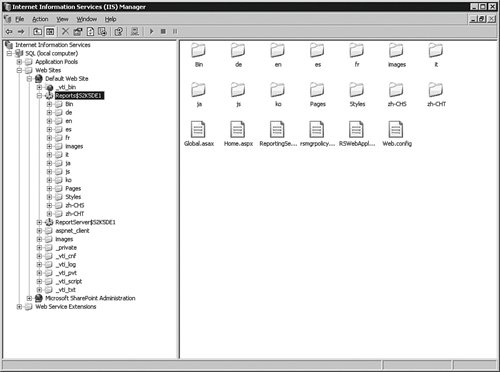
I have right-clicked the name of this site and selected Properties from the menu that appears. That brings up the panel shown in Figure 9-28 where I can see the physical directory of the Reporting Services Web site. Figure 9-28.
Unless you are familiar with IIS management, do not make any changes to these settings. You can make your site unavailable by making the smallest adjustments. One of the most useful settings you should leave selected is the Log Visits check box. This setting places an entry in the IIS log system, which will aid you in finding any problems. There are ways to configure that to send to a text file or a database, and this forms an invaluable part of troubleshooting for IIS. The screens I have just shown you are for the Windows 2003 Server version of IIS. If you are running Windows XP or Windows 2000, your screens will look slightly different. Service AccountsThe next icon in the Reporting Services Configuration Manager deals with the Windows service that runs Reporting Services. In Figure 9-29, you can see the four choices for the identity of the service account. The first, in the Built-in account pull down, is the Local System account. Because this account cannot make network connections and is not treated as a user account, this is normally a bad choice. Figure 9-29.[View full size image] 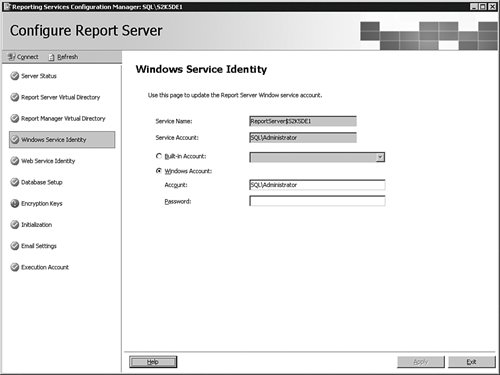
The second option, Network Service, has slightly more privileges, but is not the best choice because of its limited operating system rights. The same holds true for the Local Server, which has the added disadvantage that it cannot use networking protocols. The better choice is to create a Windows account that you can use for this service and grant it the rights needed to talk across the network, connect to an SMTP server, and run as a service.
The next icon is used to set the identity for the IIS 6 and higher application pool, as shown in Figure 9-30. Figure 9-30.[View full size image] 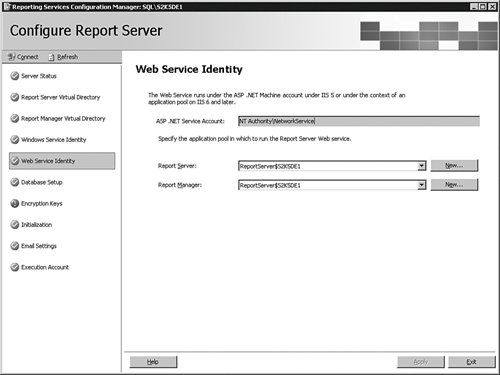
The application pool allows IIS to run code in isolation, with different rights and privileges. What that means is that a particular application will not bring down the entire IIS server, just the application assigned to its "pool." Unless you need to change this setting, leave it at the default. Report Server DatabaseIn the next icon area, you can control the database that Reporting Services uses to store the reports. You can see that selection in Figure 9-31. Figure 9-31.[View full size image] 
You also set the credentials in this area that the system uses to connect to the database. The default is to use the service accounts you specified in the previous panels. You can change that to a Windows or SQL Server account. There is also a button here that you can use to upgrade the database. This is for systems where you had an earlier version of Reporting Services installed and you want to retain the reports it has. After you install SQL Server 2005 Reporting Services, you point this panel at the older database and then click the Upgrade button. The system will apply the changes for the newer version and apply SQL Server 2005 schemas to the database layout. Encryption KeysIf you want to ensure the highest level of security on your system, encrypt the contents using this area of the Reporting Services Configuration Manager. This is shown in Figure 9-32. Figure 9-32.[View full size image] 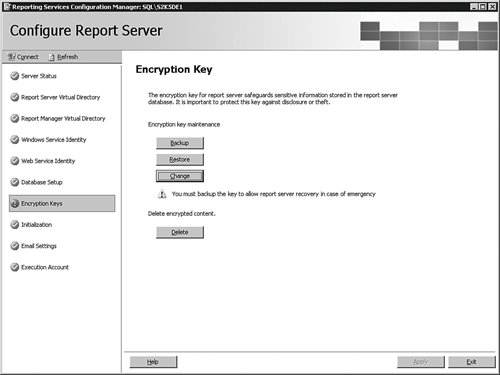
If you want to secure your system, click the Change button to start the process. When the process completes, it has generated a key that this server will use to encrypt its data. Click the Backup button right away and supply a password and a filename for the key. If you lose this key, you cannot decrypt the data later. Store that file in a safe place. InitializationThe Initialization area lets you create all of the objects and settings you need to set up an instance of Reporting Services. You can remove the instance by clicking the Remove button, as shown in Figure 9-33. Figure 9-33.[View full size image] 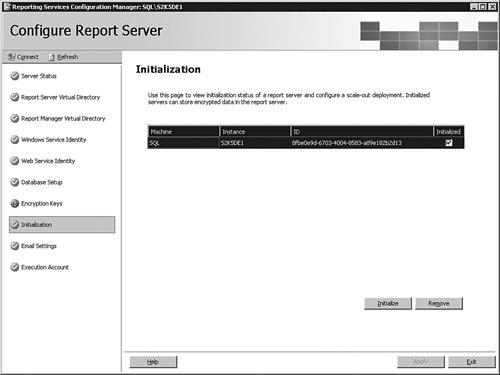
E-Mail SettingsReporting Services can send out reports using multiple channels. One of the most useful channels for reports such as Key Performance Indicators in Business Intelligence is e-mail. In the screen shown in Figure 9-34, you can set the login and location for your e-mail server. Figure 9-34.[View full size image] 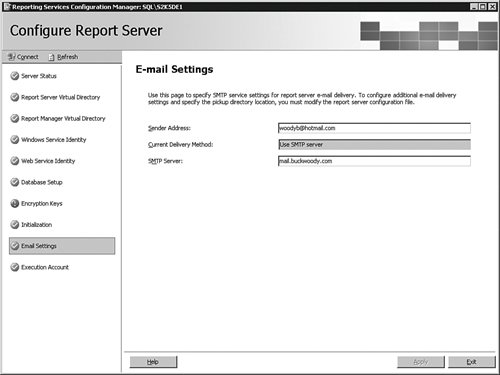
Execution AccountThe Reporting Services service accounts are not used to authenticate to other servers, other than for certain data sources. Instead, the reports can impersonate a user or use a Windows account or this execution account to retrieve graphics files and other documents. You can set that account in the screen shown in Figure 9-35. Figure 9-35.[View full size image] 
Report ManagerIf you have been following along with the examples in this chapter, you have already accessed the Web-based Report Manager several times. The location for the manager is in the following format: http://SERVERNAME/Reportsor http://SERVERNAME/Reports$INSTANCENAME The Report Manager provides a rich environment to do everything from viewing the reports to managing the security for them. In this screen, I have connected to my Reporting Services instance Web site from my local workstation. I clicked the Show Details button to arrange the items on my Reporting Services instance, as you can see in Figure 9-36. I demonstrate this tool further in a bit. Figure 9-36.[View full size image] 
Working with Report Manager ObjectsThe layout in Report Manager is similar to a file system. You have objects, such as reports, or folders that contain objects and other folders. In my case, someone (me, actually) published a report directly to the root of the site, something I would rather not have. I could either move the item to an existing folder or create a new one using the Report Manager. Because I do not have a convenient place for the reports, I create a new folder called User Reports using the New Folder button at the top of the page, as shown in Figure 9-37. Figure 9-37.[View full size image] 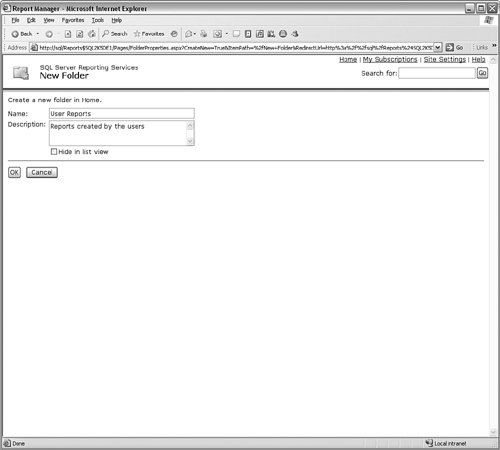
With that folder created, I click the check box for the report and then click the Move button, specifying the new folder as the destination. Each object and folder in the Report Manager has a Properties tab associated with it. You can click this tab to set the security and other information for the report or folder. In Figure 9-38, I have selected the report I just moved and then accessed the Properties tab to find out more about it. Figure 9-38.[View full size image] 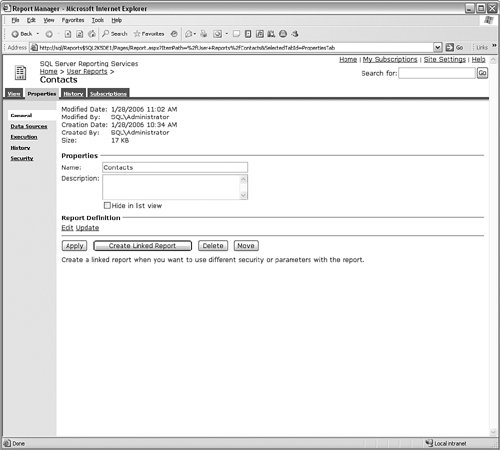
Each object also has a security property associated with it, which you can manage from here. I cover security in greater depth in a moment. Back on the Home screen of the Report Manager, you will also find a button to upload a report or other files. If your developers create reports using a tool other than the ones Microsoft provides, you can take its RDL and load the report into your system here. You can also upload binary files such as logos and other objects the users need access to; unless you have a driving need to store those types of files on the Report Server site, however, it is best not to. The Report Manager can also control the subscriptions the user has for report distribution. I cover that a little further on in the chapter. Another useful feature in the Report Manager is the ability to control the entire site from the Web. Click the Site Settings link in the upper right of the screen to manage the server. You can see the result in Figure 9-39. Figure 9-39.[View full size image] 
On this screen, you can allow users to create their own folders for publishing reports, set the number of filled out, static reports (called snapshots) the users can save, and set limitations for the duration of the reports such as timeouts. You can also enable logging here, as well as manage security for the site and set the jobs and schedules for the reports. SQL Server Management StudioIf you are connected to the same network as the Reporting Services instance, another tool you can use for management is the SQL Server Management Studio. When you connect to this tool, you specify that you want to connect to Reporting Services in the Server type box, shown in Figure 9-40. Figure 9-40.
Once inside, you have a more familiar interface to work with than the Report Manager Web site. This environment uses the noun-verb arrangement where you right-click objects (nouns) to do something with them (verbs). You can see that arrangement in Figure 9-41. Figure 9-41.[View full size image] 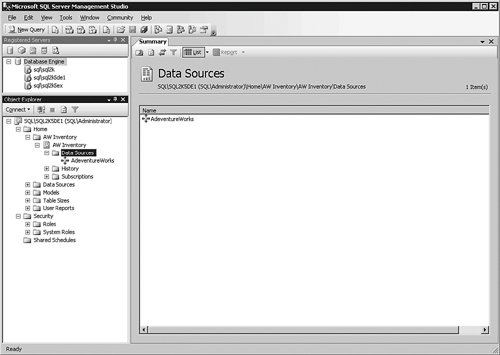
Right-click any object to get to its properties, such as security and history. Right-clicking the objects you see here is the primary method of interacting with this tool. Another advantage in using SQL Server Management Studio is that you can register Reporting Services as well as database engines, Integration Services, and more in the same panel. When you need to manage an "end-to-end" solution, SQL Server Management Studio is often the best tool to use. Let's take a look at the first task you should do with Management Studio. Backing Up and Restoring ReportsWe are going to add to the Report Server registration within SQL Server Management Studio, because to back up the data for the reports we need to use the database engine. Although it might seem cumbersome to use another part of the tool to do this kind of management, it makes sense from a task standpoint. Normally, the people in charge of the reporting system are not in charge of the database systems. If you are, it is a simple matter of clicking the Connect button just above the Object Browser and selecting Database Engine from the menu. Enter the name and credentials for the server that holds the Reporting Services databases. From there, you maintain and back up the databases in the same way that you do with any production database. There are some subtle differences, however, in the way that you set up and manage the databases. The Reporting Services databases start with the words ReportServer and are created during the install or configuration process. You will have at least two: one for the Reporting Services site, which holds the report definitions and binary objects used by the system; and the other for the temporary files created by the system. These temporary items are not just the sort operations and other "scratch" areas; it also holds the copies of the filled-out report. Recall that what the users call a report is the combination of the report definition and the source data. As such, this database can become quite large, which is just one of the reasons you do not store it on the same server as your OLTP data. Another difference in the way you handle these databases is that you should not change the structure or add objects to the database unless directed to by Microsoft. |