Creating and Running Action Queries
With Action queries, you can easily modify data without writing any code. In fact, using Action queries is often a more efficient method of modifying data than using code. Four types of Action queries are available: Update, Delete, Append, and Make Table. You use Update queries to modify data in a table, Delete queries to remove records from a table, Append queries to add records to an existing table, and Make Table queries to create an entirely new table. The sections that follow explain these query types and their appropriate uses.
Creating and Running Update Queries
You use Update queries to modify all records or any records that meet specific criteria. You can use an Update query to modify the data in one field or several fields (or even tables) at one time. For example, you could create a query that increases the salary of everyone in California by 10%. As mentioned previously, using Action queries, including Update queries, is usually more efficient than performing the same task with Visual Basic for Applications (VBA) code, so you can consider Update queries a respectable way to modify table data.
To build an Update query, follow these steps:
In the Database window, Click Queries in the Objects list.
Double-click the Create Query in Design View icon. The Show Table dialog box appears.
In the Show Table dialog box, select the tables or queries that will participate in the Update query and click Add. Click Close when you're ready to continue.
To let Access know you're building an Update query, open the Query Type drop-down list on the toolbar and select Update Query. You can also choose Query | Update Query.
Add to the query fields that you will use for criteria or that Access will update as a result of the query. In Figure 15.14, StateProvince is included on the query grid because we will use it as a criterion for the update. DefaultRate is included because it's the field that Access will update.
Figure 15.14. An Update query that increases DefaultRate for all clients in California.
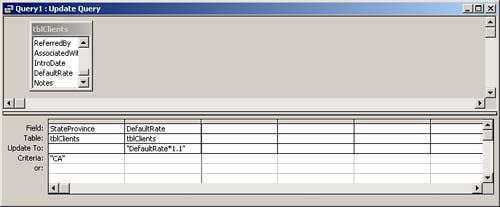
Add any further criteria, if you want. In Figure 15.14, the criterion for StateProvince is CA.
Add the appropriate Update expression. The example illustrated in Figure 15.14 increases DefaultRate by 10%.
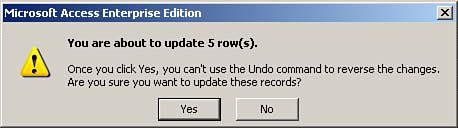
Click Run on the toolbar. The message box shown in Figure 15.15 appears. Click Yes to continue. Access updates all records that meet the selected criteria.
Figure 15.15. The confirmation message you see when you run an Update query.
You should name Access Update queries with the prefix qupd. In fact, you should give each type of Action query a prefix indicating what type of query it is. This makes your application easier to maintain, makes your code more readable, and renders your code self-documenting. Table 15.1 lists all the commonly accepted prefixes for Action queries.
Type of Query | Prefix | Example |
|---|---|---|
Update | qupd | qupdDefaultRate |
Delete | qdel | qdelOldTimeCards |
Append | qapp | qappArchiveTimeCards |
Make Table | qmak | qmakTempSales |
Access displays each type of Action query in the Database window with a distinctive icon. |
Access stores all queries as Structured Query Language (SQL) statements. You can display the SQL for a query by selecting SQL View from the View drop-down list on the toolbar. The SQL behind an Access Update query looks like this:
UPDATE tblClients SET tblClients._
    DefaultRate = [DefaultRate]*1.1
     WHERE (((tblClients.StateProvince)="CA"));
You cannot reverse the actions taken by an Update query or by any Action queries. You must therefore exercise extreme caution when running any Action query. |
It's important to remember that if you have turned on the Cascade Update Related Fields Referential Integrity setting and the Update query tries to modify a primary key field, Access updates the foreign key of each corresponding record in related tables. If you have not turned on the Cascade Update Related Fields setting and you have enforced referential integrity, the Update query doesn't allow you to modify the offending records. |
Creating and Running Delete Queries
Rather than simply modify table data, Delete queries permanently remove from a table any records that meet specific criteria; they're often used to remove old records. You might want to use a Delete query to delete all orders from the previous year, for example.
To build a Delete query, follow these steps:
While in a query's Design view, select Delete Query from the Query Type drop-down list on the toolbar. Or, you can choose Query | Delete Query.
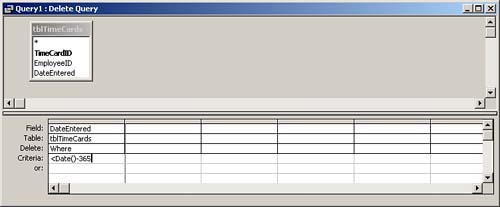
Add to the query grid the criteria you want. The query shown in Figure 15.16 deletes all time cards that are more than 365 days old.
Figure 15.16. A Delete query that is used to delete all time cards entered more than a year ago.
Click Run on the toolbar. The message box shown in Figure 15.17 appears.
Figure 15.17. The Delete query confirmation message box.
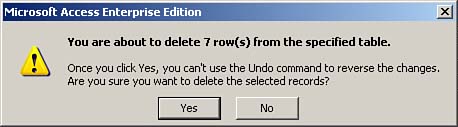
Click Yes to permanently remove the records from the table.
The SQL behind a Delete query looks like this:
DELETE tblTimeCards.DateEntered
     FROM tblTimeCards
     WHERE (((tblTimeCards.DateEntered)<Date()-365));
It's often useful to view the results of an Action query before you actually affect the records included in the criteria. To view the records affected by an Action query, you click the Query View button on the toolbar before you select Run. All records that will be affected by the Action query appear in Datasheet view. If necessary, you can temporarily add key fields to the query to get more information about the records that are about to be affected. |
Remember that if you turn on the Cascade Delete Related Records Referential Integrity setting, Access deletes all corresponding records in related tables. If you do not turn on the Cascade Delete Related Records setting and you do enforce referential integrity, the Delete query doesn't allow you to delete the offending records. If you want to delete the records on the "one" side of the relationship, first you need to delete all the related records on the "many" side. |
Creating and Running Append Queries
You can use Append queries to add records to existing tables. You often perform this function during an archive process. First, you append to the history table the records that need to be archived by using an Append query. Next, you remove the records from the master table by using a Delete query.
To build an Append query, follow these steps:
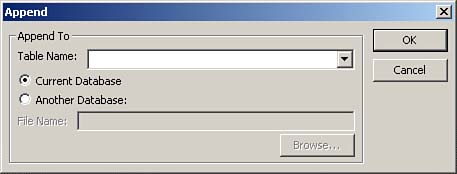
While in Design view of a query, select Append Query from the Query Type drop-down list on the toolbar or choose Query | Append Query. The dialog box shown in Figure 15.18 appears.
Figure 15.18. The dialog box in which you identify the table to which data will be appended and the database containing that table.
Select the table to which you want Access to append the data.
Drag all the fields whose data you want included in the second table to the query grid. If the field names in the two tables match, Access automatically matches the field names in the source table to the corresponding field names in the destination table. (See Figure 15.19.) If the field names in the two tables don't match, you need to explicitly designate which fields in the source table match which fields in the destination table.
Figure 15.19. An Append query that appends to another table the TimeCardID, EmployeeID, and DateEntered of each employee entered in the year 1995.
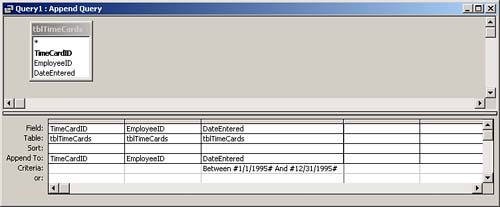
Enter any criteria in the query grid. Notice in Figure 15.19 that the example appends to the destination table all records with DateEntered in 1995.
To run the query, click Run on the toolbar. The message box shown in Figure 15.20 appears.
Figure 15.20. The Append Query confirmation message box.
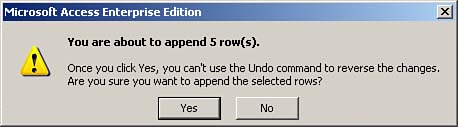
Click Yes to finish the process.
The SQL behind an Append query looks like this:
INSERT INTO tblTimeCardsArchive ( TimeCardID, EmployeeID, DateEntered )
    SELECT tblTimeCards.TimeCardID, tblTimeCards.EmployeeID,
    tblTimeCards.DateEntered
    FROM tblTimeCards
    WHERE (((tblTimeCards.DateEntered) Between #1/1/95# And #12/31/95#));
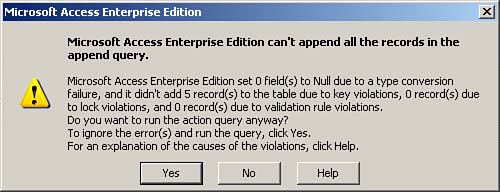
Append queries don't allow you to introduce any primary key violations. If you're appending any records that duplicate a primary key value, the message box shown in Figure 15.21 appears. If you go ahead with the append process, Access appends to the destination table only records without primary key violations.
Figure 15.21. The warning message you see when an Append query and conversion, primary key, lock, or validation rule violation occurs.
Creating and Running Make Table Queries
Whereas an Append query adds records to an existing table, a Make Table query creates a new table, which is often a temporary table used for intermediary processing. You might want to create a temporary table, for example, to freeze data while you are running a report. By building temporary tables and running a report from those tables, you make sure users can't modify the data underlying the report during the reporting process. Another common use of a Make Table query is to supply a subset of fields or records to another user.
To build a Make Table query, follow these steps:
While in the query's Design view, select Make Table Query from the Query Type drop-down list on the toolbar or choose Query | Make Table Query. The dialog box shown in Figure 15.22 appears.
Figure 15.22. The dialog box in which you enter a name for a new table and select which database to place it in.
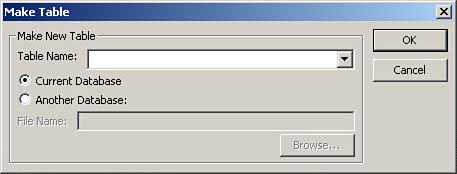
Enter the name of the new table and click OK.
Move all the fields you want included in the new table to the query grid (see Figure 15.23). You will often include the result of an expression in the new table.
Figure 15.23. Adding an expression to a Make Table query.
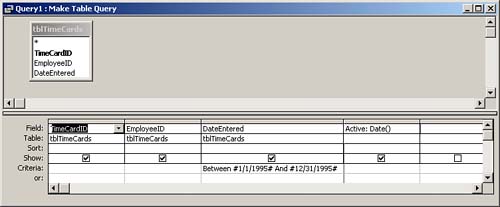
Add to the query the criteria you want.
Click Run on the toolbar to run the query. The message shown in Figure 15.24 appears.
Figure 15.24. The Make Table query confirmation message box.
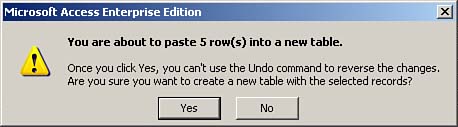
Click Yes to finish the process.
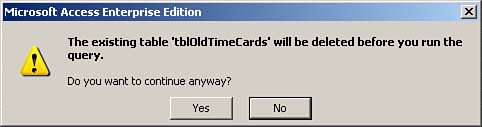
If you try to run the same Make Table query more than one time, Access permanently deletes the table with the same name as the table you're creating. (See the warning message in Figure 15.25.)
Figure 15.25. The Make Table query warning message that is displayed when an existing table already has the same name as the table to be created.
The SQL for a Make Table query looks like this:
SELECT tblTimeCards.TimeCardID, tblTimeCards.EmployeeID,
     tblTimeCards.DateEntered, [DateEntered]+365 AS ArchiveDate
     INTO tblOldTimeCards
     FROM tblTimeCards
     WHERE (((tblTimeCards.TimeCardID) Between 1 And 10));


