Adding Custom Menu Bars, Toolbars, and Shortcut Menus
You can create custom menus, toolbars, and shortcut menus to display with forms and reports. There's no limit to how many custom menu bars, toolbars, and shortcut menus you can use. You can attach each menu bar, toolbar, and shortcut menu to one or more forms or reports. Quite often, you need to restrict what users can do while they're working with a form or report. By creating a custom menu, toolbar, or shortcut menu, you can restrict and customize what users are allowed to do.
Designing a Menu Bar, Toolbar, or Shortcut Menu
Prior to Access 97, Access users could create a custom menu bar by setting the MenuBar property to the name of a menu bar macro. This function is supported in Access 2003 for backward compatibility only. In Access 97 and above, custom menu bars, toolbars, and pop-up menus are called command bars. To create any of these three objects, you choose View | Toolbars and then select Customize. After you have created a custom command bar, you can easily associate it with forms and reports by using the MenuBar, Toolbar, and Shortcut MenuBar properties. |
Follow these steps to create a custom command bar:
Choose View | Toolbars and click Customize or right-click any command bar and select Customize.
When the Customize dialog box opens, click the Toolbars tab and then click New. The New Toolbar dialog box appears (see Figure 24.1).
Figure 24.1. Using the New Toolbar dialog box to create a new command bar.
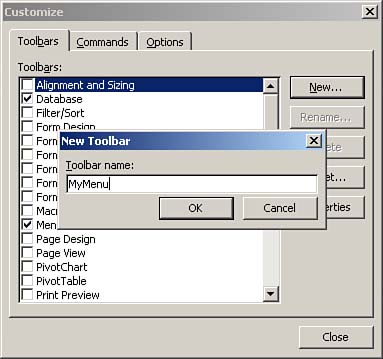
Assign a name to the new menu bar, toolbar, or pop-up menu. The new command bar then appears.
Click the Properties button on the Customize dialog box to view the properties for the newly created command bar. In the Toolbar Properties dialog box that appears, you name the toolbar, select the toolbar type, indicate the type of docking that's allowed, and set other options for the command bar. The Type drop-down list box allows you to select Menu Bar, Toolbar, or Pop-up. The options in the Docking drop-down list box are Allow Any, Can't Change, No Vertical, and No Horizontal. You can also choose whether you will allow the user to customize or move the command bar.
After you select the options you want, click Close.
Menu bars, toolbars, and pop-up menus are all referred to generically as command bars. The process you use to create each of these objects is very similar. You use the Type property of the command bar to designate the type of object you want to create. |
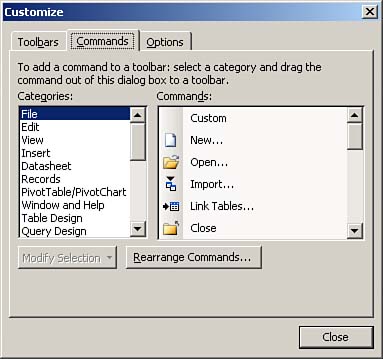
Now you're ready to add items to the new command bar. The process you use depends on whether you are working with a toolbar, menu bar, or pop-up menu. To add items to a command bar, you click the Commands tab of the Customize dialog box, shown in Figure 24.2, and drag and drop command icons onto the new command bar.
Figure 24.2. Using the Commands tab to add items to a command bar.
Here are some tips to help you to create custom menu bars, toolbars, and pop-up menus:
To add an entire built-in menu to a menu bar, select Built-in Menus from the Categories list box on the Commands tab of the Customize dialog box. Click and drag a menu pad from the Commands list box over to the menu bar to add the entire built-in menu pad to the custom menu.
To create a custom menu pad, select New Menu from the Categories list box. Click and drag the New Menu option to the menu bar. To modify the text on the menu pad, right-click the menu pad and type a new value in the Name text box.
To add a built-in command to the menu, select a category from the Categories list box and then click and drag the appropriate command to the menu pad. The new item appears underneath the menu pad.
To add a separator bar to a menu, right-click the menu item that will follow the separator bar and select Begin a Group. To remove the separator bar, again select Begin a Group.
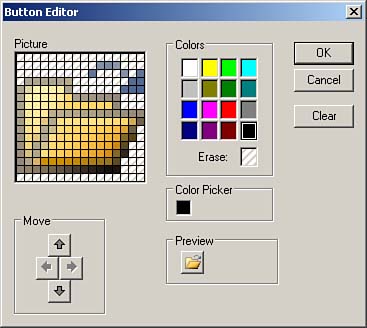
Menu items can contain text only or images and text. To select one of these options, right-click a menu item and select Default Style, Text Only (Always), Text Only (in Menus), or Image and Text. To customize an image, right-click a menu item and select Change Button Image and choose one of the available images. To modify the button image, right-click a menu item and select Edit Button Image; the Button Editor dialog box appears (see Figure 24.3). If you want to reset the button to its original image, right-click the menu item and select Reset Button Image.
Figure 24.3. Modifying or creating button images with the Button Editor.
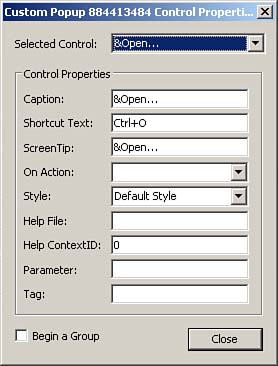
If you want to modify several properties of a menu item at once, you can right-click the menu item and select Properties (while viewing the design of the menu) to open the file Control Properties dialog box (see Figure 24.4). In this dialog box you can select properties for the menu item, such as Caption, Screen Tip, Style, Help File, and Help ContextID. You can also associate an action with a custom menu item (which you'll learn about in the next section, "Associating a Command with a Menu Item").
Figure 24.4. Modifying menu item properties with the file Control Properties dialog box.
Associating a Command with a Menu Item
In Access, it's easy to customize menus with both built-in commands and macros that you've written. For built-in commands, you can simply drag and drop commands onto command bars. To have a command bar item run a macro, follow these steps:
Right-click any toolbar or menu bar and select Customize to open the Customize dialog box. Select the Commands tab.
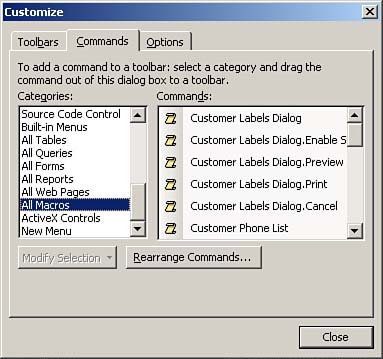
Select All Macros from the Categories list box (see Figure 24.5).
Figure 24.5. Selecting All Macros from the Categories list box.
Click and drag the macro from the Commands list box directly onto the command bar.
Right-click the menu item to change the name, button image, style, or properties.
Deleting and Renaming Menus
You can use the Customize dialog box to delete and rename menus by following these steps:
Right-click any command bar and select Customize. The Customize dialog box appears.
Click in the Toolbars list box to select the command bar you want to delete or rename (see Figure 24.6).
Figure 24.6. Deleting and renaming a menu.

Click Delete to delete the command bar or click Rename to rename it.


