Creating and Modifying Data Access Pages
Data access pages are similar to forms. Access stores them as dynamic HTML files with the .HTM extension. Users can view and update data access pages in Internet Explorer 5.0 and above. You create data access pages in one of the following four ways:
Using AutoPage
Using a wizard
From an existing Web page
From scratch
Creating a Data Access Page by Using the AutoPage Feature
To create a data access page using AutoPage, follow these steps:
Click Pages in the list of objects in the Database window.
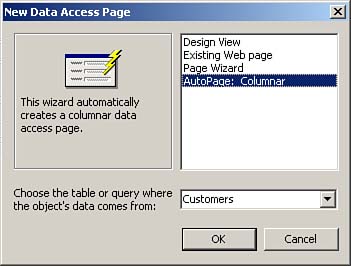
Click the New button in the Database window. The New Data Access Page dialog box appears.
Choose the table or query on which you want to base the data access page.
Select AutoPage: Columnar from the list of options for creating a data access page (see Figure 19.12).
Figure 19.12. The New Data Access Page dialog box, which allows you to select the type of data access page to create.
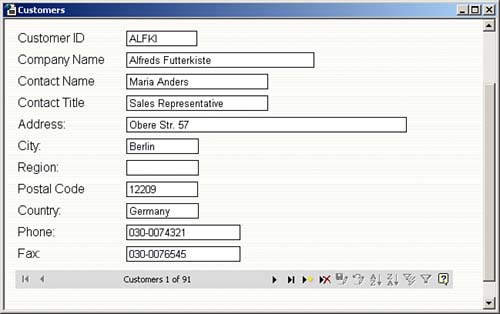
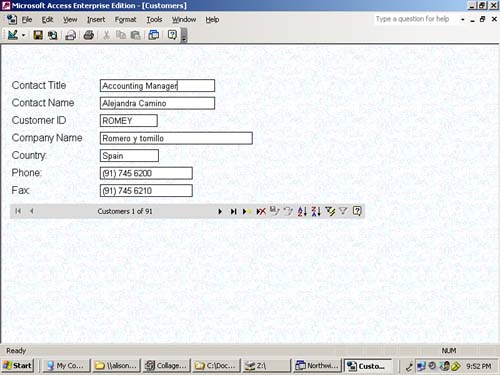
Click OK. Access creates the data access page (see Figure 19.13).
Figure 19.13. A data access page based on the Northwind database Customers table, using the AutoPage feature.
Creating a Data Access Page Using a Wizard
To create a data access page using a wizard, follow these steps:
Click Pages in the list of objects in the Database window.
Double-click the Create Data Access Page By Using Wizard option. The Page Wizard appears (see Figure 19.14).
Figure 19.14. The Page Wizard.
Select the table or query on which you want to base the data access page. In Figure 19.15, the Customers table is selected.
Figure 19.15. Selecting the table or query on which you want to base a data access page.
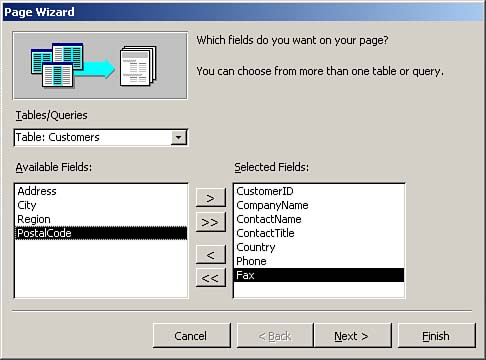
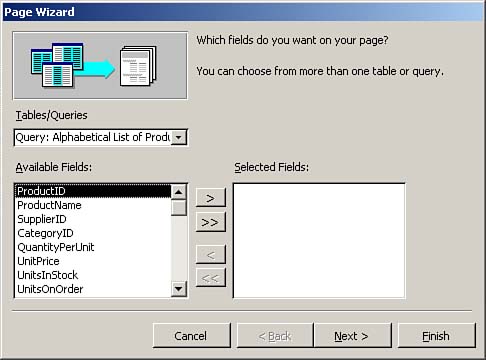
Select the fieldsp that you want to appear on the data access page. In Figure 19.15 the CustomerID, CompanyName, ContactName, ContactTitle, Country, Phone, and Fax fields are selected. Click Next to continue.
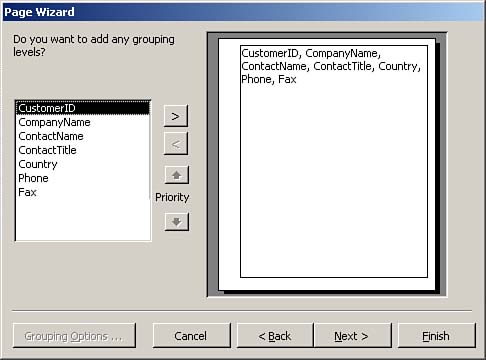
In the next window of the wizard (see Figure 19.16), add any desired grouping levels to the page. In Access 2000 the created page is rendered not editable when you apply grouping. Fortunately, that is not the case in Access 2002 and 2003! Click Next to continue.
Figure 19.16. Adding grouping levels to a data access page.
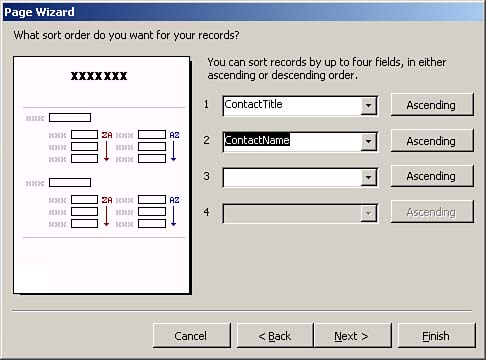
In the next page of the wizard (see Figure 19.17), select a sort order for the records included on the page. You can select either ascending or descending order. In Figure 19.17, the page is sorted by the ContactTitle field combined with the ContactName field. Click Next to continue.
Figure 19.17. Selecting a sort order for the records on a page.
The last page of the wizard asks you for a title for the page. You can also opt to apply a theme to the page. Enter the title, select whether to apply a theme, and then designate whether to open the page or modify the page's design. Click Finish to complete the process. If you elected to apply a theme to the page, the Theme dialog box appears (see Figure 19.18). Select a theme and click OK. Figure 19.19 shows the completed page in Design view. Figure 19.20 shows the completed page in Page view.
Figure 19.18. The Theme dialog box, which allows you to apply a theme to a page.
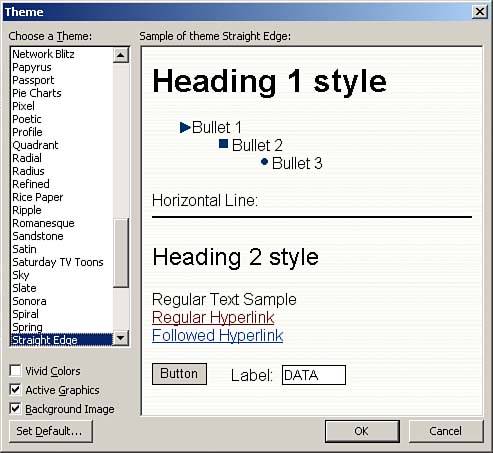
Figure 19.19. A completed data access page in Design view.
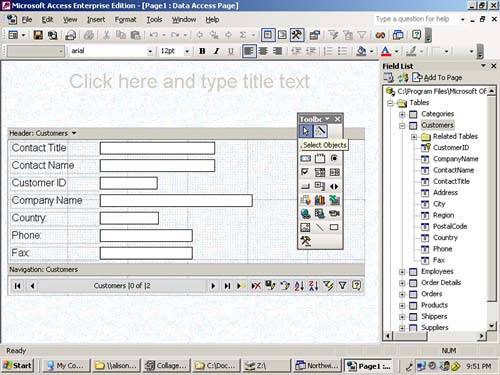
Figure 19.20. A completed data access page in Page view.
Access does not store data access pages in a database file or project. Instead, it saves data access pages as HTML files. To save a data access page, follow these steps:
Click Save on the toolbar. The Save As Data Access Page dialog box appears (see Figure 19.21).
Figure 19.21. The Save As Data Access Page dialog box.
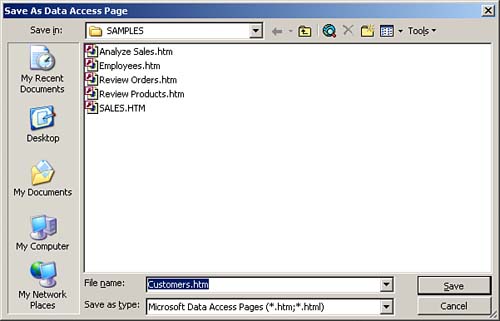
Enter the name of the HTML document. The figure shows the name Customers.htm. Click Save.
A dialog box appears, suggesting that the connection string should point to a universal naming convention (UNC) path. Pointing the connection string to a UNC path helps ensure that the data behind the page will be available over the network.
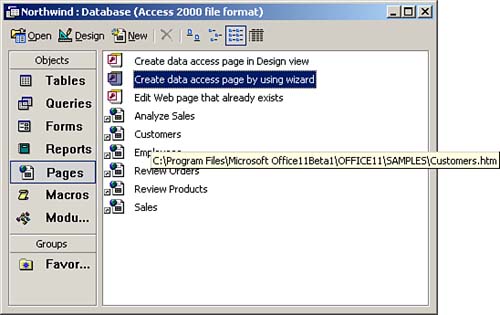
Although Access saves the data access page as a separate document, the page appears in the Database window (see Figure 19.22). Notice in the figure that a ToolTip appears, indicating the name and location of the saved HTML document. When you open the data access page from within Microsoft Access, it appears as a window in the Access environment. To view the page as it will appear in a browser, you right-click the page in the Database window and select Web Page Preview from the context menu.
Figure 19.22. A completed data access page that appears as an object.
Creating a Data Access Page from Scratch
Although the Page Wizard is very powerful, there may be times when you want to build a data access page from scratch. To do this, follow these steps:
Click Pages in the list of objects in the Database window.
Double-click the Create Data Access Page in Design View option. Access presents a dialog box, indicating that you cannot open in Access 2000 or Access 2002 a data access page that you create in Access 2003 in Design view. Click OK, and a blank data access page appears (see Figure 19.23).
Figure 19.23. A blank data access page.

Add controls to the data access page and set their properties.
You might wonder how to associate a table from a database with a data access page that you build from scratch. The process differs somewhat from the process of associating a form with data. The process is as follows:
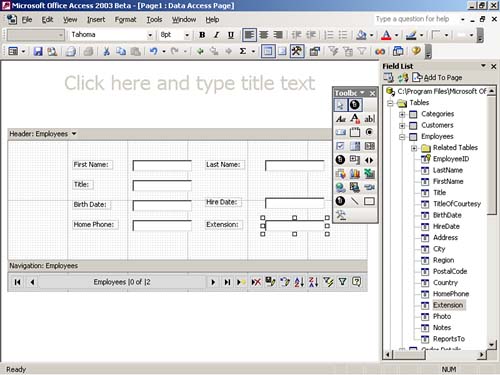
Click the Field List tool on the toolbar. The Field List window appears (see Figure 19.24). Notice that the Field List window shows two expandable lists: one with the tables in the database and one with the queries in the database (see Figure 19.25).
Figure 19.24. Adding table and query fields from the Field List window.
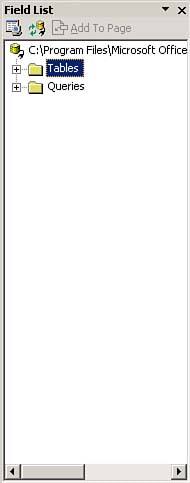
Figure 19.25. The expanded Field List window.

To add all fields from an existing table or query to the data access page, drag an entire table or query from the field list to the data access page.
To add specific fields from a table or query to the data access page, expand the field list to display the desired table or query and then drag and drop individual fields to the data access page. Figure 19.26 shows selected fields from the Employees table added to the data access page.
Figure 19.26. A data access page that contains selected fields from the Employees table.