The Linked Table Manager
The Linked Table Manager is an important tool for working with linked tables. It allows you to move tables to another folder or another drive and then update the link to that table.
To move and update table links, follow these steps:
Choose Tools | Database Utilities | Linked Table Manager. The Linked Table Manager appears (see Figure 18.12).
Figure 18.12. The Linked Table Manager.
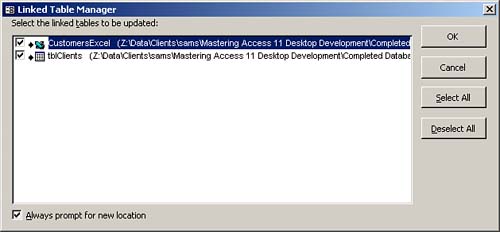
Select the linked table(s) you want to update.
Select the Always Prompt for New Location check box.
Click OK.
Select the folder or drive to which you have moved the table.
Select the table and then click Open.
Click OK.
You might at some time have a link that you no longer need. For example, you might import data because it is no longer necessary to utilize the legacy system that you have in place. The following are the steps necessary to remove such a link:
Select the link you want to remove.
Press the Delete key. The dialog box shown in Figure 18.13 appears.
Figure 18.13. Access prompting you to remove a link.
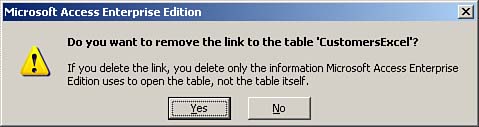
Click Yes to remove the link. The link is removed.
It is important to note that this process does not remove the linked object. It simply removes the link. |
Task: Linking Tables from One Database to Another and Exporting Data to Other Databases
Follow these steps to practice the skills that you have learned in this hour: |
Open the Northwind database that ships with Access.
Export the Orders table as an Excel spreadsheet.
Export the Products table as a text file.
Import the Orders spreadsheet into the Northwind database and name it Orders2. Base the primary key on the OrderID field.
Import the Products text file into the Northwind database and name it ProductsBackup. The ProductId field is the primary key.
Create a new database called Northwind2003.
Import the Orders table from Northwind into Northwind2003.
Link the Customers table from the Northwind2003 database to the Northwind database.
Add the records shown in Table 18.1 to the Customers table in the Northwind2003 database.
Table 18.1. Records to Add to the Customers Table
CustomerID
CompanyName
ContactName
ContactTitle
City
ALEXI
Alexis' Flowers
Alexis Balter
President
Oak Park
BREND
Brendan's Trucking
Brendan Balter
CEO
Westlake
Add the records shown in Table 18.2 to the Orders table in the Northwind2003 database.
Table 18.2. Records to Add to the Orders Table
ClientID
EmployeeID
OrderDate
Freight
ALFKI
1
6/2/2001
100
QUICK
4
7/4/2001
300
Close the Northwind2003 database and open the Northwind database.
Open the Orders table and notice that the records you added to this table in the Northwind2003 database do not appear in this table.
Close the table.
Open the Customers table and notice that the records you added to this table in the Northwind2003 database appear in this table.
Close the table and the database.


