Graphics and Images
Graphics and Images
The applications in this category enable you to work with images, graphics (line drawings and shapes), and sound. Chapter 5 describes the CD players you can use to play audio CDs on your Red Hat Linux system. The following applications, summarized in this chapter, enable you to prepare, view, modify, and print graphics and images:
-
The GIMP (the GNU Image Manipulation Program)—A program for viewing and performing image-manipulation tasks, such as photo retouching, image composition, and image creation
-
Xfig—A drawing program capable of producing engineering drawings
-
Gnuplot—A plotting package
-
Ghostscript—A PostScript interpreter capable of producing output on many devices, including output in various image-file formats
-
KGhostview—A KDE application capable of displaying PostScript and PDF files
Manipulating Images with the GIMP
The GIMP (GNU Image Manipulation Program) is an image-manipulation program written by Peter Mattis and Spencer Kimball and released under the GNU General Public License (GPL). It is installed if you select the Graphics Manipulation package when you install Red Hat Linux from this book’s companion CD-ROMs. The GIMP is comparable to other image-manipulation programs, such as Adobe Photoshop and Corel Photopaint.
To try out the GIMP, select Main Menu>Graphics>The GIMP from the GNOME desktop or the KDE desktop. The GIMP starts and displays a window with copyright and license information. Click the Continue button to proceed with the installation. The next screen shows the directories to be created when you proceed with a personal installation of the GIMP.
GIMP installation involves creating a directory called .gimp-1.2 in your home directory and placing a number of files in that directory. This directory essentially holds information about any changes to user preferences you might make to the GIMP. Go ahead and click the Continue button at the bottom of the window. The GIMP creates the necessary directories and copies the necessary files to those directories, then it displays an installation log.
After reading the installation log and ensuring that there are no error messages, click the Continue button. The GIMP then guides you through several screens from which you are asked to specify the values of some parameters; you can accept the defaults and click the Continue button in each screen until the installation window closes. From this time on, you won’t see the installation window; you have to deal with installation only when you run the GIMP for the first time.
The GIMP then loads any plug-ins—external modules that enhance its functionality. It displays a startup window that shows a message about each plug-in as it has loaded. After finishing the startup, the GIMP displays a tip of the day in a window and a number of windows, as shown in Figure 10-9. You can browse the tips and click the Close button to close the tip window.
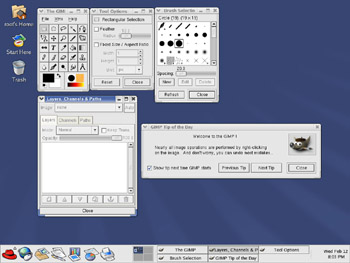
Figure 10-9: The Initial Windows Displayed by the GIMP.
The initial GIMP windows include a main toolbox window titled The GIMP, a Tool Options window, a Brush Selection window, and a Layers, Channels & Paths window. Of these, the main toolbox window is the most important—in fact, you can close the other windows and work by using the menus and buttons in the toolbox.
The toolbox has three menus on the menu bar: File, Xtns (extensions), and Help. The File menu has options to create a new image, open an existing image, save and print an image, mail an image, and quit the GIMP. The Xtns menu gives you access to numerous extensions to the GIMP. The exact content of the Xtns menu depends on which extensions are installed on your system. The Help menu enables you to view tips and get help on the GIMP. For example, select Help>Help to bring up the GIMP Help Browser with online information about the GIMP.
To open an image file in the GIMP, select File>Open. This brings up the Load Image dialog box from which you can select an image file. You can change directories and select the image file you want to open. GIMP can read all common image-file formats, such as GIF, JPEG, TIFF, PCX, BMP, PNG, and PostScript. After you select the file and click the OK button, the GIMP loads the image into a new window. Figure 10-10 shows a JPEG image from the file /usr/share/wallpapers/alien-night.jpg, which the GIMP has opened.
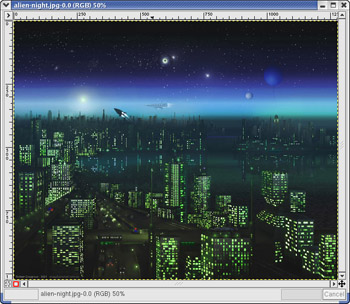
Figure 10-10: Opening an Image with the GIMP.
The GIMP’s main toolbox also has many buttons that represent the tools you use to edit the image and apply special effects. You can get pop-up help on each tool button by placing the mouse pointer on the button. You can select a tool by clicking that tool’s button, and you can apply that tool’s effects on the image.
For your convenience, the GIMP displays a pop-up menu when you right-click your mouse on the image window. The pop-up menu has most of the options from the File and Xtns menus in the toolbox. You can then select specific actions from these menus.
You can do much more than just load and view images with the GIMP, but a complete discussion of all its features is beyond the scope of this book. If you want to try the other features of the GIMP, you should consult the GIMP User Manual (GUM), available online at http://manual.gimp.org/. You can also select Xtns>Web Browser>GIMP.ORG>Documentation to access the online documentation for the GIMP (you need an Internet connection for this to work).
Some documentation about the GIMP is installed in the /usr/share/doc directory. To go to that directory, type cd /usr/share/doc/gimp* (the actual directory name depends on the current version of the GIMP). The README file in that directory points you to other resources on the Web, where you can learn more about the GIMP. In particular, visit the GIMP home page at http://www.gimp.org/ to learn the latest news about the GIMP and to find links to other resources.
Drawing Figures with xfig
The xfig program is an interactive drawing program that runs under X and can generate encapsulated PostScript files suitable for inclusion in documents. To use xfig, you need to install two RPM files—first the transfig RPM and then the xfig RPM.
To install xfig, follow these steps:
-
Mount each CD-ROM and search for the transfig and xfig RPMs. Insert each CD-ROM and wait for it to be mounted (or type mount /dev/cdrom to mount the CD-ROM). Then, type the following commands in a terminal window and look for the files:
cd /mnt/cdrom/RedHat/RPMS
ls transfig*
ls xfig*
-
After you find the files, install the transfig program with the rpm command as follows:
rpm -ivh transfig*.rpm
-
Install the xfig program with the rpm command as follows:
rpm -ivh xfig*.rpm
To try xfig, type xfig & in a terminal window. This command causes a rather large xfig window to appear. At the top edge of the window, you’ll find a menu bar. To open an xfig drawing, click the File button. That action brings up a file-selection dialog box, through which you can change directories and locate xfig files (they usually have the .fig extension).
You will find a large number of xfig drawings, organized into subdirectories, in the /usr/lib/X11/xfig/Libraries directory of your Red Hat Linux system (these files are installed when you install xfig). You can open and view some of these drawing files in xfig. For example, Figure 10-11 shows the xfig window after loading the drawing file /usr/lib/X11/xfig/Libraries/Buildings/twostory.fig.
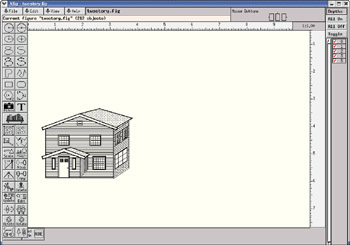
Figure 10-11: A Sample Drawing That xfig Displays.
As is true of any other tool, learning to use all of the features of xfig takes some practice. If you are familiar with other drawing software, such as MacDraw (Macintosh) or CorelDRAW (PC), you should be able to use xfig without much trouble.
Plotting Data with Gnuplot
Gnuplot is an interactive plotting utility. You need to run Gnuplot under the X Window System because it uses an X window as the output device. Gnuplot is command-line-driven program; it prompts you and accepts your input commands. In response to those commands, Gnuplot displays various types of plots. The output appears in an X window.
To install Gnuplot, follow these steps:
-
Mount each CD-ROM and search for the gnuplot RPM. Insert each CD-ROM and wait for it to be mounted (or type mount /dev/cdrom to mount the CD-ROM). Then, type the following commands in a terminal window and look for the file:
cd /mnt/cdrom/RedHat/RPMS
ls gnuplot*
-
After you find the file, install Gnuplot with the following rpm command:
rpm -ivh gnuplot*.rpm
After installing Gnuplot, run it by typing gnuplot & in a terminal window. Gnuplot displays an opening message and waits for further input at the prompt, as shown in Figure 10-12.
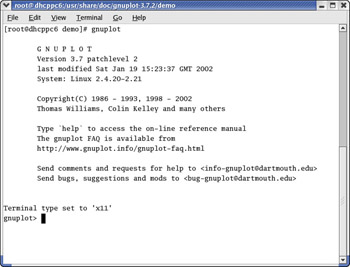
Figure 10-12: Running Gnuplot in a Terminal Window.
To see an immediate result, type the following Gnuplot command at the prompt:
plot sin(x)
Gnuplot opens an output window and displays a plot of the sine function, as shown in Figure 10-13.
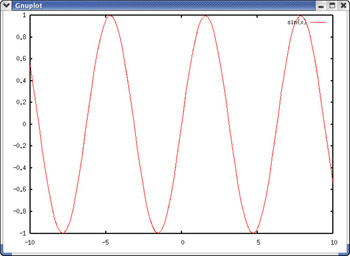
Figure 10-13: Plotting sin(x) in Gnuplot.
To quit Gnuplot, click the terminal window to make it active, then type quit. This example is a simple illustration of Gnuplot’s capabilities.
Incidentally, although Gnuplot has “Gnu” in its name, it has nothing to do with GNU or the Free Software Foundation.
At any time in Gnuplot, you can ask for online help. The help is similar to that in the old DEC VAX/VMS system. To learn more about the plot command, for example, type help plot at the Gnuplot prompt.
Gnuplot also comes with several example files that appear in the /usr/lib/gnuplot/ demos directory of your system. To try these demo files, type the following commands in a terminal window:
cd /usr/share/doc/gnuplot*
cd demo
gnuplot
When the Gnuplot prompt appears, load one of the demo files (the ones with the .dem extension) with the load command. To load the world.dem file, for example, type the following command at the Gnuplot prompt:
load "world.dem"
The world.dem Gnuplot file displays a map of the world and pauses until you press Enter. After you press Enter, Gnuplot displays the next plot, which happens to be a view of the earth in spherical coordinates, as shown in Figure 10-14.
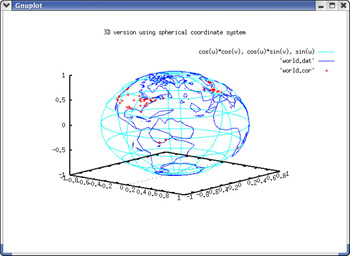
Figure 10-14: A 3D Plot of the World in Gnuplot.
If you are curious about the world.dem file, here’s what it contains:
#
# $Id: world.dem,v 1.1.1.1.2.3 2001/12/04 14:12:53 lhecking Exp $
#
#
set title "Gnuplot Correspondences"
set nokey
set noborder
set noyzeroaxis
set noxtics
set noytics
#
# Plot world map and correspondent locations as a +
plot 'world.dat' with lines 3 4, 'world.cor' with points 1 2
set title ""
set key
set border
set yzeroaxis
set xtics
set ytics
pause -1 "Hit return to continue."
#
# plot a '3D version using spherical coordinate system' of the world.
set angles degrees
set title "3D version using spherical coordinate system"
set ticslevel 0
set view 70,40,0.8,1.2
set mapping spherical
set parametric
set samples 32
set isosamples 9
set urange [-90:90]
set vrange [0:360]
splot cos(u)*cos(v),cos(u)*sin(v),sin(u) with lines 5 6,\
'world.dat' with lines 3 4, 'world.cor' with points 1 2
pause -1 "Hit return to continue"

#
# Plot a '3D version using cylindrical coordinate system' of the world.
set title "3D version using cylindrical coordinate system"
set ticslevel 0.0
set view 70,40,0.8,1.2
set mapping cylindrical
set parametric
set samples 32
set isosamples 9
set urange [-180:180]
set vrange [-90:90]
splot cos(u),sin(u),v with lines 5 6,\
'world.dat' with lines 3 4, 'world.cor' with points 1 2
pause -1 "Hit return to continue."
reset
As the listing shows, the world.dem file consists of Gnuplot commands. You can learn a great deal about Gnuplot by trying each file in the Gnuplot demo directory and by studying the commands in the file.
Working with PostScript in Ghostscript
Ghostscript is a utility for previewing and printing PostScript documents. Ghostscript enables you to print PostScript documents on many non-PostScript devices.
At its heart, Ghostscript is a nearly complete implementation of the PostScript language. Ghostscript includes the interpreter that processes PostScript input and generates output on an output device. A Ghostscript device can be a printer (or display screen), as well as an image-file format, such as BMP or PCX.
Ghostscript is distributed under the GNU GPL but is copyrighted and maintained by Aladdin Enterprises. The latest version remains under Aladdin’s control for one year after its release, at which point it is transferred to the Free Software Foundation and can be distributed under GPL.
To run Ghostscript, type gs in a terminal window. Ghostscript brings up an empty window and displays the following text in the terminal window (the version number is different if you are running a later version of Ghostscript):
GNU Ghostscript 7.05 (2002-04-22)
Copyright (C) 2002 artofcode LLC, Benicia, CA.  All rights reserved.
This software comes with NO WARRANTY: see the file PUBLIC for details.
Loading NimbusRomNo9L-Regu font from /usr/share/fonts/default/Type1/n021003l.pfb
... 2410668 1053956 1642520 347466 0 done.
Loading NimbusSanL-Regu font from /usr/share/fonts/default/Type1/n019003l.pfb...
 2785628 1379834 1662616 358654 0 done.
Using NimbusSansL-Regu font for NimbusSanL-Regu.
GS>
At this point, you are interacting with the Ghostscript interpreter. Unless you know the Ghostscript language (which is like PostScript), you’ll feel lost at this prompt. It’s kind of like the C:> prompt under MS-DOS or the Linux shell prompt at a terminal.
If you have a PostScript file available, you can interactively load and view it in Ghostscript with a simple command. For example, try the following command:
GS> (/usr/share/ghostscript/7.05/examples/golfer.ps) run
>>showpage, press <return> to continue<<
You have typed a Ghostscript command that should cause Ghostscript to load the file /usr/share/ghostscript/7.05/examples/golfer.ps and process it. (If you are running a version of Ghostscript other than 7.05, you must change 7.05 to that version number.) The result is a picture in Ghostscript’s output window. To exit Ghostscript, press Enter and type quit.
Fortunately, you do not have to use Ghostscript at the interpreter level (unless you know PostScript well and want to try PostScript commands interactively). Typically, you use Ghostscript to load and view a PostScript file.
Ghostscript takes several command-line arguments, including the file to be loaded. To see a list of Ghostscript options, type the gs -h command.
To see how Ghostscript renders a PostScript document, you can use any PostScript document you have available. You can view one of the sample PostScript files in the /usr/share/ghostscript/7.05/examples directory (replace 7.05 with whatever version of Ghostscript is installed on your system). Type the following command, for example, in a terminal window:
gs /usr/share/ghostscript/7.05/examples/golfer.ps
Ghostscript opens that file, processes its contents, and displays the output in another window, as shown in Figure 10-15.
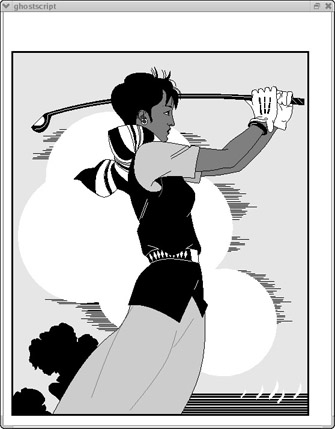
Figure 10-15: Ghostscript Displaying a PostScript File.
In this case, the output happens to be a picture of a golfer. After displaying the output, Ghostscript displays the following message:
>>showpage, press <return> to continue<<
Press Enter to continue. For a multiple-page PostScript document, Ghostscript then shows the next page. After all the pages are displayed, you return to the Ghostscript prompt. Type quit to exit Ghostscript.
Viewing PostScript or PDF Files with KGhostview
KGhostview is a KDE application that’s essentially a graphical front end to the Ghostscript interpreter. KGhostview is ideal for viewing and printing PostScript and PDF documents. For a long document, you can view and print selected pages. You can also view the document at various levels of magnification by zooming in or out.
To run KGhostview, select Main menu>Graphics>More Graphics Applications>PS/ PDF Viewer from the GNOME or KDE desktop. This causes the KGhostview application window to appear. In addition to the menu bar and toolbar along the top edge, the main display area of the window is divided vertically into two parts.
To load and view a PostScript document in KGhostview, select File>Open, or click the open folder icon on the toolbar. This action causes KGhostview to display a file-selection dialog box. Use this dialog box to navigate the file system and select a PostScript file. You can select one of the PostScript files that come with Ghostscript. For example, open the file tiger.ps in the /usr/share/ghostscript/7.05/examples directory. (If your system has a version of Ghostscript later than 7.05, you have to use the new version number in place of 7.05.)
To open the selected file, click the Open File button in the file-selection dialog box. Ghostview opens the selected file, processes its contents, and displays the output in its window, as shown in Figure 10-16.
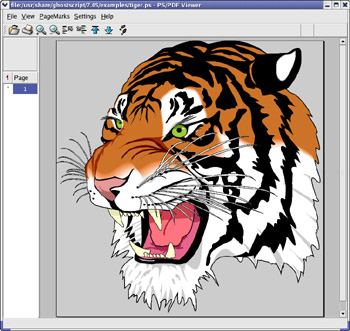
Figure 10-16: KGhostview Displaying a PostScript File.
KGhostview is useful for viewing various kinds of documentation that come in PostScript and PDF format (these files typically have the .ps or .pdf extension in their names). For example, I use Ghostview to view the documentation for the CVS program, which comes in several PostScript files you can find in the /usr/ share/doc/cvs* directory. When viewing such documents in Ghostview, I zoom in by clicking the magnifying glass icon (with the plus sign) on the toolbar in Figure 10-16. This makes the document legible onscreen.


