Creating Recordsets with Joins
In this task, you'll begin building the page that displays the tours. This is a new page in the site, so you'll start with generic_template.asp and go from there. This particular page is going to have lots of SQLno less than three queries, in factand you'll build the simplest one in this lesson. This query will retrieve all of the information about all of the tours, without any filtering mechanisms.
When you create this query, you're going to use a SQL structure called a join. As you know, a relational database is split into many different tables that share different relationships. Sometimes, you will need a set of data from two or more tables that are related to one another. To collect all of this information, you use a join. If this sounds scary, don't worry: You've already done it! In Lesson 10 in the country profile page you created a join when you modified the SQL statement so that it retrieved the region name, rather than simply the region ID. (Remember the WHERE clause?)
The syntax you used in Lesson 10, which relied on WHERE, is no longer the preferred way to handle joins, though it is the easiest to understand and it will be supported in all major database management systems (like Access) in the foreseeable future, so there is nothing wrong with using it. But there is a better way to join tables, which you will learn in this task.
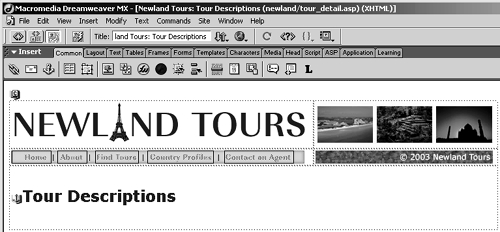
Open generic_template.asp, use the toolbar to title the page Newland Tours: Tour Descriptions. Replace the placeholder title text with Tour Descriptions. Save the file as tour_detail.asp.
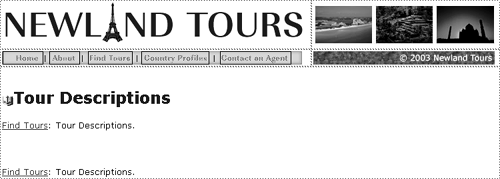
In the first line of body text, type Find Tours: Tour Descriptions. Highlight Find Tours and use the Property inspector to link it to tours.asp. Position the cursor at the end of the word Descriptions, and press Enter/Return twice to add two new lines. Copy the Find Tours line and paste it on the bottom line.
In these two steps, you are building the static part of the page. You'll place the tour descriptions in between the two Find Tours links, so users can easily return to the tour search page from the detail page.
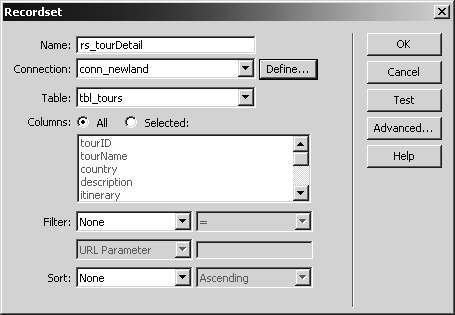
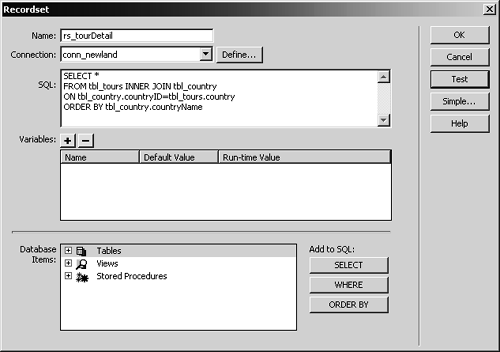
Add a new recordset to the page, using the following information:
Name: rs_tourDetail
Connection: conn_newland
Table: tbl_tours
Columns: All
You need to create a query that will pull all of the information from the tours table, so you can use it to build the descriptions. As with the country profiles, one of the fields (country) contains a foreign key, which means that it will retrieve an arbitrary number (the country's primary key), rather than the country name, which is what you really want. You'll use a join to retrieve this information, but you can't do that in this simple interface, so in this step you are building the portion of the SQL query that you can use as the basis for the more advanced query you'll write in the next step.
Click the Advanced button to open the advanced version of the Recordset dialog.
As you can see, this version of the dialog contains the SQL that you specified in the simple version of the dialog. You'll write the remaining code here in the SQL window.
TIP
You can return, by the way, to the simple version by clicking the Simple button.
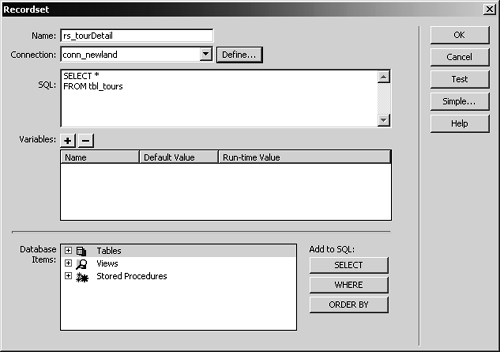
Change the SQL statement in the window so that it reads as follows:
SELECT *
FROM tbl_tours INNER JOIN tbl_country
ON tbl_country.countryID=tbl_tours.country
ORDER BY tbl_country.countryName
The syntax for joins is hard to read for many people. However, this query does the exact same things as the following (easier to read) query:
SELECT *
FROM tbl_tours, tbl_country
WHERE tbl_country.countryID=tbl_tours.country
ORDER BY tbl_country.countryName
That is, it selects all records and fields from both tables. When it merges the two tables, it does so by matching the value in the country field of tbl_tours with the countryID field, which is the primary key of the tbl_country table. This ensures that the correct country's data is joined to each tour. In other words, the country Argentina (and all of its data as entered in tbl_country) is associated with Highlights of Argentina.
Once the two tables are joined together, using the shared country/countryID value as the joining criterion, the retrieved records are listed in order by country name.
Note
Once you've entered this SQL code, you can no longer switch back to Simple view, because that view has no way of representing the sophisticated SQL statement you just created.
Click the Test button.
This brings up a large set of records. You'll need to scroll to the right to see most of the data, as it's offscreen to start.
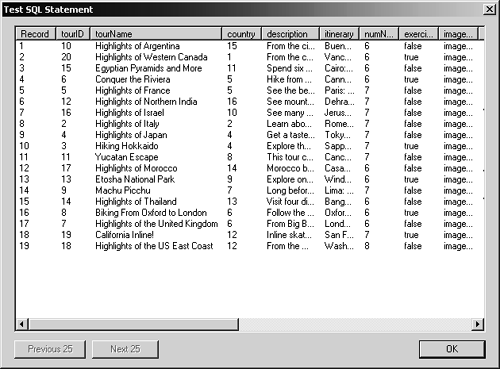
There are a couple of things to note here. First, look in the country column (it should be the fourth column from the left). Notice that it lists only numbers. Had you not done the join, and you output the country in the tour description, these would have appeared as the country. Scroll to the right, until you see the countryName column. There, you will see each of the countries listed, in alphabetical order. This column was added thanks to the join, and it means that you can output the actual country name, rather than its arbitrary primary key number.
Again, this is no different in its result than what you did in Lesson 10 with the region name. The only difference now is that you are using the best syntax (the INNER JOIN…ON…syntax) to retrieve this data.
Click OK twice to close the Test and then the Recordset dialogs.
In the Bindings panel, you'll see the new recordset is in place. As noted earlier, although the Simple version of the Recordset dialog can't handle this SQL, Dreamweaver can. The data is correctly represented in the Bindings panel.
NOTE
If you double-click the recordset in the Bindings panel to edit it, you will be taken directly to Advanced view, because Simple view cannot represent the code.
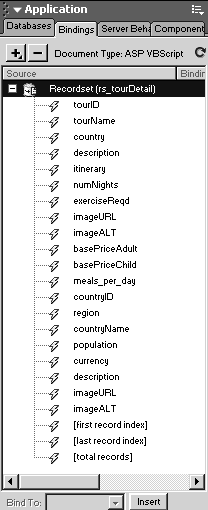
The data is now available to the page, so you can begin laying out the tour descriptions.


