Validating Your XHTML
You have done a lot of work in this lesson to whip the code into shape. Now it's time to find out how well you did. Dreamweaver has several built-in code validation tools that you can use to check your code. In this task, you'll verify that you successfully upgraded the code throughout the site to XHTML.
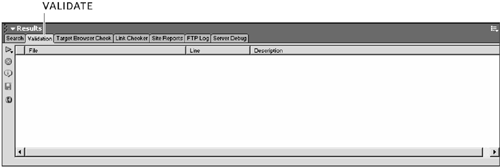
Choose Window > Results > Validation.
This opens the Results panel, if it isn't already open, and switches it to the Validation tab.

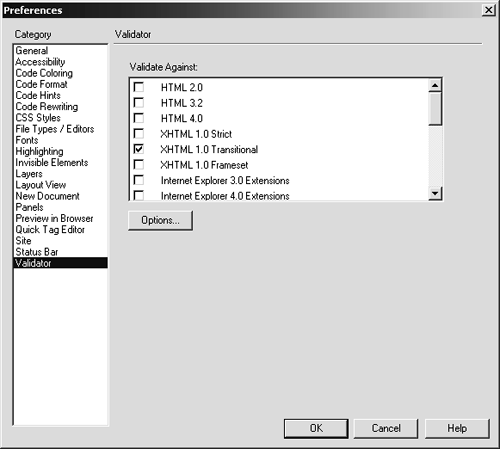
Click the Validate button, and from the pop-up list, choose Settings.
This option is a shortcut to the Preferences dialog's Validator category, where you see a list of several different versions of HTML and proprietary language code. Before you can validate your code, you need to tell Dreamweaver which version of code you want to validate against.
In the Validate Against list, choose XHTML 1.0 Transitional. Click OK to proceed.
By choosing XHTML 1.0 Transitional, you are aligning the Validator with the settings you specified at the beginning of this lesson, when you pasted the DOCTYPE declaration at the beginning of the document.

Click the Validate button again, and this time, choose Validate Entire Site from the list.
The Validator may take a few moments to run, and when it does, it will list any problems in the Validation tab, including the file, the line, and the nature of the problem. If you followed all of the steps in this lesson, you should see the message "No errors or warnings were found" for each of the site's five files.

If you did encounter problems, then double-click the error, and Dreamweaver will open the file at the line in question, and you can inspect the code for yourself.
If problems remain, study the code until you figure out what went wrong, and then use what you learned in this chapter to fix it using Dreamweaver's Find and Replace tools.
In the worst-case scenario (not to encourage sloth), don't forget that the completed files for this lesson on the CD-ROM are clean, so feel free to replace your files with the files on the CD if you just want to move on.


