Creating Recordsets and Displaying Database Information
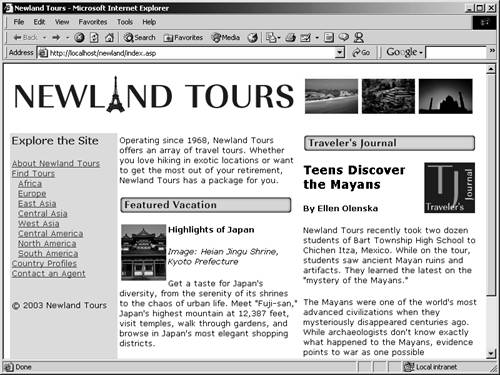
It seems like a long time since you made any improvements to the actual site. You've done some theory, some exploration, and some configuration. But you haven't done anything to any pages yet. In this final task of the lesson, you'll cause the Traveler's Journal to load dynamically from the database. In the browser, the homepage will look the same as it did before, but in Dreamweaver, the difference will be unmistakable.
With index.asp open in Design view, select the text from "Teens Discover…" down to "…putting together" at the bottom. Do not select the yellow image icon beside the T in Teens. Press Delete.
You're going to replace this text with dynamic text, so you are just making room in this step.

Click the Traveler's Journal image to select it. In the tag selector (in the bottom-left corner of the document window), right-click the <h3> tag just to the left of the <img> tag, and choose Remove Tag from the menu.
The journal entry in the database is already marked up in HTML. You need to remove the <h3> tag here, or the tags in the journal entry will be illegally nested inside the <h3> tag.
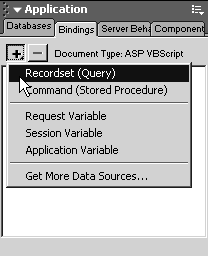
In the Bindings panel, click the New Binding (+) button, and choose Recordset (Query) from the menu.
At this point, you have connected your site to a data source, which means you have made it possible for Dreamweaver to write code for you that retrieves data from your database. However, you have not actually retrieved any data yet. In this and the next two steps, you'll create a recordset, which as you'll recall from the beginning of this lesson, is a collection of data that meets certain criteria and that is retrieved from a database using SQL.
Your goal is to display the journal entry, but you don't want to display all the journal entries, only the most recent. In order to facilitate this, each journal entry has been given an unique ID (a primary key). These IDs are numbered incrementally, as the records are added. Therefore the record with the highest journalID is the most recent. You'll need to sort the data, and then retrieve the contents of the latest journal entry in order to display it. You'll take the first steps toward doing this in the next step.
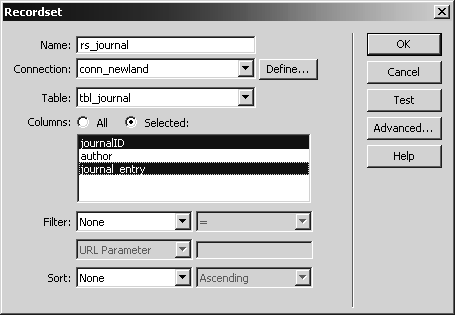
In the Recordset dialog, enter rs_journal as the Name. Choose conn_newland (or newland for ColdFusion users) from the Connection drop-down. Select tbl_journal from the Table drop-down. In the Columns section, choose the Selected radio button, and Ctrl-select (Windows) or Command-select (Macintosh) journalID and journal_entry.
In this dialog, you are creating a recordset, named rs_journal. The data in this recordset is retrieved using criteria specified in SQL. You may not realize it, but you have already begun the SQL statement.
Specifically, you have specified data in the data source stored in conn_newland (that connection specifies the newland DSN). Within that data source, you are specifying that the data is in a table named tbl_journal. Going a step further, you are specifying that you only want to retrieve the journalID and journal_entry fields from that table.
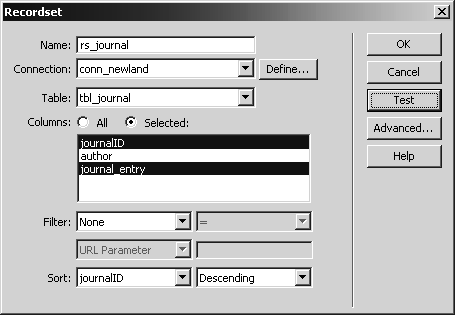
In the Sort drop-down menu, choose JournalID, and then choose Descending in the next drop-down menu. Click OK.
This adds the SQL necessary to sort the entries from most recent to least recent. You have entered the information necessary to create the recordset.
After you click OK, the recordset appears in the Bindings panel, much like form and URL variables did earlier in the book.
Expand Recordset(rs_journal) in the Bindings panel, and drag and drop journal_entry so that it is beside the image. If necessary, drag the image icon so that it appears to the left of the dynamic text.
It may take some trial and error to order the dynamic text and the image correctly, so just keep trying till the image icon, the dynamic text, and the graphic itself look like they do in the screenshot.

Choose View > Live Data from the main menu.
You already know that when you want to test a dynamic page, you can press F12 to open it in a browser, running from the server. If that is too much trouble for you, you can also view Live Data from inside Dreamweaver. This is a very convenient feature, because you can see the effects of your work right in the Dreamweaver authoring environment. It is especially handy when you are trying to format dynamic content, and Dreamweaver's pseudocode placeholders don't give you a sufficiently visual idea of how the page will look.
Clearly, the recordset and display of the live data worked, because you can see the database data inside of Dreamweaver. You can also see that it is correctly formatted. The formatting is possible, because I entered HTML tags in the database itself, so when the data was placed on the page, the browser (or, in this case, Dreamweaver) correctly parsed and rendered the HTML tags.
NOTE
The text is highlighted in yellow to show you that it is dynamic and cannot be edited like normal text. This yellow highlighting does not appear in the actual browser; it is merely a Dreamweaver authoring aid.

Choose View > Live Data again, to toggle it off. Save and upload index.asp. Press F12 to test it in a browser.
If you are seeing what's in the screenshot, then your system is fully configured, and from here forward it's all about the code.
