Creating and Applying a Custom CSS Class
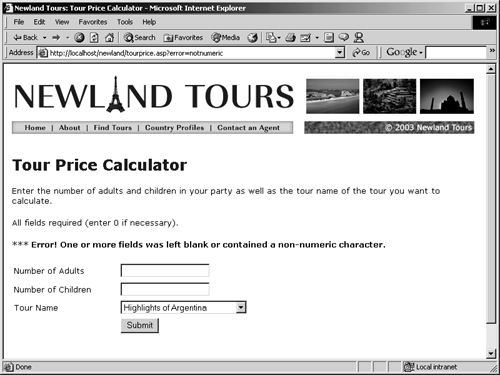
Making the error message more conspicuous is a matter of presentation. In XHTML, you should use CSS for presentation-related controls. XHTML has built-in styles for headings, body text, lists, and so forth, but XHTML lacks an <errormessage> tag that you can redefine with CSS. Fortunately, CSS enables developers to create custom styles, which can be applied to standard XHTML elements, such as the <p> tag.
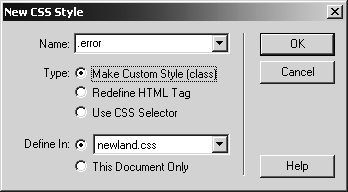
In this task, you will create a custom CSS style, also called a class, just for error messages.
In the CSS Styles panel, click the New CSS Style button. In the dialog, select make Custom Style (class), and enter .error as the name. Use the Defined In field to verify that the new style is added to newland.css. Click OK.
The period (.) before the word error is obligatory, so don't leave it out.
You went through this process several times earlier in the book, so it should be familiar. Just remember that rather than redefining an existing tag, you are creating a custom class.
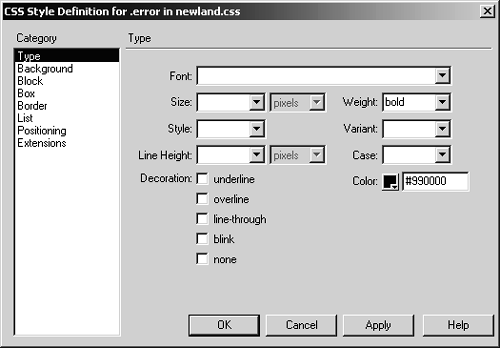
In the CSS Style Definition dialog, set the Weight as Bold and the color as #990000, a deep red. Click OK.
One of the advantages of CSS styles is that they inherit attributes of other styles that they don't explicitly contradict. This new class will be attached to the <p> tag that contains the error message. The <p> is already defined such that it uses a certain font, in a certain size, and so on. The .error class inherits all of that. When you create a CSS class, then, define only those attributes that are unique to that class in this case, the fact that the text should be bold and red.
Now that the style is created, you need to apply it.
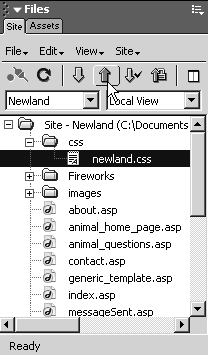
Using the Site panel, upload newland.css to the remote server.
Remember, the new .error style has been saved only locally, so if you don't upload the style sheet, you won't see any difference when you test the file.
Back in code view, scroll to the Response.Write or <cfoutput> line that prints the error message, and modify its <p> tag so that it reads <p class="error">.
To apply a CSS style to a tag, use the class attribute. Notice that the period is omitted in the class attribute.
ASP users only: Add a second pair of quotation marks in front of each of the quotation marks in the class attribute.
The second set of quotes is necessary, because the entire HTML string is embedded in quotes. If you use a normal set of quotation marks, ASP gets confused. By adding the second set, you are communicating to ASP that it should treat these quotation marks as a part of the text string, rather than as the boundaries of the text string.
This additional step is unnecessary in ColdFusion, because the output text string in ColdFusion is enclosed in <cfoutput> tags and not quotation marks.

Save, upload, and test the file.
For such a simple application, it took a fair amount of work. But the extra polish shows: The application is useful and usable. Now that it works, you need to remove the dummy dollar values and use real data. That requires working with databases, which is introduced in the next lesson.