Enhancing Accessibility with Invisible Navigation
In creating a page template, you spared yourself the redundant task of reconstructing the basic page content every time you want to create a new page. In this task, you'll extend a similar courtesy to visitors accessing your site via screen readers.
As you know by now, screen readers are browsers that read page contents out loud, so that users with visual impairments can still access the site. The problem is that screen readers start at the beginning of the page and work their way down. This means that visitors using screen readers will have to sit through a description of your navigation bar, along with all of its hotspots, over and over again as they browse through the site.
In this task, you will implement an easy solution to this problem, using a hidden layer and a link. This will enable these visitors to jump straight to the page's main content. And users accessing your site through traditional browsers need never know that this feature exists.
Here's how it works: You will create a CSS layer, using a <div> tag, with an internal link that skips to the page title on each page. You will place this at the very top of the <body> element, so that it is the first element that a screen reader will encounter. And you will take advantage of the <div> tag's visibility attribute to make it hidden from sight.
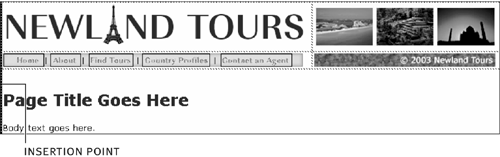
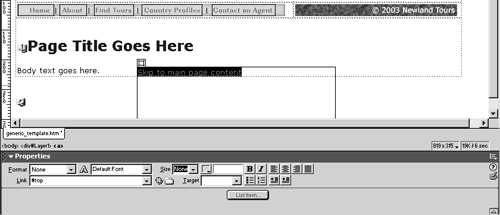
With generic_template.htm still open, click anywhere inside the main table, and click the <table> tag in the tag selector. Then, using the keyboard arrow key, press left once.
This should position a rather large insertion point just to the left of the page table, which indicates that the insertion point is now the first item after the opening <body> tag.
Click the Draw Layer button in the Insert panel, and draw out a layer anywhere on screen. Click inside the new layer to begin adding content.
The layer's location doesn't matter, since it will be invisible and since it already appears in the first line of code after the <body> tag. I drew mine away from other content, so I could see what I was doing.
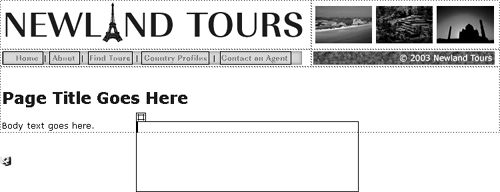
Inside the new layer, type Skip to main page content.
In a moment, you'll add a hyperlink that points to a named anchor just before the page title.
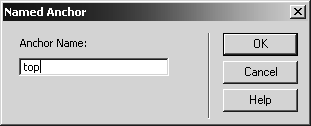
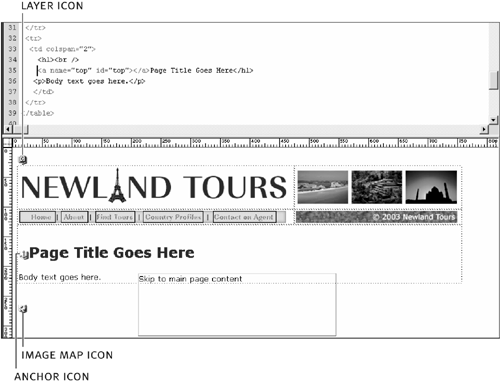
Position the insertion point just to the left of the word Page in the page title. Choose Insert > Named Anchor. In the Named Anchor dialog, name it top, and click OK.
Dreamweaver inserts the anchor in the code. Depending on your view settings, you may also see a yellow anchor icon beside the page title. This icon is a Dreamweaver visual aid only; it will not appear in a browser. Two other visual aids are already on the page: one for the layer you drew a few moments ago and the other for the image map in the navigation bar.
TIP
You can toggle these icons on or off by checking or unchecking View > Visual Aids > Invisible Elements.
Drag to select the text inside the layer. In the Link field of the Property inspector, type #top.
This creates the link between the (soon to be) invisible layer and the page title.
Click anywhere along the edge of the layer to select it. In the Property inspector, enter accessibility as the Layer ID. In the Vis drop-down menu, choose Hidden. Click the edge of the layer again, and choose Edit > Copy. Click anywhere on the page, outside of the layer.

The layer disappears, of course, because it is now hidden. However, it will not be hidden from screen readers, creating a win-win solution for all visitors to the Newland Tours site.
You are copying the layer so that you can easily add it to the five existing pages in the site.
TIP
If for some reason you need to see the hidden layer, for example, to edit its contents, simply click its icon at the top of the page.
Save generic_template.htm.
The template is ready to use.
Open about.htm, click anywhere inside the main table on the page, select <table> from the tag selector, and press the left arrow key once. Choose Edit > Paste.
This pastes the invisible accessibility layer into the correct place on the page. Because it is invisible, you won't see it in design view (though its icon should appear).
In design view (or the design half of split view) position the insertion point just to the left of the page title, and press Ctrl+Alt+A (Windows) or Command+Option+A (Macintosh) to insert a named anchor. Once again, name it top, and click OK.
Obviously, for the link to work, the named anchor needs to be inserted!
Repeat steps 8 and 9 for each of the remaining pages, except index.htm.
Index.htm has a different structure, so it won't work the same way. If you want to insert the accessibility layer anyway, go ahead, but it's optional on this page.


