Finding Images Without the 'ALT' Attribute
At this point, the Newland site meets the XHTML standard, so you've succeeded in the main goal of the lesson, which was to upgrade the site to XHTML. One problem remains, and while it's not strictly speaking related to XHTML, it is a code issue: Many of the images lack the alt attribute. As you recall, the alt attribute of the <img> tag provides a description of an image, which is used by those who have no access to the image, for instance, because they are using a screen reader or because they are using a text-only browser.
This change is also hard to automate, since every image should have a different alt attribute. You'll use Find and Replace a couple of different ways in this task. First, you'll use it to add alt text to the four images that make up the banner on all of the pages. Second, you'll use it to find the remaining images that are lacking the alt attribute.
Open about.htm.
The homepage, index.htm, doesn't have the full navigation bar that the other pages have, so by switching to about.htm, you ensure that you can take care of all the images used in the navigation bars.
Click the Eiffel Tower to select the left half of the Newland Tours banner in design view. Its corresponding HTML should be highlighted in code view. Right-click (Windows) or Control-click (Macintosh) over the highlighted code, and choose Copy from the context menu.
This method is about the fastest way that you can get the code for a given object onto the clipboard, which makes it convenient for pasting into the Find and Replace dialog or reusing on other pages. It works not just for images, but also for other objects, from image maps to Macromedia Flash movies.
Press Ctrl+F (Windows) or Command+F (Macintosh) to open the Find and Replace dialog, remove any existing text (from previous searches) in the upper text area, and paste in the HTML code for the image.
Don't forget to double-check that Entire Current Local Site is selected in the Find In drop-down menu and that Source Code is selected in the Search For drop-down menu.
TIP
You can resize the Find and Replace dialog to accommodate long text strings.
Paste the same HTML code in the Replace With (lower) text area. Somewhere inside the tag, add the following text: alt="Newland Tours Banner, Left"
The order of the attributes doesn't matter. Just make sure that the attribute is typed in lowercase and that the attribute's value is in quotation marks.

Click Replace All, and click Yes when the warning dialog appears.
The alt tag has now been updated for the left side of the banner throughout the site.
Repeat the preceding steps for the right-hand graphic on the banner (the three photos). The alt tag should read as follows: alt="Newland Tours Banner, Right". Click Replace All.
Both halves of the banner now have alt attributes.
Repeat the preceding steps to add an alt attribute to the button bar beneath the Newland Tours banner. The alt attribute should read alt="Navigation Bar".
The navigation bar is an interesting problem, because it is not the navigation bar as a whole, but rather the individual button graphics on the bar that matter. Adding an alt attribute to this image doesn't convey what each of the buttons does. Remember, though, that what makes the buttons do something (namely, load another page when clicked) is the image map, and not the image itself. For this reason, it is necessary to add the alt attribute to each of the <area> tags within the image map. I have already done this for you.
Repeat the preceding steps to add an alt attribute to the marbleized bar beneath the three photos. The alt attribute should read alt="Copyright 2003 Newland Tours".
That's it for the banner and navigation bar.
The next step is to identify the remaining graphics that don't have an alt attribute. None of the remaining images appears on multiple pages, so you can't automate the replacement process with Find and Replace. Fortunately, you can automate the finding process, which will make it easy for you to identify the pictures still needing alt attributes.
Open Find and Replace again, and choose Specific Tag from the Search For drop-down menu. Choose img from the HTML Tag List drop-down menu. A new row for additional search criteria appears automatically, and it defaults to With Attribute. Change that to Without Attribute, and choose alt from the next drop-down menu. Don't worry about the Action row.
These settings tell Dreamweaver to find all instances of images that do not have an alt attribute. This should make it easy to ensure that you find all of the images without alt attributes. You don't need to specify anything in the action row, because you are taking no action. You are not replacing anything. You are simply using Dreamweaver tools to find tags that meet a certain criterion.
Press Find Next.
You will be taken automatically to an image without an alt tag. Which one you are taken to depends on the location of your cursor when you initiated the search.
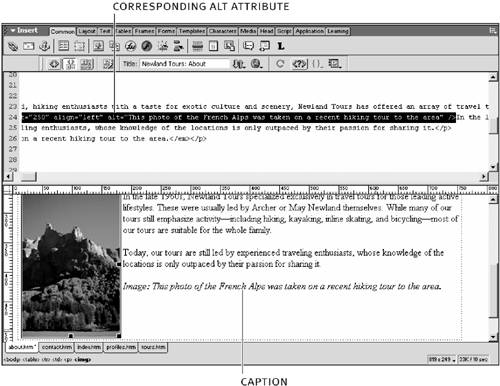
Add alt attributes to each of the images you find on all of the pages except tours.htm and profiles.htm. Several of the images have captions or descriptive text embedded in them, so use those as a guide.
It doesn't matter all that much what you enter, so long as it is descriptive and conveys textually what the image conveys visually.
The reason you don't need to enter alt attributes on tours.htm and profiles.htm is that these pages will be upgraded to dynamic pages, and you'll implement a more radical solution to the alt attribute later in the book.
Save and close any open files.


